Salted Caramel Hot Chocolate Cookies: The Ultimate Guide to Decadence The Salted Caramel Hot Chocolate Cookie is more than just a dessert; it is a masterful confluence of textures and temperatures, marrying the familiar comfort of a rich, deeply chocolatey cookie with the luxurious surprise of warm, gooey caramel and the perfect counterpoint of sea…
Salted Caramel Hot Chocolate Cookies: The Ultimate Guide to Decadence
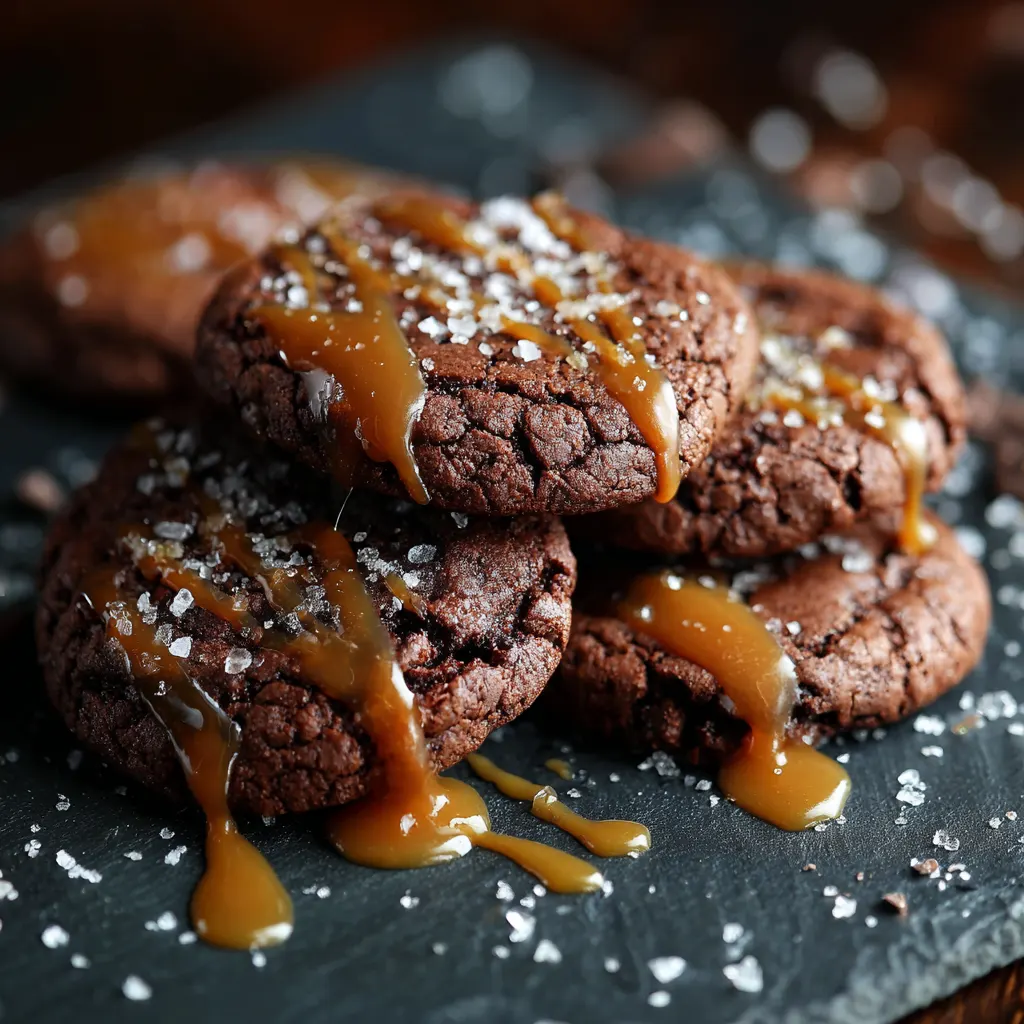
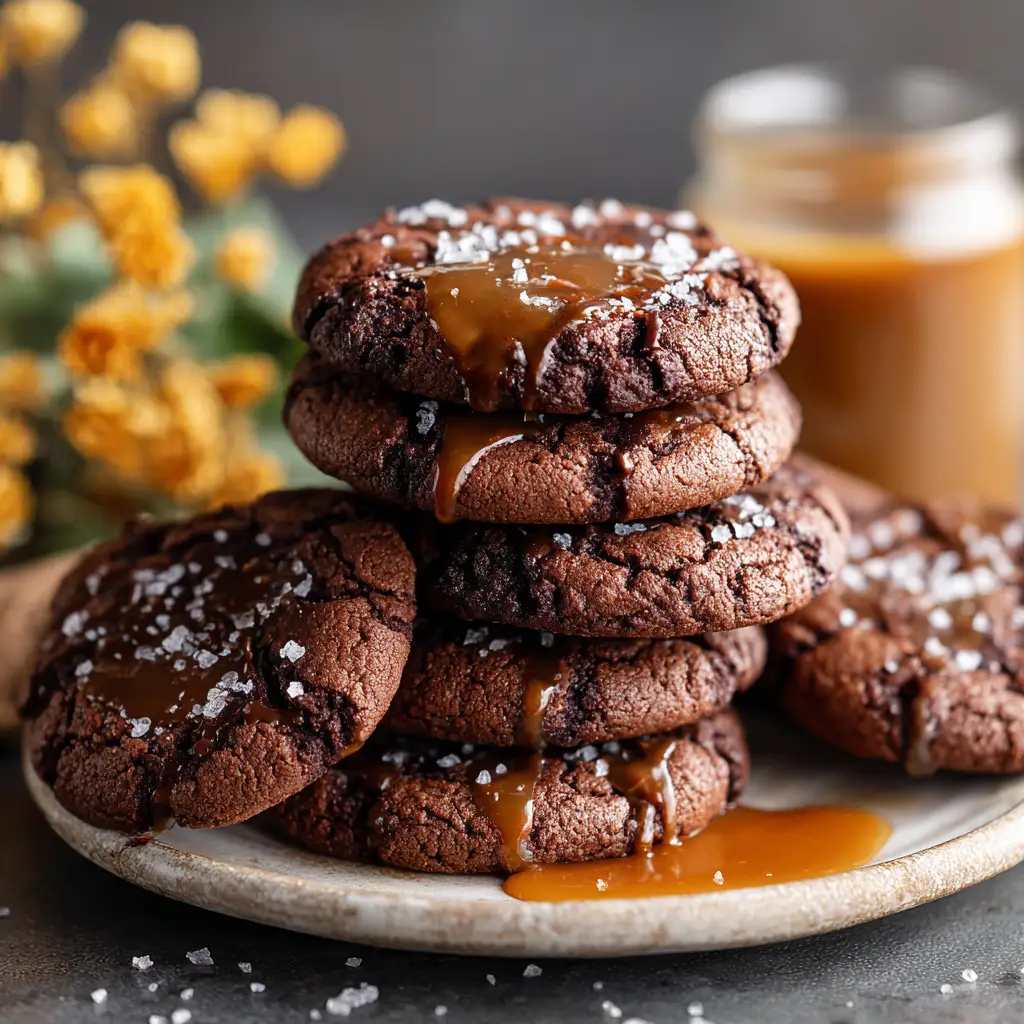
The Salted Caramel Hot Chocolate Cookie is more than just a dessert; it is a masterful confluence of textures and temperatures, marrying the familiar comfort of a rich, deeply chocolatey cookie with the luxurious surprise of warm, gooey caramel and the perfect counterpoint of sea salt. This confection captures the essence of a cozy winter drink in a handheld treat, offering a dark, fudgy base that melts in your mouth, surrounding a molten, chewy center of salted caramel. Achieving the ideal balance requires attention to detail—from selecting the right cocoa powder for that deep “hot chocolate” hue to ensuring the caramel center remains perfectly liquid upon baking. Here is the definitive recipe and a comprehensive guide to mastering this intensely satisfying cookie.
Ingredients
For the Chocolate Cookie Dough:
-
1 cup (2 sticks or 225g) unsalted butter, softened to room temperature
-
¾ cup (150g) granulated sugar
-
1 cup (200g) packed light or dark brown sugar
-
2 large eggs, at room temperature
-
2 teaspoons pure vanilla extract
-
2 cups (250g) all-purpose flour
-
¾ cup (65g) unsweetened Dutch-process cocoa powder (or dark cocoa powder)
-
¼ cup (40g) dry hot cocoa mix powder (for authentic hot chocolate flavor)
-
1 teaspoon baking soda
-
1 teaspoon kosher salt (for the dough)
-
1 cup (170g) semi-sweet chocolate chips or dark chocolate chunks
For the Salted Caramel Center and Topping:
-
20 soft caramel candies (such as Kraft or Rolos), unwrapped
-
Flaky sea salt (such as Maldon or Sel Gris), for sprinkling
Step-by-Step Instructions
1. Prepare the Dough Base: In a large bowl, using a stand mixer fitted with a paddle attachment or a handheld mixer, beat the softened butter, granulated sugar, and brown sugar together on medium speed until the mixture is light and fluffy (this usually takes 3 to 4 minutes). This process, known as creaming, is crucial for developing the cookie’s texture. Add the eggs one at a time, mixing well after each addition, then mix in the vanilla extract.
2. Combine Dry Ingredients: In a separate medium bowl, whisk together the all-purpose flour, cocoa powder, hot cocoa mix, baking soda, and kosher salt. Gradually add the dry ingredient mixture to the wet ingredients on low speed until just combined. Do not overmix. The dough will be thick and quite sticky. Fold in the chocolate chips or chunks using a rubber spatula.
3. Chill the Dough (Mandatory Step): Cover the dough tightly with plastic wrap and chill in the refrigerator for at least 2 hours, or up to 3 days. Chilling is essential for cocoa-heavy doughs as it prevents excessive spread and concentrates the flavor.
4. Stuff the Caramels: Preheat your oven to 350°F (175°C). Line two large baking sheets with parchment paper or silicone baking mats. Scoop approximately 2 tablespoons of chilled dough for each cookie. Split this portion in half. Flatten one half into a disk, place one soft caramel candy (or two halves of a larger square caramel) in the center, and top with the second half of the dough. Carefully pinch and seal the edges all the way around, ensuring the caramel is completely enclosed within the dough ball.
5. Bake and Finish: Place the stuffed dough balls 2 inches apart on the prepared baking sheets. Lightly sprinkle the tops of the cookie dough balls with a few flakes of sea salt. Bake for 11 to 13 minutes. The edges should appear set, but the centers should still look soft. Do not overbake, as the cookies will continue to set on the pan. Remove from the oven and allow the cookies to cool on the baking sheet for 5 minutes before transferring them to a wire rack to cool completely. Serve warm for the best gooey caramel experience.
The Anatomy of a Perfect Chocolate Base: Hot Cocoa Meets Cookie
The true genius of the Salted Caramel Hot Chocolate Cookie lies in its foundation: a chocolate base that mimics the depth and richness of a premium hot cocoa. To achieve this, simply adding standard cocoa powder is not enough; the baker must consider the type of cocoa, the fat content, and the inclusion of elements that deepen the chocolate’s profile.
The Cocoa Conundrum: Natural vs. Dutch-Process
Most recipes utilize either natural or Dutch-process cocoa powder, and the choice significantly impacts the final product.
-
Natural Cocoa Powder: This is acidic, reacting strongly with baking soda to create lift. It typically yields a lighter-colored, slightly more crumbly cookie.
-
Dutch-Process Cocoa Powder: Also known as alkalized cocoa, this has had its acidity neutralized. It is what gives a cookie that deep, dark, rich “hot chocolate” color and a smoother, less bitter flavor, often resulting in a fudgier texture. For a cookie that truly tastes like premium hot cocoa, Dutch-process or a “Special Dark” variety is highly recommended.
Incorporating the “Hot Chocolate” Flavor
To push the chocolate base beyond a standard chocolate cookie, bakers often turn to two key additions:
-
Dry Hot Cocoa Mix: Including a small amount of dry hot cocoa powder (as used in the recipe above) adds the distinct creamy flavor and fine sugar that characterizes a prepared mug of hot chocolate.
-
Espresso Powder: A teaspoon of instant espresso or coffee powder dissolved in hot water and added to the wet ingredients is a common trick. Coffee does not make the cookie taste like coffee; instead, it dramatically amplifies and intensifies the flavor of the chocolate, giving the base a profound richness.
Fat and Sugar for Fudginess
The balance of fats and sugars is crucial for the cookie’s texture. Using a high ratio of brown sugar to granulated sugar adds necessary moisture and molasses, contributing to a chewy center. Furthermore, starting the cookie with softened (but not melted) butter allows for proper creaming with the sugars, introducing air that results in a soft, cakey edge while maintaining that coveted fudgy, dense interior.
Mastering the Caramel Element: Stuffed vs. Swirled vs. Drizzled
The salted caramel component offers the greatest opportunity for customization, but also the most potential for baking pitfalls. The term “Salted Caramel” implies a balance: the overwhelming sweetness of the caramel must be cut by a distinct salinity.
1. The Stuffed Caramel (The Ultimate Gooey Center)
This method, utilizing soft caramel candies (like Kraft or Rolos) encased in dough, is the most popular way to achieve a molten core.
Tips for Success:
-
Seal Completely: Ensure the dough fully encases the caramel. Even a tiny crack can allow the caramel to leak out onto the baking sheet, where it will crystalize and burn, ruining the cookie’s presentation and texture.
-
Caramel Quality: Use soft, fresh, store-bought caramels. Hard or brittle caramels will not melt down to a gooey consistency inside the short bake time.
-
Temperature: Serving the cookies warm is key. As the cookie cools, the caramel will harden and become chewy; a quick 10-second reheat in the microwave will restore the molten texture.
2. The Drizzle and Finish
Some recipes forego the stuffed center and opt to drizzle a thick, buttery caramel sauce over the cookies after they have fully cooled.
Tips for Success:
-
Consistency is Key: The caramel sauce must be thick enough to hold its shape but thin enough to flow. If it’s too thin, it will run off the sides; if it’s too thick, it will be messy and difficult to drizzle.
-
Wait to Drizzle: Always apply caramel sauce after the cookies are completely cool, otherwise the heat of the cookie will cause the sauce to melt and be absorbed into the chocolate base.
3. Salt Application
The salt is not an afterthought; it is the critical balancing agent. Use flaky sea salt (such as Maldon) rather than table salt. Flaky salt has a cleaner, less harsh salinity, and its larger crystals provide an appealing visual contrast and a satisfying textural crunch on the palate. Whether you stuff the caramel or drizzle the sauce, the flaky salt should be applied on top of the dough or caramel just before baking, or immediately after drizzling.
Essential Baking Science and Dough Mastery
Baking these rich, cocoa-laden cookies requires attention to specific techniques to ensure they bake correctly—soft and thick, never thin and brittle.
The Importance of Chilling
Chilling the dough is arguably the most crucial step for a chocolate cookie base. Cocoa powder absorbs moisture differently than flour, often resulting in a stickier dough immediately after mixing.
-
Structural Integrity: Chilling allows the fats (butter) to firm up, preventing the cookies from spreading too quickly when they hit the hot oven. This yields a thicker, puffier cookie.
-
Hydration: It gives the flour and cocoa powder time to fully hydrate, resulting in a tender crumb structure and preventing a gritty texture.
-
Flavor Concentration: Chilling allows the complex flavors of the chocolate and sugars to fully meld, leading to a deeper, more satisfying final taste. A minimum of two hours is necessary, but chilling for 24 hours often produces superior results.
Avoiding the “Cakey” Pitfall
While the “hot chocolate” identity might suggest a softer, cake-like texture, the ideal version of this cookie remains chewy and dense. To ensure this, focus on:
-
Brown Sugar Ratio: The higher moisture content in brown sugar, compared to granulated sugar, promotes chewiness.
-
Baking Soda vs. Baking Powder: Relying primarily on baking soda (especially when using acidic natural cocoa or brown sugar) helps the cookie spread and gives a dense, moist chew, while an over-reliance on baking powder can result in a drier, cake-like lift.
-
The “Pan Bang” Technique: If your cookies are not spreading by minute nine of baking, remove the pan from the oven and firmly tap it on the countertop 2–3 times. This helps deflate the rising centers and encourages the edges to crinkle, resulting in a denser, chewier finish.
Elevating the Experience: Flavor Variations and Toppings
Once the base recipe is mastered, there are several avenues to explore for variations that deepen the complexity and capitalize on the “hot chocolate” theme.
The Marshmallow Crown
To truly embrace the hot chocolate theme, the cookies can be topped with a marshmallow surprise. About two minutes before the cookie is done baking (around the 9-minute mark), remove the pan from the oven and immediately press half a large marshmallow or a few mini marshmallows onto the center of each cookie. Return the cookies to the oven for the final two minutes until the marshmallow is slightly melted and puffy, but not browned. Once cooled, this soft, gooey topping can be further drizzled with melted dark chocolate or the remaining caramel sauce.
Beyond the Cocoa: Browned Butter
For a deeper, nuttier, and more sophisticated caramel flavor, try swapping the softened butter for browned butter. Browning the butter involves gently melting it on the stovetop until the milk solids separate and turn a rich amber color. This process removes some of the water content and adds a layer of toasted, nutty flavor (or beurre noisette). Ensure the browned butter is cooled slightly but is still pourable before creaming it with the sugars. This extra step enhances the caramel notes in the cookie base itself.
Chocolate Chip Choice
While semi-sweet chocolate chips are standard, upgrading the chips can enhance the overall profile:
-
Dark Chocolate: Using high-quality dark chocolate (60–70% cacao) chunks complements the sweetness of the caramel and the sea salt, adding sophisticated bitterness.
-
White Chocolate: White chocolate chips can be added alongside the caramel for an additional layer of sweetness and vanilla, creating a striking visual contrast against the dark cocoa base.
Serving and Storage: Maximizing Freshness and Gooeyness
The final presentation and serving temperature of the Salted Caramel Hot Chocolate Cookie can significantly influence the eating experience, especially given the dual-textured nature of the caramel.
The Warmth Factor
These cookies are undeniably best when served warm. The warmth keeps the encased caramel in its most desirable, molten, and flowing state. If serving cookies that have cooled down, a brief 10-second blast in the microwave will reactivate the internal heat, softening the caramel to a gooey consistency. Serving them alongside a cold glass of milk creates the classic temperature and textural contrast that elevates the indulgence.
Ideal Pairings
The intense richness of the chocolate and caramel requires a pairing that can cleanse the palate or match its intensity.
-
Classic Cold Pairings: Whole milk or a rich oat milk cuts through the sweetness and provides a comforting, cooling contrast.
-
Gourmet Hot Pairings: A robust, black coffee, a shot of espresso, or a glass of dry red wine (such as a Zinfandel) offers a bitterness that contrasts beautifully with the sugar. Of course, a mug of actual hot chocolate or a mocha provides a thematic link to the cookie’s inspiration.
Freezing and Storage
Like most drop cookies, the dough for Salted Caramel Hot Chocolate Cookies freezes exceptionally well.
-
Freezing Dough Balls: Fully prepare and stuff the dough balls, then arrange them on a baking sheet and flash-freeze them until solid. Once frozen, transfer them to an airtight freezer bag for up to 3 months. When ready to bake, place them directly on a baking sheet and add 2–3 minutes to the bake time.
-
Storage: Baked cookies will keep well in an airtight container at room temperature for up to one week. However, the caramel center will harden over time. Always reheat for a few seconds before serving to recapture that initial, irresistible gooeyness.