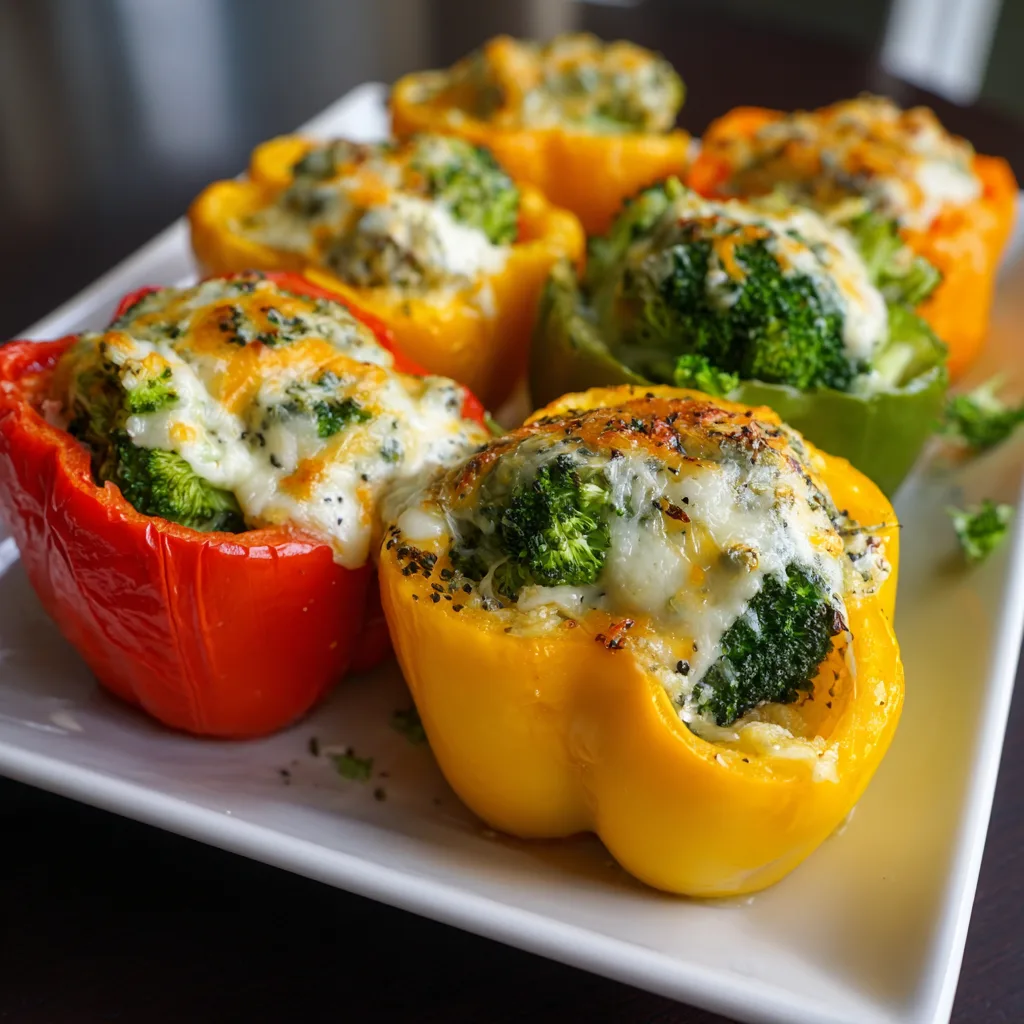
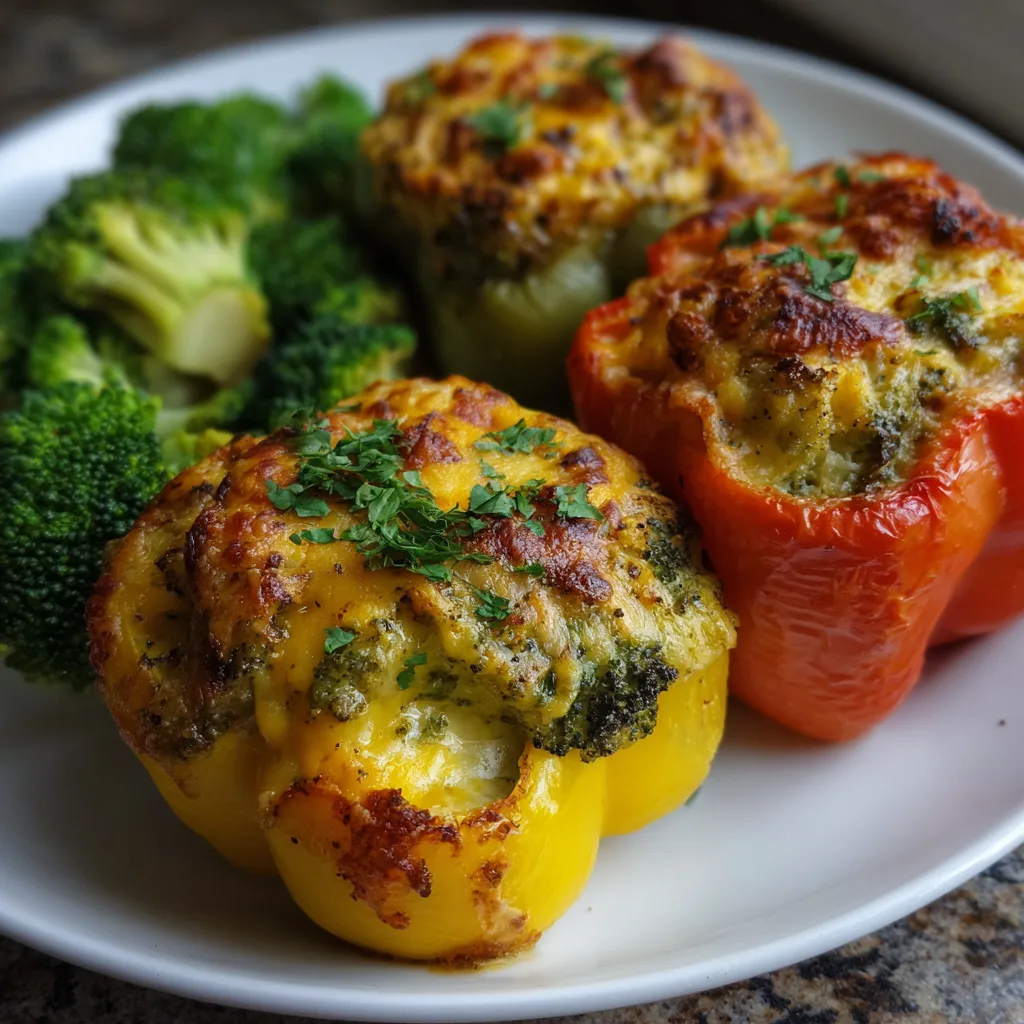
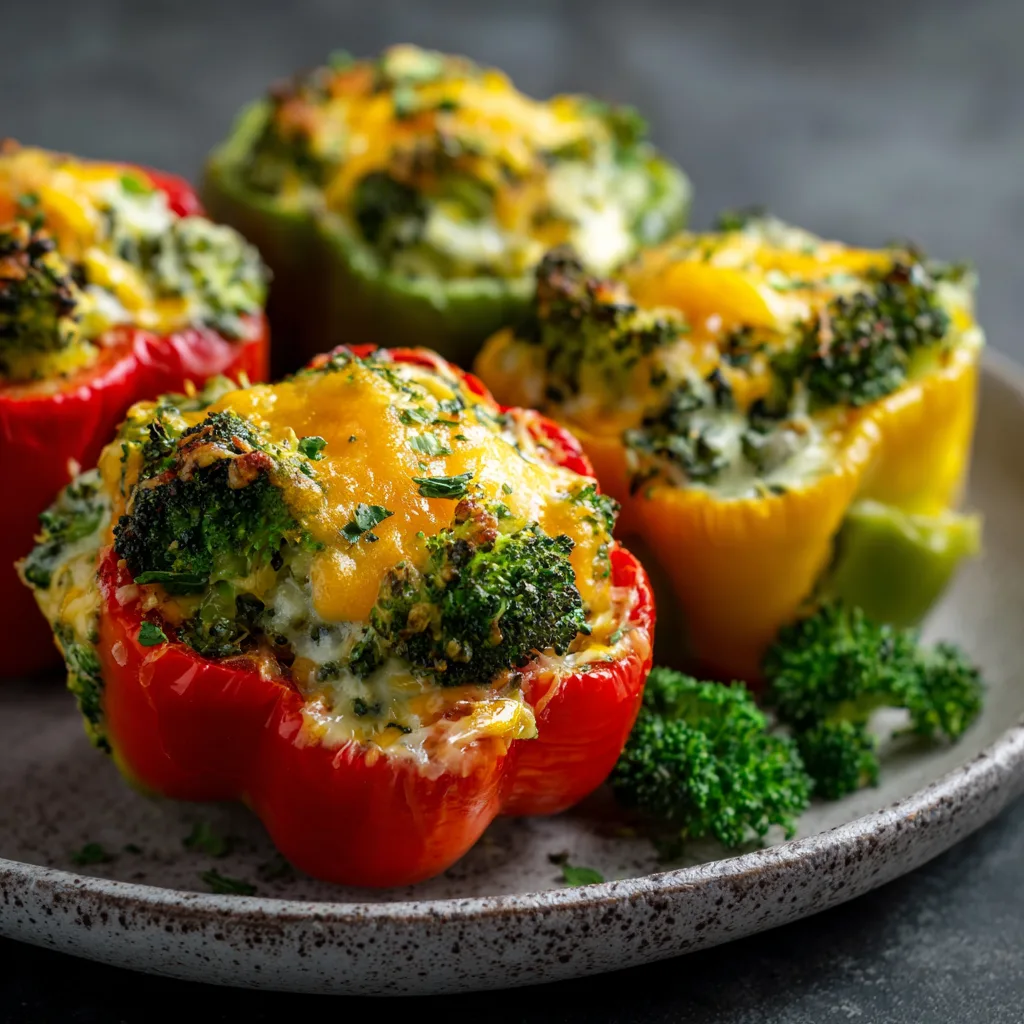
The Ultimate Broccoli and Cheese Stuffed Bell Peppers Broccoli and cheese stuffed bell peppers are the perfect marriage of comfort food and healthy eating. This dish transforms the classic, nostalgic flavor profile of broccoli cheddar soup into a structured, vibrant meal that satisfies both the eyes and the palate. Whether you are looking for a…
The Ultimate Broccoli and Cheese Stuffed Bell Peppers
Broccoli and cheese stuffed bell peppers are the perfect marriage of comfort food and healthy eating. This dish transforms the classic, nostalgic flavor profile of broccoli cheddar soup into a structured, vibrant meal that satisfies both the eyes and the palate. Whether you are looking for a low-carb dinner option, a kid-friendly way to serve more vegetables, or a colorful centerpiece for your weekly meal prep, these peppers deliver a punch of nutrition without sacrificing the creamy, cheesy indulgence we all crave. By roasting the peppers until they are tender and slightly charred, you create a sweet, smoky vessel that perfectly complements the earthy broccoli and sharp melted cheese.
Ingredients You’ll Need
To create the perfect batch of stuffed peppers, quality and balance are key. Here is what you will need:
-
Bell Peppers: 4 large bell peppers (any color, though red, orange, and yellow are sweeter than green).
-
Broccoli: 3 cups of fresh broccoli florets, chopped into bite-sized pieces.
-
Base Grain (Optional): 1.5 cups of cooked quinoa or cauliflower rice (for a low-carb version) or white/brown rice.
-
Cheese: 2 cups of shredded sharp cheddar cheese (divided).
-
Aromatics: 1 small yellow onion (diced) and 3 cloves of garlic (minced).
-
Creamy Element: 4 ounces of cream cheese or ½ cup of Greek yogurt.
-
Seasoning: 1 teaspoon smoked paprika, ½ teaspoon garlic powder, salt, and black pepper to taste.
-
Liquid: ¼ cup vegetable broth or water for steaming.
-
Topping: ¼ cup panko breadcrumbs or crushed pork rinds for extra crunch.
Step-by-Step Preparation Guide
-
Prepare the Peppers: Preheat your oven to 400°F (200°C). Slice the bell peppers in half lengthwise, removing the seeds and membranes. Place them cut-side up in a large baking dish. Drizzle with a little olive oil and a pinch of salt. Pre-bake the empty shells for 10–15 minutes to ensure they are tender by the time the filling is cooked.
-
Sauté the Aromatics: While the peppers are pre-baking, heat a tablespoon of olive oil in a large skillet over medium heat. Add the diced onion and cook until translucent (about 5 minutes). Add the minced garlic and cook for another 60 seconds until fragrant.
-
Steam the Broccoli: Add the chopped broccoli florets and the vegetable broth to the skillet. Cover with a lid for 3–4 minutes to steam the broccoli until it is bright green and fork-tender.
-
Mix the Filling: Remove the skillet from the heat. Stir in your cooked grain (rice, quinoa, or cauliflower rice), the cream cheese (or yogurt), 1.5 cups of the shredded cheddar, and the seasonings. Stir until the cheese has melted and the mixture is creamy and well-combined.
-
Stuff and Bake: Remove the pepper shells from the oven and drain any liquid that may have pooled inside. Spoon the broccoli and cheese mixture generously into each pepper half.
-
The Final Layer: Sprinkle the remaining ½ cup of cheddar cheese and the breadcrumbs over the top of the peppers.
-
Roast to Perfection: Return the dish to the oven and bake for another 15–20 minutes, or until the cheese is bubbly and golden brown. Let them rest for 5 minutes before serving to allow the flavors to set.
Tips for the Best Texture and Flavor
Achieving the perfect stuffed pepper is all about managing moisture and texture. One common pitfall is a “watery” pepper. To avoid this, always ensure your broccoli is well-drained after steaming and before mixing it with the cheese. If you are using frozen broccoli, thaw it completely and squeeze out the excess water using a paper towel.
For those who prefer a deeper flavor profile, consider roasting your broccoli in the oven at a high temperature before adding it to the filling. This adds a nutty, charred element that pairs beautifully with sharp cheddar. Additionally, don’t be afraid to experiment with your cheese. While sharp cheddar is the gold standard for broccoli pairings, adding a bit of Gruyère for earthiness or Pepper Jack for a spicy kick can elevate the dish to gourmet levels.
Nutritional Benefits and Dietary Customizations
This recipe is a powerhouse of vitamins and minerals. Bell peppers are exceptionally high in Vitamin C, while broccoli provides a significant amount of fiber, Vitamin K, and antioxidants. By using bell peppers as the “bowl” instead of a traditional bread or pasta base, you significantly reduce the glycemic load of the meal.
This recipe is also incredibly adaptable to various dietary needs:
-
Keto/Low-Carb: Use cauliflower rice or omit the grain entirely. Ensure you use full-fat cheeses to maintain the fat-to-protein ratio.
-
Vegan: Replace the cheddar and cream cheese with your favorite plant-based alternatives (cashew-based sauces work exceptionally well here) and ensure your breadcrumbs are vegan-friendly.
-
Protein Boost: Add cooked shredded chicken, ground turkey, or chickpeas to the filling for a more filling, high-protein meal.
Serving Suggestions and Storage
Broccoli and cheese stuffed bell peppers are a complete meal on their own, but they also pair wonderfully with a simple side salad or a light tomato soup. For a more indulgent dinner, serve them alongside a piece of crusty sourdough bread to soak up any extra cheesy filling.
If you have leftovers, these peppers store remarkably well. Place them in an airtight container in the refrigerator for up to 4 days. When reheating, the oven or an air fryer is preferred over the microwave to help maintain the structure of the pepper and the crispiness of the topping. If using an air fryer, heat at 350°F for about 5–7 minutes. These can also be frozen for up to 3 months; simply thaw them in the fridge overnight before reheating to ensure the center gets hot without burning the cheese on top.