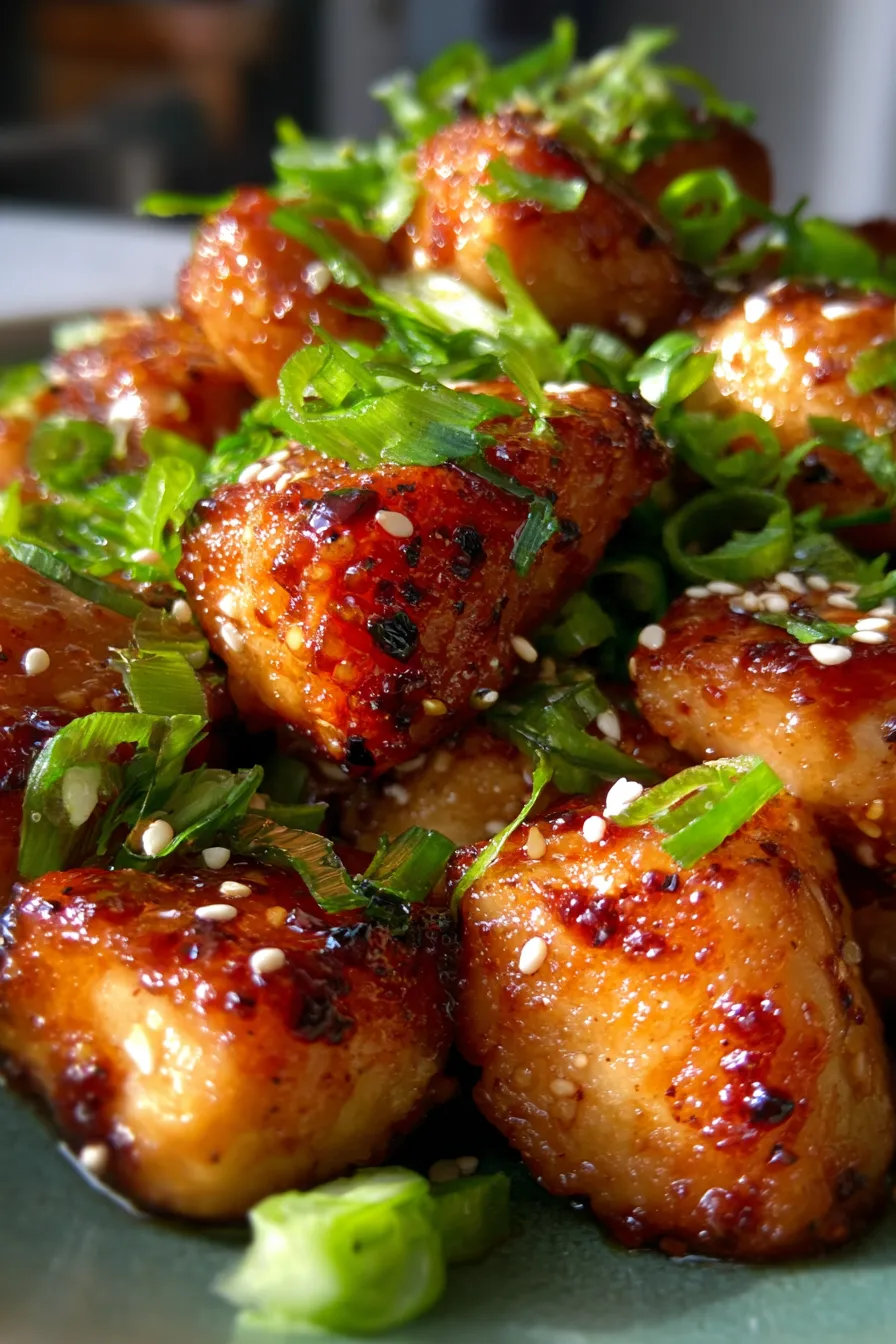
Irresistible Honey Garlic Chicken | Better Than Takeout, Made Easy I remember those chilly, rainy Sunday evenings when the thought of cooking felt like an insurmountable task. The aroma of garlic and ginger, however, always had a way of pulling me into the kitchen, reminding me of the warmth and comfort a home-cooked meal brings….
Irresistible Honey Garlic Chicken | Better Than Takeout, Made Easy
I remember those chilly, rainy Sunday evenings when the thought of cooking felt like an insurmountable task. The aroma of garlic and ginger, however, always had a way of pulling me into the kitchen, reminding me of the warmth and comfort a home-cooked meal brings. This feeling is exactly what inspired my obsession with creating the perfect, effortless fakeout meal.
That’s where this recipe for Honey Garlic Chicken | Better Than Takeout Dinner quickly became our go-to! It’s an absolute game-changer for anyone craving that sweet, savory, and sticky goodness without the greasy aftermath or the long wait for delivery. This dish isn’t just an easy dinner; it’s a vibrant explosion of comfort food flavors that will have everyone asking for seconds.
It’s a tried-and-true family favorite, tested countless times, and consistently delivers a healthier, incredibly satisfying meal that truly lives up to its ‘better than takeout’ promise. Get ready to transform your weeknight routine with minimal effort and maximum flavor!
Why You’ll Love This Recipe
❤️ Here’s why this Honey Garlic Chicken will become a staple in your kitchen:
- Unbeatable Flavor Profile: It perfectly balances sweet honey with savory soy sauce, pungent garlic, and a hint of zesty ginger. Every bite is an explosion of perfectly harmonized tastes that tantalize the palate.
- Quicker Than Delivery: You can have this restaurant-quality meal on your table in under 40 minutes, from start to finish. It’s significantly faster and more satisfying than waiting for takeout to arrive, making it ideal for busy weeknights.
- Simple, Accessible Ingredients: No obscure ingredients here! You likely have most of the pantry staples needed for this recipe already on hand. This makes it a convenient and budget-friendly option for any home cook.
- Versatile and Customizable: While chicken thighs are amazing, you can easily substitute with chicken pieces, shrimp, or even firm tofu. Adjust the sauce’s sweetness or spice level to perfectly match your family’s preferences.
- Family-Friendly: The sweet and savory notes appeal to even the pickiest eaters. It’s a crowd-pleaser that guarantees clean plates and happy faces around the dinner table, making mealtime stress-free.
- Fantastic for Meal Prep: This dish reheats beautifully, making it an excellent choice for meal prepping lunches or dinners for the week ahead. Simply portion it out with your favorite sides, and you’re good to go!
- Healthier Takeout Alternative: By making it at home, you control the quality of ingredients and reduce excess oil and sodium often found in restaurant versions. Enjoy a delicious meal without compromising on your health goals.
- Impressive Yet Effortless: Despite its simple preparation, this Honey Garlic Chicken looks and tastes incredibly sophisticated. It’s perfect for entertaining guests or simply treating yourself to a gourmet experience without all the fuss.
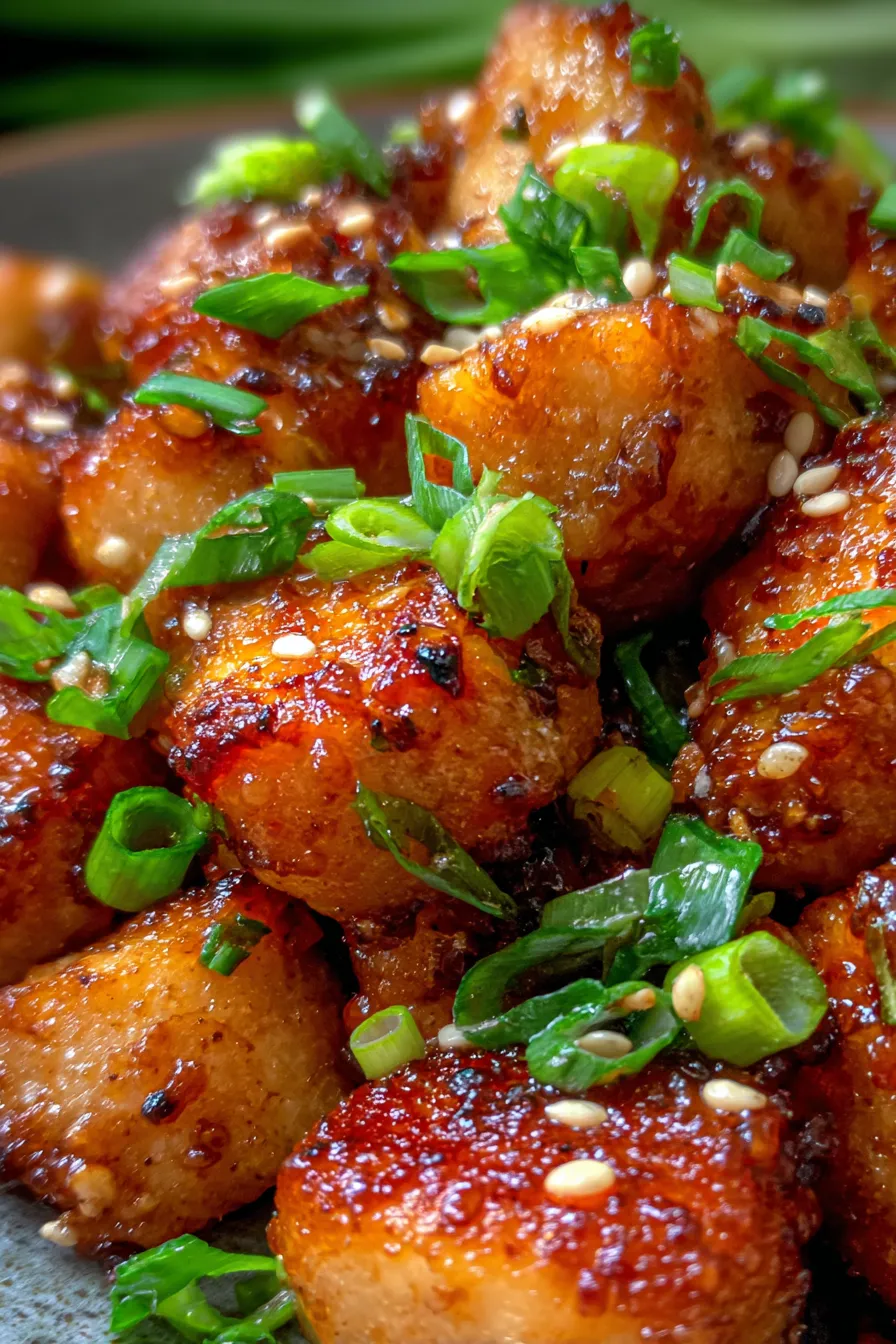
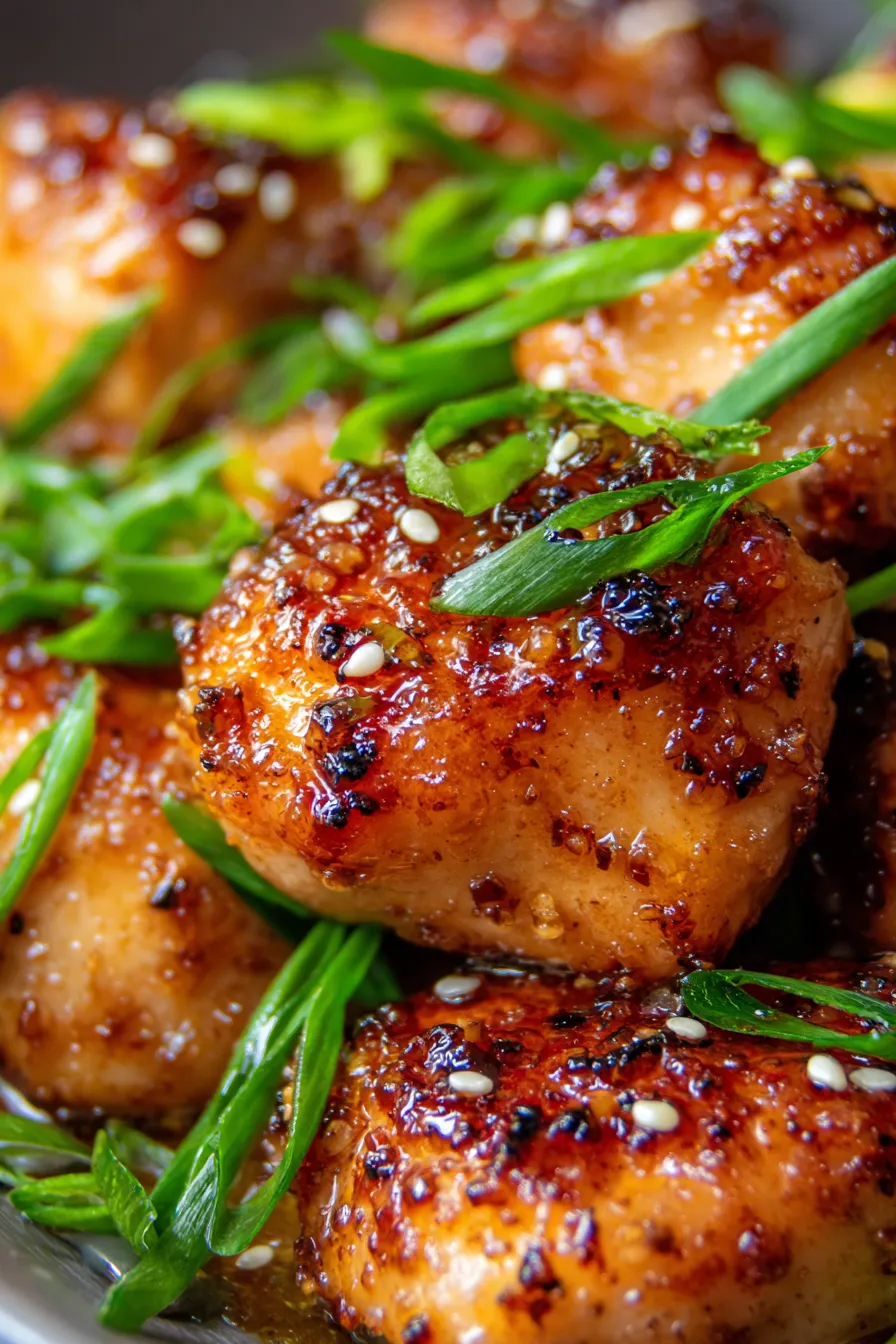
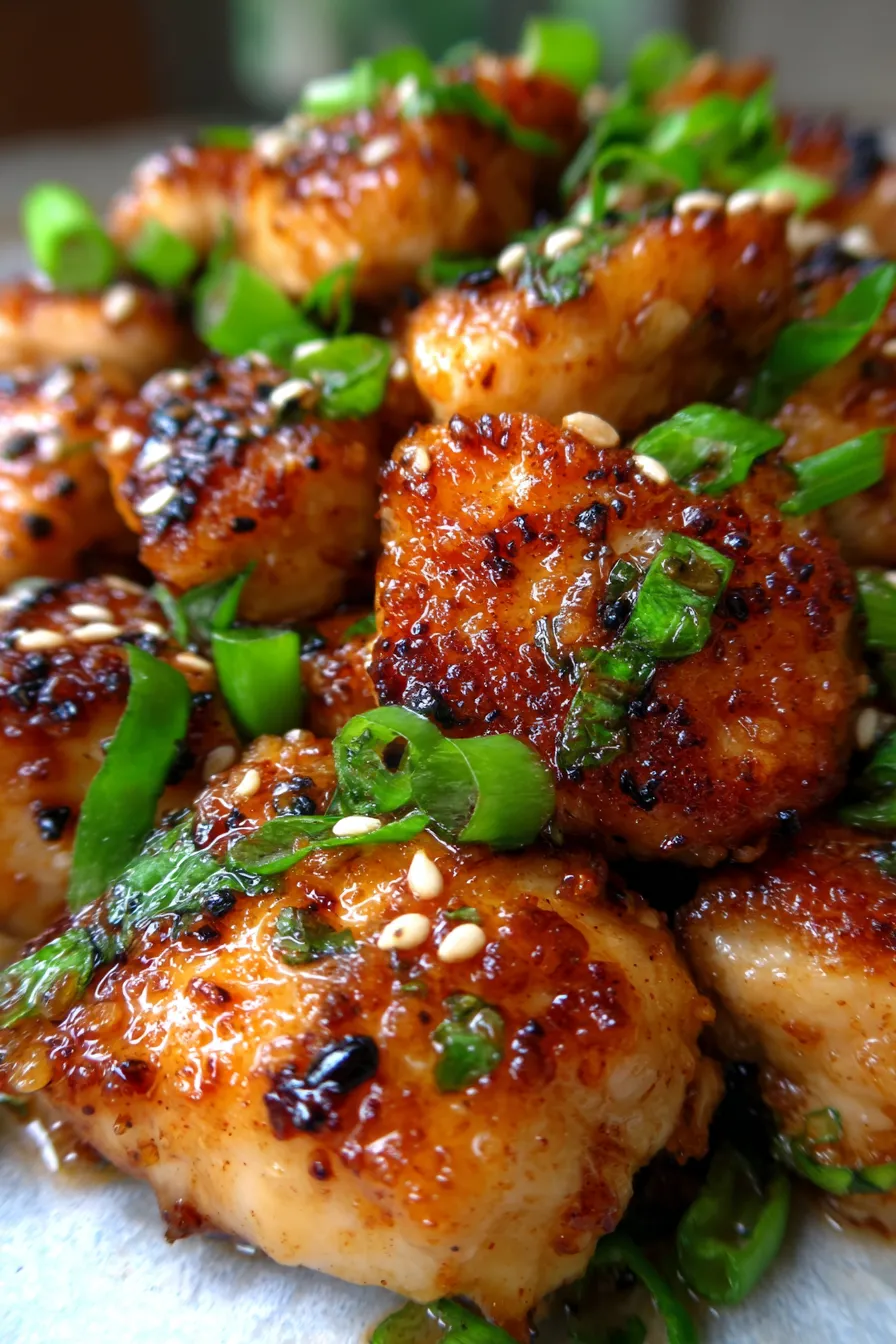
- Sticky, Glazy Perfection: The sauce develops into a thick, glossy glaze that clings beautifully to every piece of chicken. This texture is incredibly satisfying and makes every bite irresistible, soaking perfectly into rice or noodles.
- Perfect Pairing Potential: This chicken pairs wonderfully with a myriad of sides, from fluffy jasmine rice and quinoa to steamed broccoli or a crisp side salad. Its adaptability ensures it always feels fresh and exciting.
What You Need
You only need a few simple pantry staples for this recipe! Most of these items are probably already in your kitchen, making this a perfect last-minute meal solution. We’re talking about basic ingredients that come together to create an explosion of flavor. Check the full printable recipe card below for detailed measurements and any specific brand recommendations I might have!
Expert Tips
💡 Master this dish with these insider secrets:
- Pat Your Chicken Dry: Before seasoning, always pat your chicken pieces thoroughly dry with paper towels. This crucial step helps achieve a beautiful golden-brown sear and prevents the chicken from steaming in the pan, ensuring maximum flavor and texture.
- Don’t Overcrowd the Pan: Cook the chicken in batches if necessary. Overcrowding lowers the pan’s temperature, leading to steamed, pale chicken instead of nicely browned pieces. Give each piece space to sizzle and develop that delicious crust.
- Fresh Garlic and Ginger Are Key: While powders can work in a pinch, fresh minced garlic and grated ginger elevate the flavor profile immensely. Their vibrant aromas and sharp tastes are essential to the ‘better than takeout’ experience.
- Achieving the Perfect Sauce Consistency: The cornstarch slurry is your friend! Make sure to mix the cornstarch with cold water before adding it to the simmering sauce. This prevents lumps and ensures a smooth, glossy, and perfectly thick glaze that clings to the chicken.
- Taste and Adjust the Sauce: Before adding the chicken back, taste your sauce! Depending on your soy sauce brand or honey, you might want a little more sweetness, tang, or savory depth. A splash of lime juice can also brighten it up.
- Marinating for Deeper Flavor (Optional but Recommended): While not strictly necessary for this quick recipe, marinating the chicken in a portion of the sauce for 15-30 minutes beforehand can infuse even deeper flavor into the meat, taking it to the next level.
- High Heat for Searing: Start with medium-high heat to get a good sear on your chicken. Once browned, you can reduce the heat slightly to ensure the chicken cooks through without burning the exterior.
- Consider a Wok or Cast Iron Skillet: These types of pans retain heat exceptionally well, making them ideal for searing chicken and creating that perfect sticky sauce. They also handle the heat without warping, ensuring even cooking.
- Garnish for Freshness and Texture: Don’t skip the garnishes! Toasted sesame seeds add a delightful nutty crunch, and fresh sliced green onions provide a pop of color and a mild, fresh oniony bite that beautifully complements the rich sauce.
- Prevent Sauce from Burning: Once you add the sauce and cornstarch slurry, keep stirring constantly, especially as it thickens. The honey and sugar can caramelize quickly and potentially burn if left unattended on high heat.
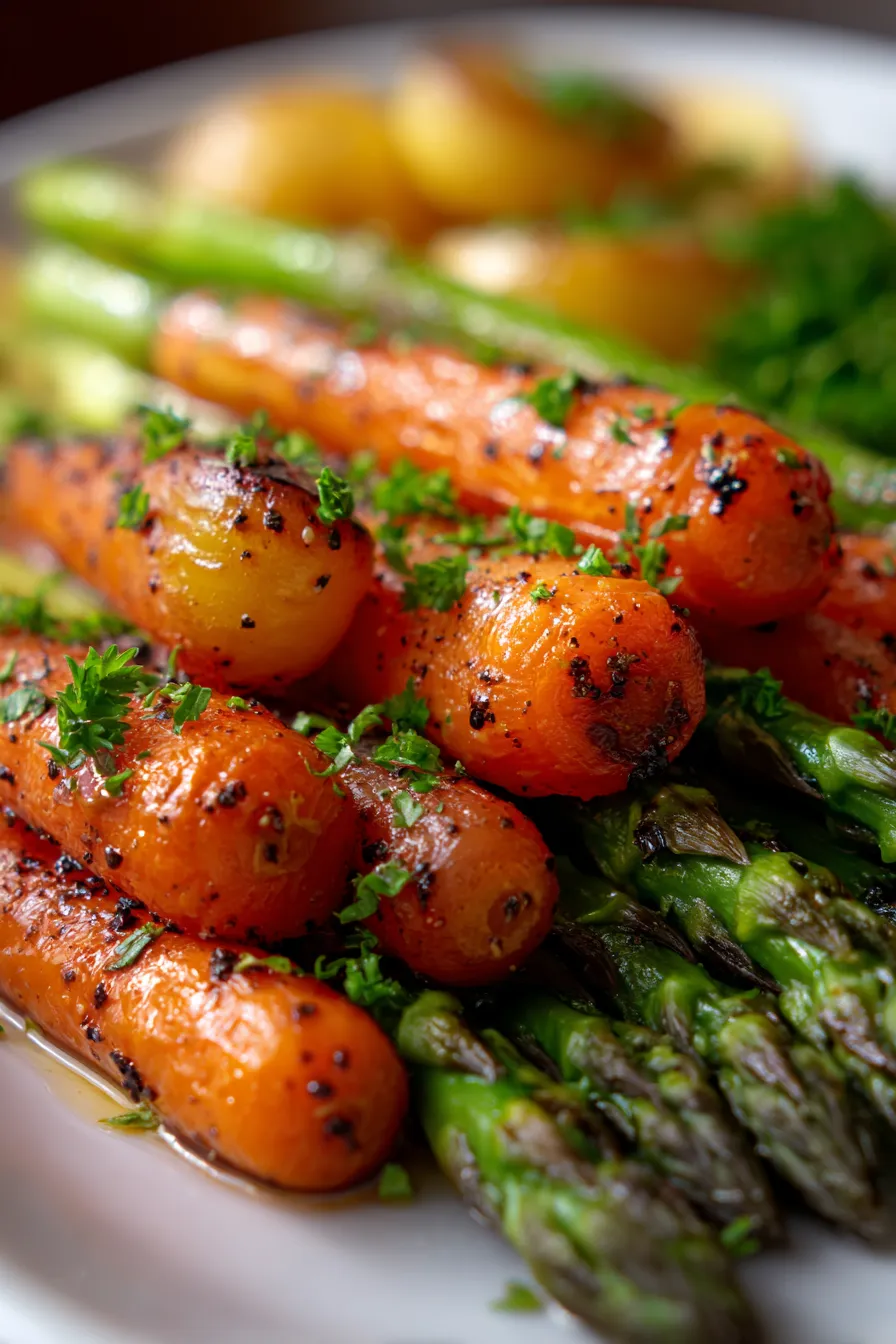
- Serving Suggestions Matter: This dish truly shines when served over a bed of fluffy white rice or noodles, which are perfect for soaking up every last drop of that incredible sauce. Steamed or roasted vegetables like broccoli or asparagus make excellent fresh accompaniments.
- Check Internal Temperature: Always use a meat thermometer to ensure your chicken is cooked to a safe internal temperature of 165°F (74°C). This ensures juiciness and food safety.
Variations & Substitutions
One of the best things about this Honey Garlic Chicken is its adaptability! Here are some ideas to make it your own:
- Gluten-Free: Simply swap out regular soy sauce for a certified gluten-free tamari. Ensure all other ingredients, like rice vinegar, are also GF.
- Low-Carb/Keto Friendly: Replace honey with a keto-friendly liquid sweetener (like erythritol-based syrup) and use coconut aminos instead of soy sauce. Thicken the sauce with xanthan gum (use sparingly, about 1/4 teaspoon) or skip the thickener for a thinner sauce. Serve with cauliflower rice or zucchini noodles.
- Add a Spicy Kick: For those who love heat, introduce a pinch of red pepper flakes with the garlic and ginger, or swirl in a tablespoon of sriracha or chili garlic sauce into your finished sauce.
- Different Protein: This sauce is incredibly versatile! Try it with shrimp (cook for less time), pork tenderloin cutlets, or even firm tofu or tempeh for a vegetarian option.
- Include Veggies: Boost the nutrition and color by tossing in some quick-cooking vegetables like sliced bell peppers, snap peas, or broccoli florets during the last few minutes of cooking the chicken, or stir-fry them separately and add to the finished dish.
- Citrus Brightness: A squeeze of fresh lime or lemon juice at the very end can add a wonderful brightness and cut through the richness of the sauce, enhancing the overall flavor.
Storage & Freezing
This Honey Garlic Chicken is fantastic for meal prep, and storing leftovers is a breeze!
- Refrigeration: Allow the chicken to cool completely before transferring it to an airtight container. It will keep well in the refrigerator for up to 3-4 days. The sauce might thicken more when cold, which is normal.
- Freezing Instructions: This dish freezes beautifully. Once cooled, place the chicken and sauce in a freezer-safe airtight container or heavy-duty freezer bag. It can be frozen for up to 2-3 months.
- Thawing & Reheating: To reheat, thaw frozen chicken overnight in the refrigerator. For both refrigerated and thawed portions, gently reheat on the stovetop over medium-low heat, stirring occasionally, or in the microwave until warmed through. You may need to add a splash of water or chicken broth to loosen the sauce if it’s too thick.
FAQ
Can I use chicken cutlets instead of thighs?
Absolutely! Boneless, skinless chicken pieces or cutlets work wonderfully. Just be mindful that they cook faster than thighs, so adjust your cooking time accordingly to prevent overcooking and ensure they remain juicy. Cutting them into similar-sized pieces will also help with even cooking.
How can I make the sauce thicker?
The cornstarch slurry is your secret weapon! If your sauce isn’t as thick as you like after adding the initial slurry, mix an additional teaspoon of cornstarch with a tablespoon of cold water until smooth. Stir this into your simmering sauce a little at a time until it reaches your desired consistency. Remember, it will continue to thicken slightly as it cools.
Is this recipe spicy?
As written, it’s a beautifully balanced sweet and savory dish with a hint of warmth from the ginger and garlic. It’s not spicy. However, if you love a kick, you can easily add a pinch of red pepper flakes with the garlic and ginger, or a drizzle of sriracha to the sauce mixture. Taste and adjust to your preference for heat!
What can I serve with Honey Garlic Chicken?
This dish is incredibly versatile! I love serving it over fluffy jasmine rice or brown rice to soak up all that delicious sauce. Steamed or roasted broccoli, asparagus, or green beans make a great green side. For a lighter option, a simple side salad with a light vinaigrette is perfect. Don’t forget to garnish with extra sesame seeds and sliced green onions for that authentic touch!
Can I prepare the sauce in advance?
Yes, you absolutely can! Whisk all the sauce ingredients (honey, soy sauce, rice vinegar, sesame oil, garlic, ginger, and cornstarch) together and store it in an airtight container in the refrigerator for up to 3-4 days. This makes weeknight cooking even faster – just brown your chicken and add the pre-made sauce when you’re ready to cook!
This Honey Garlic Chicken | Better Than Takeout Dinner is more than just a meal; it’s a culinary hug in a bowl, a vibrant explosion of flavor that proves homemade can truly be better than anything you order out. I hope this recipe brings as much joy to your dinner table as it does to mine. Don’t forget to pin this recipe for later and share your creations with me!

Irresistible Honey Garlic Chicken | Better Than Takeout Dinner
Ingredients
- 1.5 lbs boneless, skinless chicken thighs (or cutlets), cut into 1-inch pieces
- 1/2 cup low-sodium soy sauce
- 1/2 cup honey
- 2 tablespoons rice vinegar
- 1 tablespoon sesame oil
- 4 cloves garlic, minced
- 1 tablespoon fresh ginger, grated
- 1 tablespoon cornstarch
- 2 tablespoons cold water (for slurry)
- 1 tablespoon vegetable oil (for cooking)
- Salt and black pepper to taste
- Garnish: toasted sesame seeds, sliced green onions
Instructions
- Step 1 1. Pat chicken dry with paper towels and season lightly with salt and black pepper. Set aside.
- Step 2 2. In a medium bowl, whisk together the soy sauce, honey, rice vinegar, sesame oil, minced garlic, and grated ginger. In a small separate bowl, whisk cornstarch with cold water to form a smooth slurry.
- Step 3 3. Heat vegetable oil in a large skillet or wok over medium-high heat. Add chicken pieces in a single layer, ensuring not to overcrowd the pan. Cook until golden brown and cooked through, about 5-7 minutes, flipping once. Remove chicken from skillet and set aside.
- Step 4 4. Pour the whisked sauce mixture (from step 2) into the skillet. Bring to a simmer, stirring constantly. Stir in the cornstarch slurry and cook, stirring frequently, until the sauce thickens to a glossy, desired consistency, about 1-2 minutes.
- Step 5 5. Return the cooked chicken to the skillet, tossing gently to coat each piece evenly with the shimmering honey garlic sauce. Cook for another 1-2 minutes to ensure the chicken is fully heated through and thoroughly glazed.
- Step 6 6. Serve immediately over your choice of rice or noodles, garnished generously with toasted sesame seeds and freshly sliced green onions for a vibrant finish.