The Ultimate Raspberry White Chocolate Loaf: A Perfect Harmony of Sweet and Tart The pairing of sweet, creamy white chocolate and bright, tangy raspberries is a timeless classic, especially when baked into a tender, moist loaf. Often referred to as a quick bread or a loaf cake, this recipe delivers a simple yet sophisticated treat…
The Ultimate Raspberry White Chocolate Loaf: A Perfect Harmony of Sweet and Tart
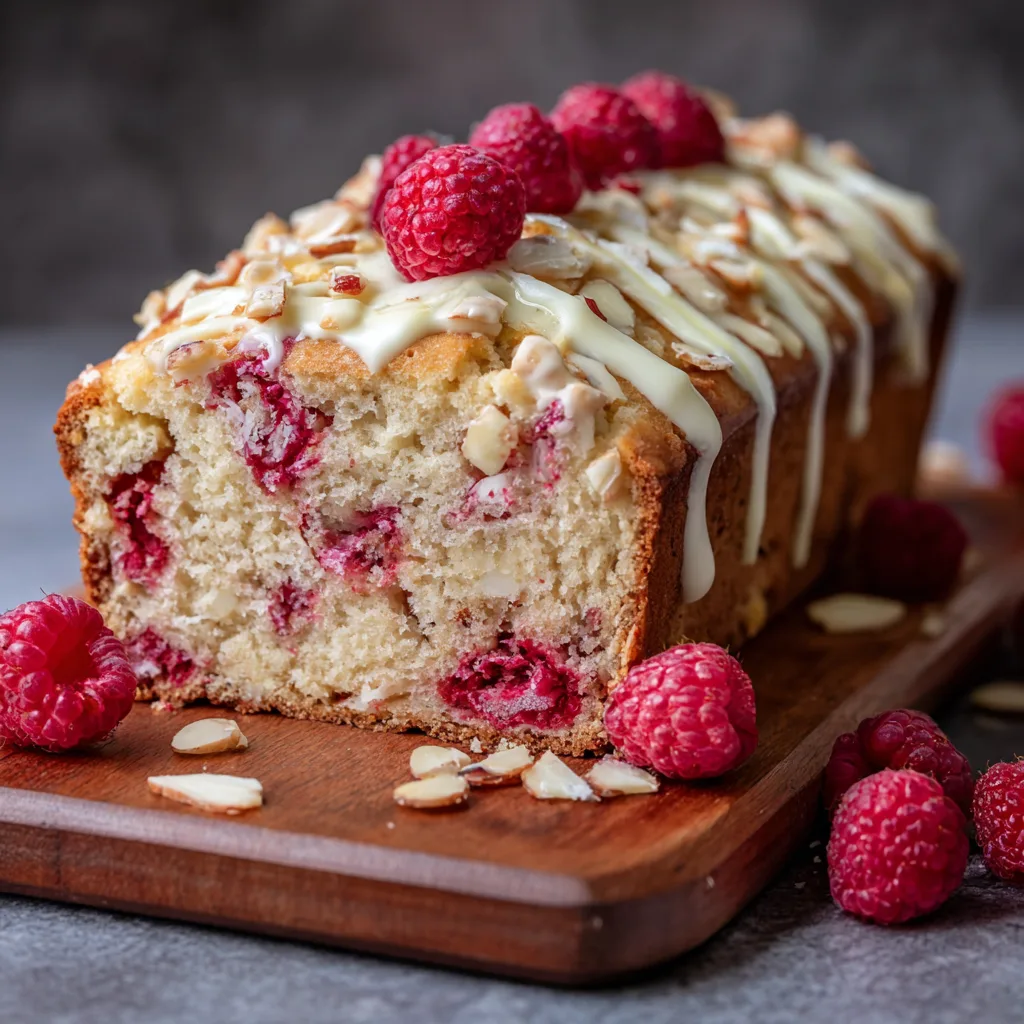
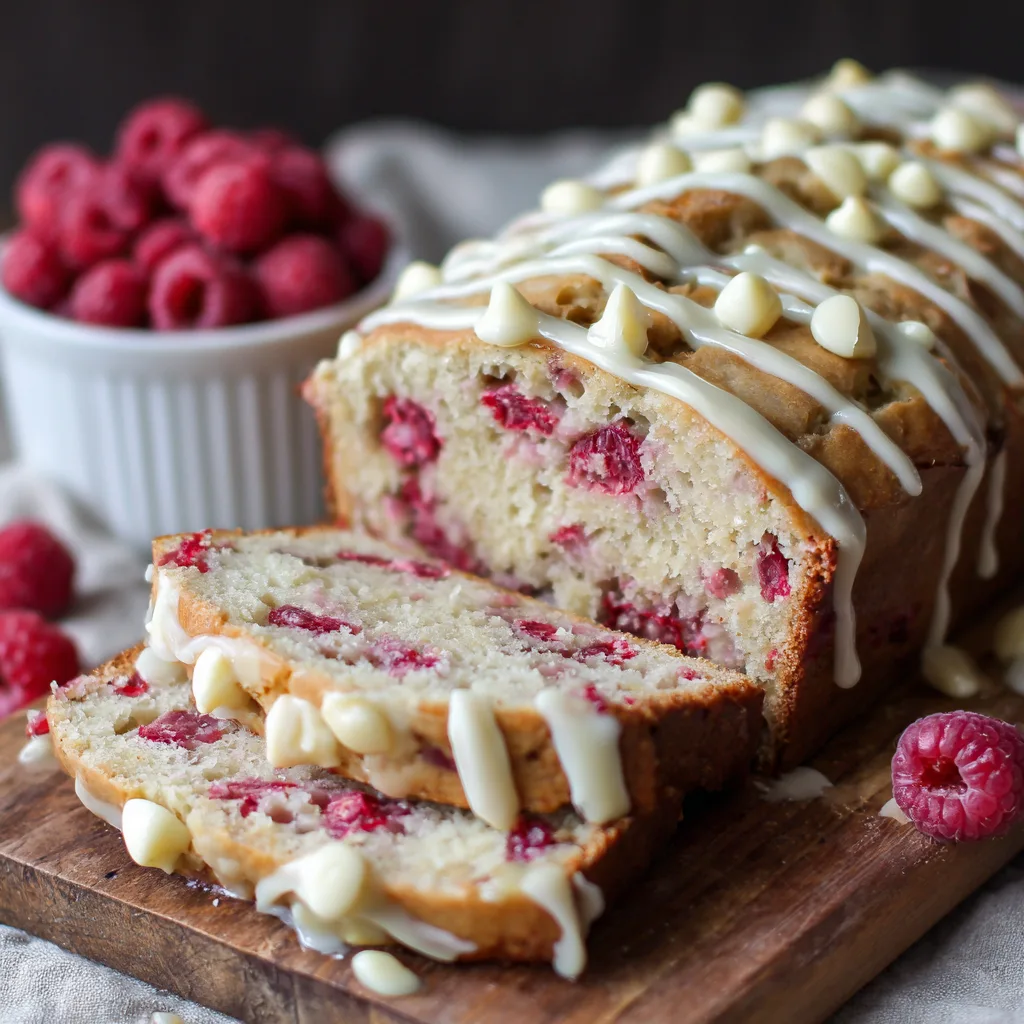
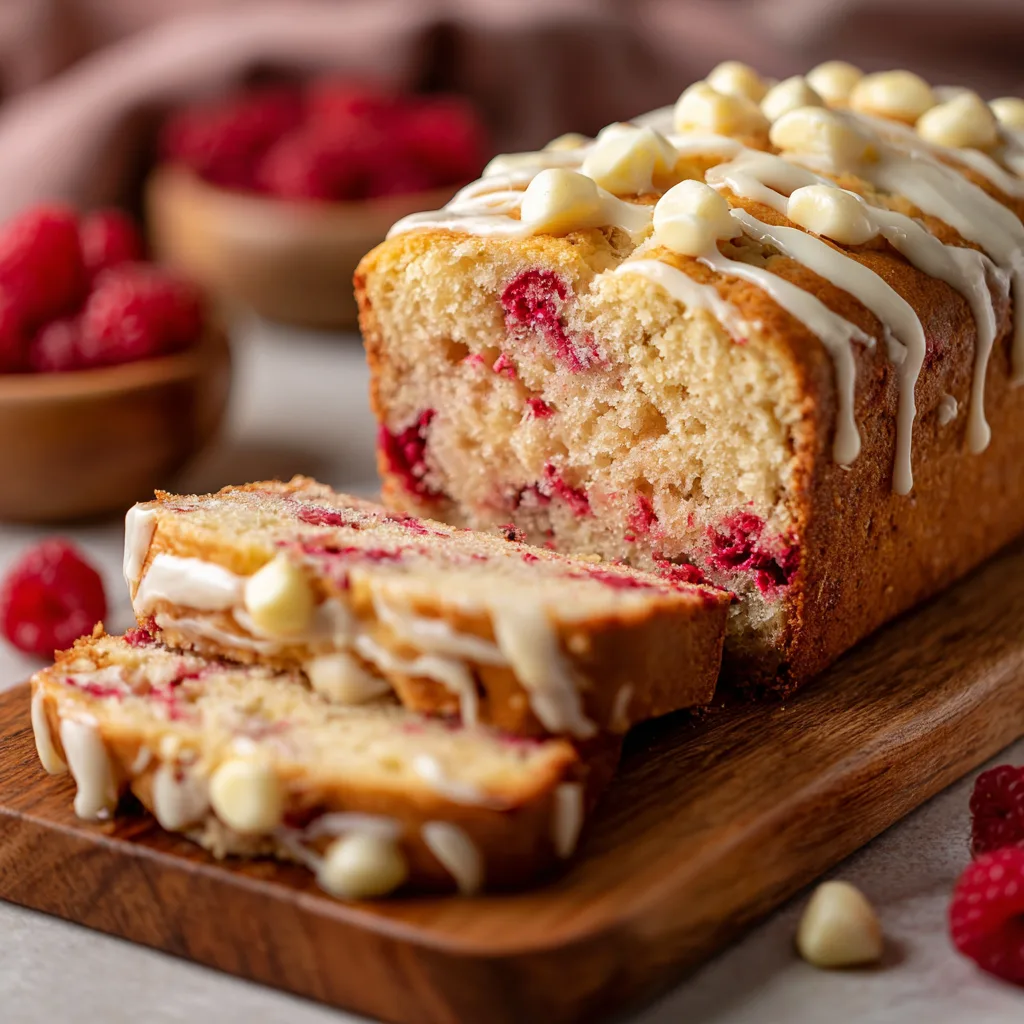
The pairing of sweet, creamy white chocolate and bright, tangy raspberries is a timeless classic, especially when baked into a tender, moist loaf. Often referred to as a quick bread or a loaf cake, this recipe delivers a simple yet sophisticated treat perfect for breakfast, dessert, or an afternoon snack. It achieves a delicate balance, where the richness of the white chocolate complements the burst of acidic raspberry juice, resulting in a show-stopping bake that remains moist for days. Achieving this ideal texture and flavor requires attention to ingredient temperature and mixing technique, ensuring a perfectly domed loaf with well-distributed berries and chips.
Ingredients
For the Loaf:
-
1 ½ cups (180g) All-Purpose Flour, plus 1 tbsp for coating
-
¾ cup (150g) Granulated Sugar
-
2 teaspoons Baking Powder
-
½ teaspoon Baking Soda
-
¼ teaspoon Salt
-
1 cup (240g) Plain Full-Fat Yogurt or Buttermilk (room temperature)
-
½ cup (113g or 1 stick) Unsalted Butter, melted and slightly cooled
-
2 large Eggs (room temperature)
-
1 teaspoon Pure Vanilla Extract
-
1 teaspoon Lemon Zest (optional, but recommended)
-
1 ¼ cups (about 150g) Raspberries, fresh or frozen (do not thaw)
-
¾ cup (130g) White Chocolate Chips or coarsely chopped White Chocolate Bar
For the Simple Glaze (Optional):
-
1 cup (120g) Powdered Sugar (Confectioner’s Sugar)
-
2-3 tablespoons Milk or Fresh Lemon Juice
Instructions
Preparation and Pre-Bake:
-
Preheat and Prepare: Preheat your oven to 350°F (175°C). Grease a standard 9×5-inch loaf pan and line it with parchment paper, leaving an overhang on the long sides to easily lift the bread out later.
-
Combine Dry Ingredients: In a large bowl, whisk together the 1 ½ cups of flour, granulated sugar, baking powder, baking soda, and salt. Set aside.
-
Combine Wet Ingredients: In a separate medium bowl, whisk together the melted butter, yogurt (or buttermilk), eggs, vanilla extract, and lemon zest until smooth. Ensure the butter is cool enough not to scramble the eggs.
-
Toss the Mix-ins: In a small bowl, gently toss the raspberries and white chocolate chips with the remaining 1 tablespoon of flour. This crucial step prevents the berries and chocolate from sinking to the bottom of the batter during baking.
-
Mix Batter: Pour the wet ingredients into the dry ingredients. Using a rubber spatula, mix only until the flour streaks have just disappeared and the batter is moistened. A few lumps are perfectly acceptable—do not overmix, as this develops gluten and results in a tough loaf.
-
Fold in Inclusions: Gently fold in the flour-coated raspberries and white chocolate chips until they are evenly dispersed throughout the batter.
-
Bake: Scrape the batter into the prepared loaf pan and smooth the surface. Bake for 55–65 minutes.
-
Check for Doneness: At the 40-minute mark, if the top is browning too quickly, loosely tent the loaf with aluminum foil. The bread is done when a wooden skewer inserted into the center comes out clean or with moist crumbs attached.
-
Cool: Let the loaf cool in the pan for 10–15 minutes before using the parchment paper overhang to lift it out onto a wire rack. Allow it to cool completely before glazing.
Glazing (Optional):
-
Mix Glaze: Whisk together the powdered sugar and milk (or lemon juice) until a smooth, drizzly consistency is achieved. Add liquid slowly—a little goes a long way.
-
Apply: Drizzle the glaze generously over the cooled loaf. Wait 15–20 minutes for the glaze to set before slicing and serving.
Mastering the Batter: Essential Tips for a Perfect Crumb
The distinction between a magnificent, moist loaf and a dense, dry one often lies in handling the batter and the ingredients correctly. A quick bread relies on chemical leaveners (baking powder and soda) rather than yeast, making the mixing process delicate.
The single most important technical tip is controlling the temperature of the dairy and eggs. If the yogurt and eggs are fridge-cold, they will react poorly with the melted butter, causing it to seize up and create small, hard butter lumps. By allowing these ingredients to come to room temperature (typically 30–60 minutes on the counter), they emulsify beautifully, leading to a much more tender and fine crumb.
Another critical step is preventing the berries and chocolate from sinking. Raspberries are quite heavy and high in moisture. To counteract this, coating them lightly in a tablespoon of flour before folding them into the batter creates a barrier that allows the fat and air in the batter to support the inclusions during the rising process. When using frozen raspberries, ensure they are added to the batter directly from the freezer; thawing them introduces excess moisture, making the batter soupy and sticky.
Finally, resist the urge to overmix. Once the wet and dry ingredients are combined, stop mixing the moment the last streaks of flour disappear. Overworking the batter develops gluten, which should be kept to a minimum in quick breads, otherwise the resulting loaf will be tough, dense, and potentially collapse in the middle.
Ingredient Deep Dive: Choosing Your Raspberries and Chocolate
While the core recipe is straightforward, optimizing the quality and preparation of the two star ingredients will dramatically elevate the final result.
Raspberry Selection:
-
Fresh vs. Frozen: Fresh raspberries offer the best visual appeal and the cleanest flavor, but frozen berries are perfectly acceptable—and often necessary—outside of peak season. If using frozen, the aforementioned tip of adding them frozen is key to preventing excessive color bleed and controlling moisture. Some bakers prefer using freeze-dried raspberries, which offer an intense, concentrated flavor without adding any disruptive moisture to the batter, resulting in a cleaner-looking crumb.
-
Acidity and Zest: The bright acidity of the raspberries is essential for balancing the sweetness of the white chocolate and the sugar. A small addition of lemon zest not only complements the raspberries but also brightens the entire flavor profile of the loaf without making it taste overtly lemony.
White Chocolate Quality:
-
Chips vs. Chunks: White chocolate chips are convenient, as they are formulated to hold their shape during baking. However, using a high-quality bar of white chocolate (one that contains real cocoa butter, not just vegetable oil) and chopping it coarsely will result in pockets of rich, creamy, melted chocolate throughout the loaf. Since white chocolate is naturally very sweet, using a premium brand is recommended for the best flavor payoff. If using chocolate wafers for a glaze, choose pure white chocolate or a quality coating intended for melting.
The Role of Dairy:
The use of acidic dairy—yogurt, sour cream, or buttermilk—is fundamental to this recipe’s success. These ingredients interact with the baking soda to create a rapid rise and activate the chemical leaveners, contributing significantly to the moist, tender, and slightly tangy crumb that defines a great quick bread.
Beyond the Loaf: Flavor Variations and Alternative Bakes
While the classic white chocolate raspberry loaf is a masterpiece on its own, its versatile nature allows for several exciting modifications, catering to different flavor preferences and baking styles.
Finishing Touches:
-
Glazing Options: The simplest finish is a confectioner’s sugar glaze, which adds a thin, crackly crust and an extra touch of sweetness. For a richer finish, a simple white chocolate drizzle (made by melting chips or coating wafers) provides depth, while a sophisticated white chocolate buttercream frosting transforms the loaf into a decadent dessert cake.
-
Aromatic Variations: Introduce warmth by adding a dash of ground cardamom or cinnamon to the dry ingredients, both of which pair beautifully with berries. For those who enjoy a hint of nuttiness, a ¼ teaspoon of almond extract can be used in place of or alongside the vanilla.
Alternative Bread Styles:
-
Sourdough Inclusion: For dedicated bakers, the raspberry white chocolate pairing is easily translated into a long-fermented sourdough loaf. This method involves introducing the berries and chips during the lamination or late-stage stretch-and-folds, resulting in a bread with a chewy crust and an open, slightly sour crumb that contrasts wonderfully with the sweet inclusions. Note that this is a multi-day process involving active starter, autolyse, bulk fermentation, and cold proofing.
-
Other Formats: The quick bread batter can be adapted into other forms: bake as muffins (reducing the baking time to 20–25 minutes), scones (using cold butter and requiring less liquid), or a bread pudding (a fantastic way to use up stale bread, combining it with the fruit, chocolate, and a rich custard base).
Serving, Storage, and Shelf Life
Proper handling of the loaf after it comes out of the oven is just as important as the baking process itself.
Cooling and Serving:
Though tempting, cutting into the loaf while it is still piping hot is discouraged. Quick breads continue to set as they cool, and slicing too early can lead to a gummy texture and a collapsed appearance. Allowing the loaf to cool on a wire rack for at least one hour—or fully for a cleaner slice—is essential. While delicious at room temperature, this loaf truly shines when served slightly warm, perhaps with a scoop of vanilla ice cream, whipped cream, or a dollop of crème fraîche.
Storage Instructions:
-
Room Temperature: Due to the high moisture content from the yogurt and berries, the loaf remains fresh and moist for 3 to 5 days when stored in an airtight container at cool room temperature. If glazed, keeping it on the counter is generally better for the glaze texture.
-
Refrigeration: If you live in a very warm climate or prefer to extend the shelf life slightly, the loaf can be refrigerated in an airtight container for up to a week. Warming a slice in the microwave for 10–15 seconds before eating will restore its soft texture.
-
Freezing: This bread freezes exceptionally well. Once fully cooled, wrap the entire loaf or individual slices tightly in plastic wrap, followed by a layer of aluminum foil or placed in a freezer-safe bag. Frozen slices can be kept for up to three months and thawed overnight at room temperature or reheated directly in the oven.