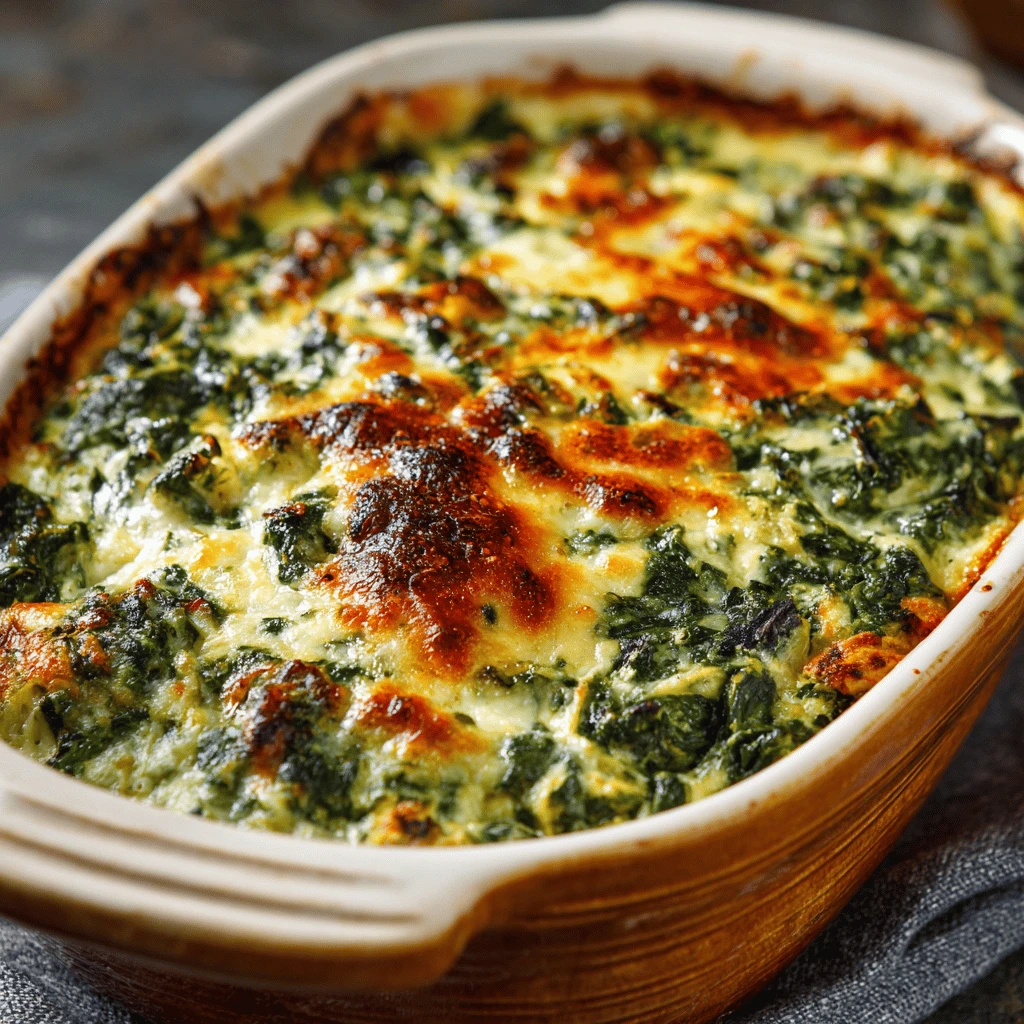
Best Ever Creamy Mac and Cheese with Roasted Red Peppers There’s nothing quite like the embrace of a warm, comforting bowl of mac and cheese, is there? For me, it instantly transports me back to my grandmother’s kitchen, where every Sunday brought the promise of her legendary baked macaroni. But one rainy afternoon, years later,…
Best Ever Creamy Mac and Cheese with Roasted Red Peppers
There’s nothing quite like the embrace of a warm, comforting bowl of mac and cheese, is there? For me, it instantly transports me back to my grandmother’s kitchen, where every Sunday brought the promise of her legendary baked macaroni. But one rainy afternoon, years later, I decided to give her classic a little twist, a touch of something unexpected and utterly delightful. That’s how this incredible Mac and Cheese with Roasted Red Peppers was born, transforming a beloved comfort food into an elevated, yet still incredibly easy weeknight dinner.
I remember that first bite vividly – the familiar creamy pasta, but then a subtle sweetness and smoky depth from the roasted red peppers. It was a revelation! Since then, this recipe has become a true family favorite, tested countless times and always met with rave reviews. It’s the kind of dish that warms your soul, impresses your guests, and makes even the busiest weeknight feel a little bit special. Trust me, once you try this combination, you’ll wonder how you ever lived without it.
It’s more than just a meal; it’s an experience. A creamy, cheesy hug with a sophisticated edge, making it the perfect comforting dish for any occasion. From casual potlucks to a cozy dinner in, this recipe truly shines, bringing together the best of classic comfort with a vibrant, flavorful twist.
Why You’ll Love This Recipe
❤️ Here’s why this Mac and Cheese with Roasted Red Peppers will quickly become a cherished staple in your recipe collection:
- Unforgettable Flavor Combination: The creamy, tangy cheese sauce perfectly complements the sweet and smoky notes of the roasted red peppers. This isn’t just plain mac and cheese; it’s a sophisticated upgrade that tantalizes the taste buds without being overly complicated. Each spoonful delivers a harmonious blend of textures and flavors that will have everyone asking for seconds.
- Ultimate Comfort Food with a Twist: It takes the beloved classic and elevates it with minimal effort, offering all the familiar warmth and coziness you crave, but with an exciting depth of flavor. This dish is pure edible comfort, making it ideal for chilly evenings, family gatherings, or simply when you need a delicious pick-me-up.
- Surprisingly Easy to Make: Despite its gourmet taste, this recipe is incredibly straightforward, perfect for both seasoned cooks and beginners. We break down the process into simple, manageable steps, ensuring a successful and delicious outcome every time. You’ll be amazed at how quickly you can create such an impressive meal from scratch.
- Crowd-Pleasing & Kid-Friendly: Even the pickiest eaters will adore this cheesy pasta dish, and the roasted red peppers are often a hit, adding color and nutrients without an overpowering taste. It’s a guaranteed hit at potlucks, family dinners, and holiday tables, earning you countless compliments.
- Perfect for Meal Prep & Leftovers: This mac and cheese tastes even better the next day, making it fantastic for lunch or dinner throughout the week. It reheats beautifully, providing delicious, ready-to-eat meals whenever hunger strikes. Plus, it’s a great make-ahead option for busy schedules.
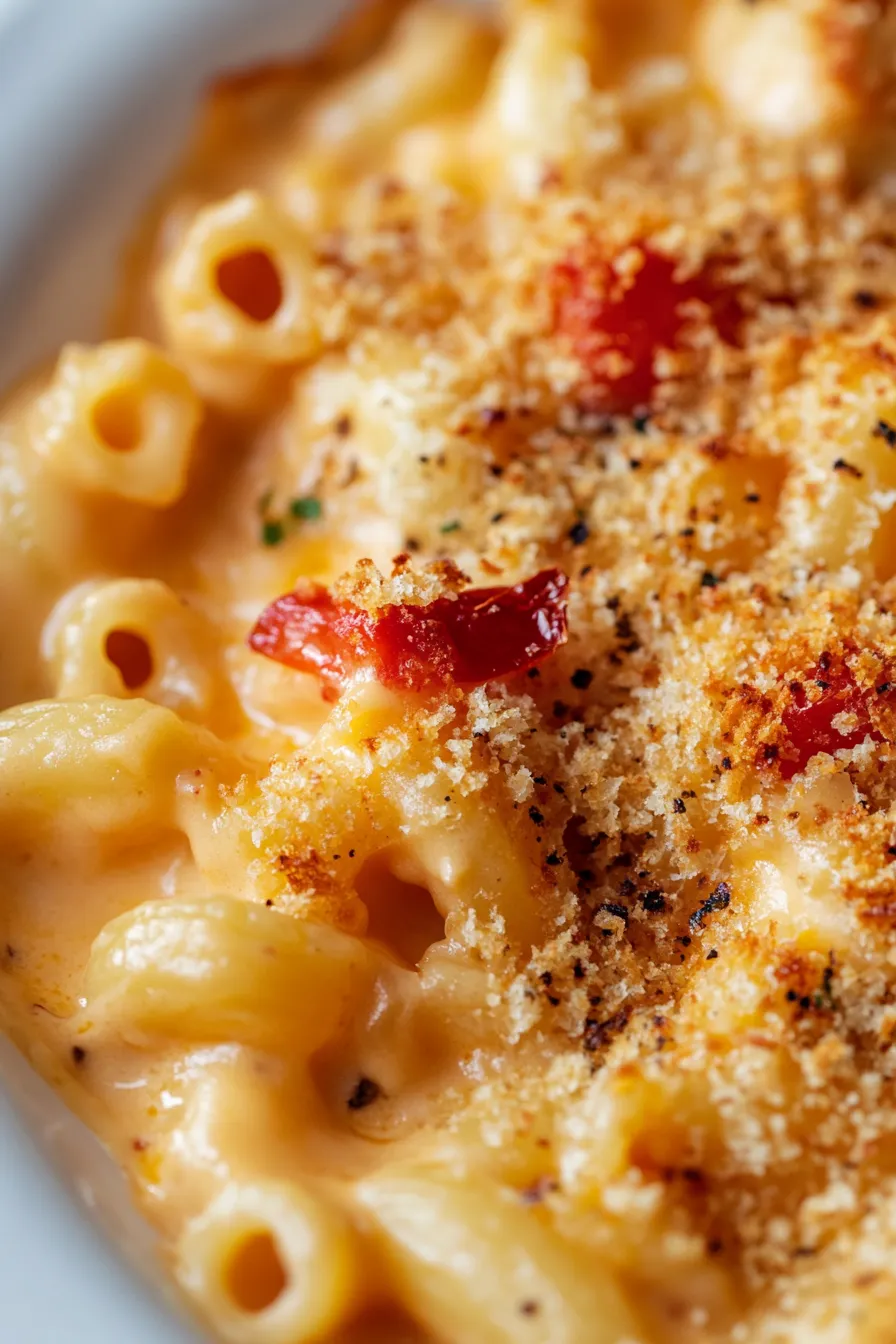
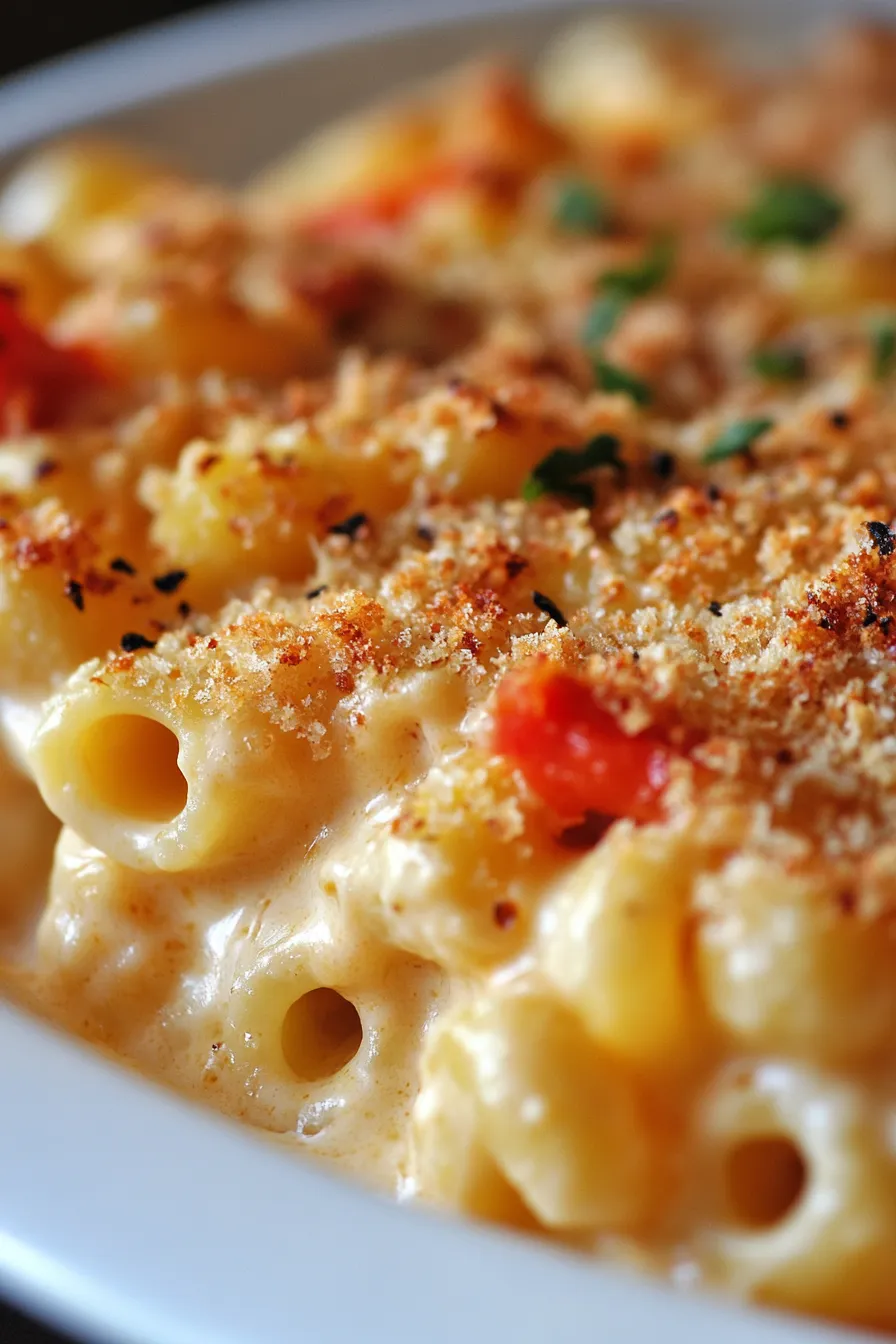
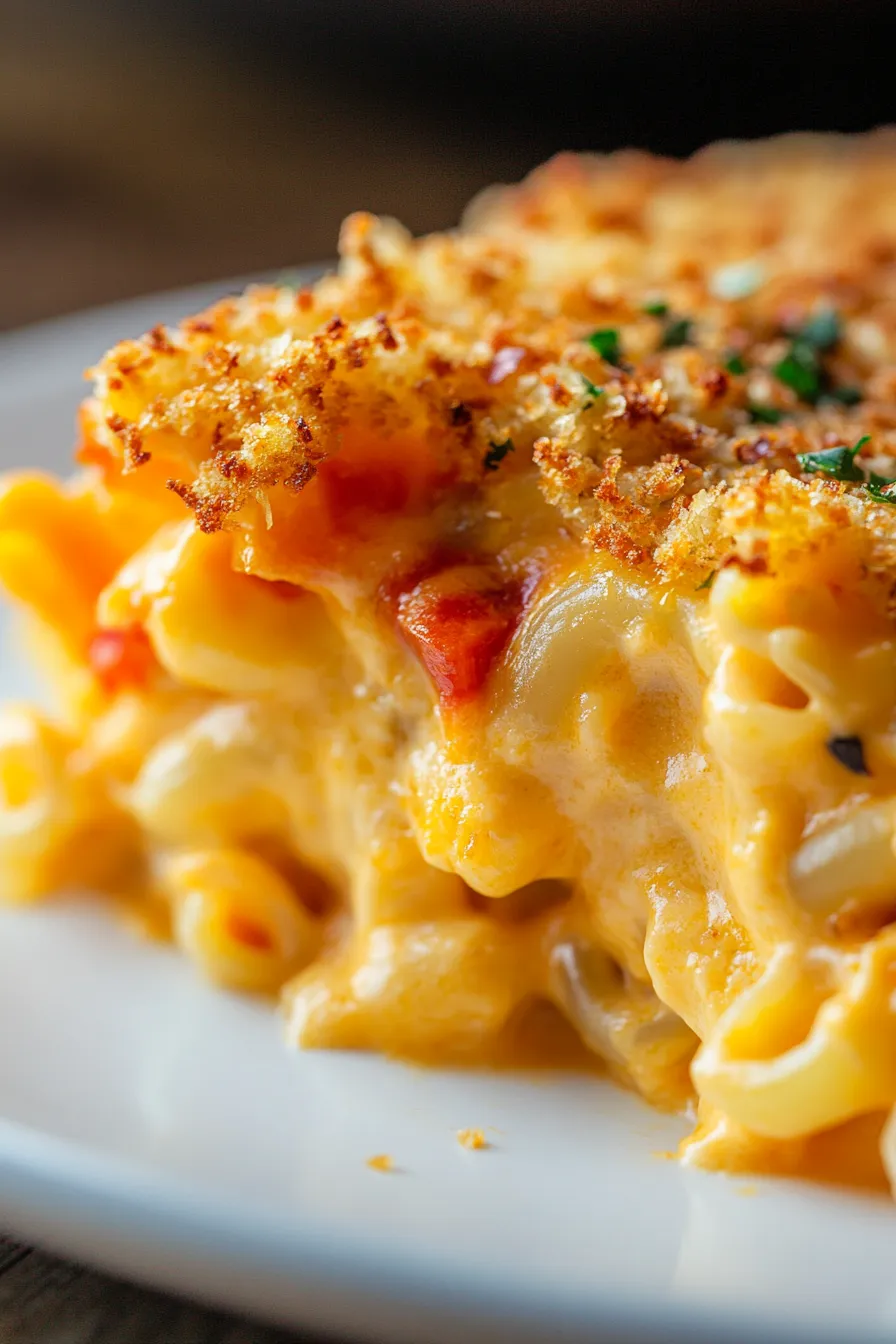
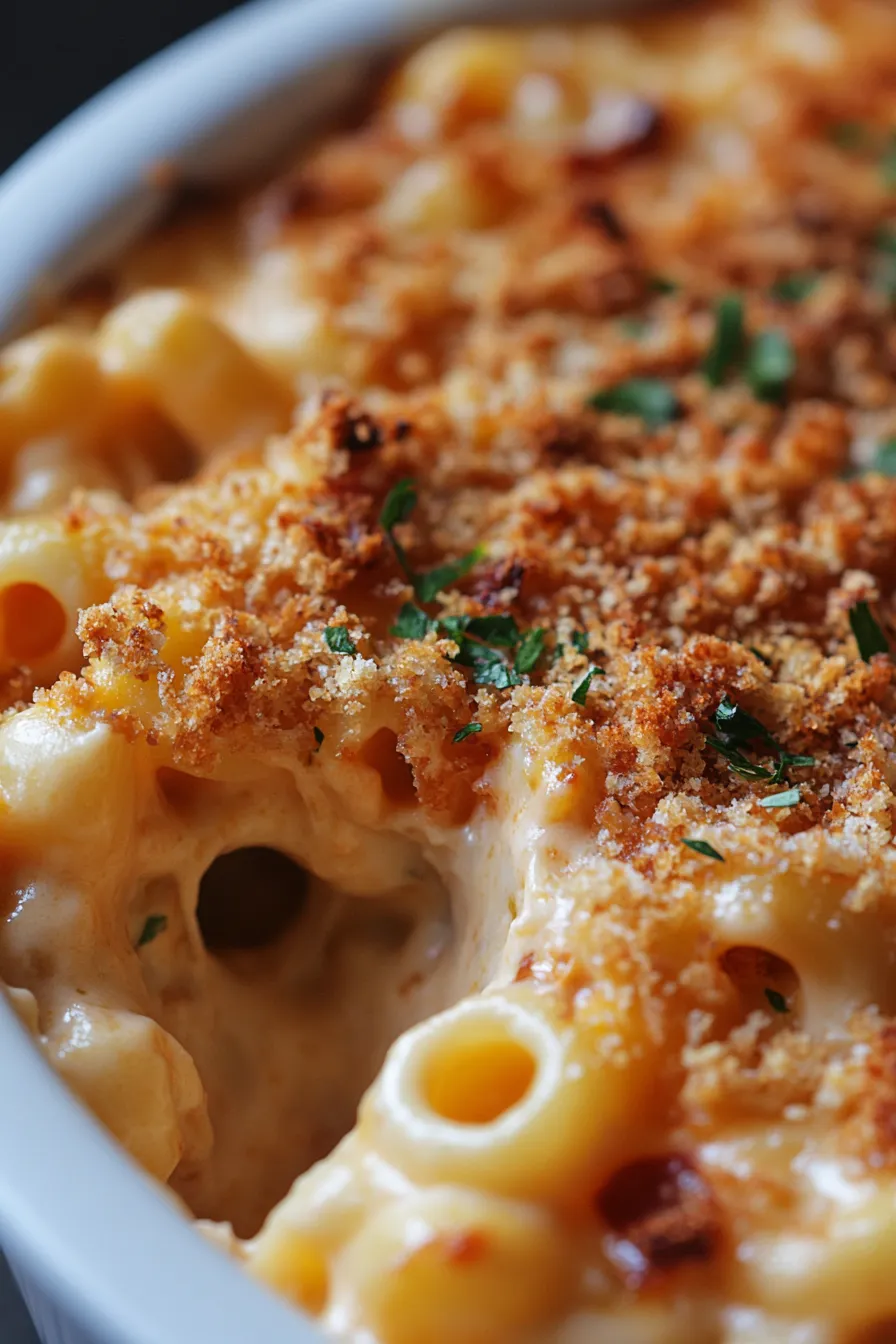
- Visually Appealing: The vibrant red flecks of pepper against the golden-yellow cheese sauce make for a truly beautiful dish. It looks as good as it tastes, adding a pop of color to your dinner table and making it an attractive centerpiece.
What You Need
You only need a few simple pantry staples for this recipe, alongside some fresh produce! The magic happens when these humble ingredients come together to create something truly spectacular. Check the full printable recipe card below for detailed measurements and a complete list of everything you’ll need.
Expert Tips
💡 Elevate your Mac and Cheese with these pro tips for the best results:
- Perfectly Roast Your Red Peppers: For the deepest flavor, char your red peppers until the skin is blackened and blistered, either under a broiler, over a gas flame, or on a grill. Once charred, immediately place them in a bowl and cover tightly with plastic wrap or a lid for 10-15 minutes. This steaming process makes the skin super easy to peel off. The smoky, sweet flavor imparted by proper roasting is crucial to the dish’s unique profile.
- Choose Your Cheese Wisely: A blend of cheeses offers the best flavor and texture. Sharp cheddar provides that classic mac and cheese tang, while a melting cheese like Gruyère, Fontina, or even Monterey Jack adds incredible creaminess and a beautiful stretch. Avoid pre-shredded cheeses if possible, as they often contain anti-caking agents that can make your sauce gritty. Grate your own for the smoothest, silkiest sauce.
- Master the Béchamel Sauce: The foundation of a good mac and cheese is a smooth béchamel. Start with equal parts butter and flour to make your roux, cooking it for a couple of minutes to remove the raw flour taste. Gradually whisk in warm milk, ensuring no lumps form. Cook until the sauce thickens and coats the back of a spoon. This technique is key to a luscious, non-clumpy cheese sauce.
- Don’t Overcook Your Pasta: Boil your macaroni or pasta shape of choice to just al dente, or even slightly undercooked, as it will continue to cook when baked in the oven. This prevents mushy pasta and ensures a satisfying chew in every bite. Rinse it briefly with cool water after draining to stop the cooking process if you’re not mixing it with the sauce immediately.
- Seasoning is Key: Don’t forget to season your béchamel and cheese sauce generously. Salt and freshly ground black pepper are essential, but a pinch of nutmeg is a secret weapon that enhances the cheesy flavor beautifully. A touch of paprika can also add warmth and a subtle smokiness. Taste and adjust as you go!
- Achieve that Golden Topping: For a truly irresistible crust, mix your breadcrumbs with a little melted butter and perhaps some extra grated cheese or a pinch of paprika before sprinkling over the top. This ensures a uniformly golden, crispy, and flavorful crust that adds a delightful texture contrast to the creamy interior.
- Let it Rest: After baking, let the mac and cheese rest for 5-10 minutes before serving. This allows the sauce to set slightly, preventing it from being too runny and ensuring it stays perfectly creamy and cohesive when scooped. It also helps prevent burned tongues!
Variations & Substitutions
This recipe is wonderfully versatile, allowing you to customize it to your taste or dietary needs:
- Make it Spicy: Add a pinch of red pepper flakes to the cheese sauce, or finely dice a jalapeño and sauté it with the peppers before adding to the mac and cheese for a fiery kick.
- Add Protein: Cooked and shredded chicken, crispy bacon bits, or even diced ham make fantastic additions. Stir them into the cheese mixture just before baking for a heartier meal.
- Gluten-Free Option: Easily swap regular macaroni for your favorite gluten-free pasta. Ensure your roux is made with a gluten-free all-purpose flour blend for a completely GF dish.
- Different Cheeses: Experiment with different cheese blends! Smoked gouda, provolone, or even a spicy pepper jack can add unique flavor profiles. Just ensure they are good melting cheeses.
- Extra Veggies: Sautéed mushrooms, spinach (drain well!), or caramelized onions can be folded into the mix along with the roasted red peppers for added nutrients and flavor complexity.
- Vegan Adaptation: While more involved, this dish can be adapted. Use a plant-based béchamel with nutritional yeast and vegan cheeses. Ensure your roasted red peppers are cooked without dairy.
Storage & Freezing
Proper storage ensures you can enjoy this delicious mac and cheese for days to come:
- Refrigeration: Store any leftovers in an airtight container in the refrigerator for up to 3-4 days. When reheating, you might want to add a splash of milk or cream to help loosen the sauce and restore its creaminess. Reheat gently in the microwave or oven until warmed through.
- Freezing: You can absolutely freeze this mac and cheese! Allow it to cool completely, then transfer it to a freezer-safe, airtight container or a heavy-duty freezer bag. It will keep well for up to 2-3 months. Thaw overnight in the refrigerator before reheating. For best results, reheat slowly in the oven, covered with foil, adding a little milk if it seems dry.
FAQ
Can I make this Mac and Cheese with Roasted Red Peppers ahead of time?
Yes, you can! You can assemble the entire dish, up to the point of baking, and store it covered in the refrigerator for up to 24 hours. When ready to bake, let it sit at room temperature for about 30 minutes before baking as directed, adding a few extra minutes to the baking time if it’s still very cold.
My cheese sauce is lumpy, what went wrong?
Lumpy sauce usually happens if the milk was added too quickly or wasn’t warm enough, causing the flour in the roux to seize up. To fix it, you can try whisking vigorously over low heat. If that doesn’t work, pass the sauce through a fine-mesh sieve before adding the cheese. Always add milk slowly and whisk continuously for a silky-smooth béchamel.
How do I prevent the mac and cheese from drying out when baking?
To keep your mac and cheese wonderfully creamy, ensure your cheese sauce is slightly thinner than you think it needs to be before baking, as it will thicken in the oven. You can also cover the dish with foil for the first part of the baking time, uncovering only for the last 10-15 minutes to allow the topping to crisp up and brown.
Do I have to use freshly roasted red peppers, or can I use jarred?
While freshly roasted red peppers offer the best flavor profile, providing a deep smoky sweetness, you can certainly use good quality jarred roasted red peppers in a pinch. Just make sure to drain them thoroughly and pat them dry before dicing and adding to the dish. The fresh ones truly elevate this recipe, though!
There you have it – a truly magnificent Mac and Cheese with Roasted Red Peppers that’s sure to become a cherished recipe in your home. Whether you’re making it for a special occasion or just a cozy night in, it promises warmth, comfort, and incredible flavor. Don’t forget to snap a picture and tag me on social media when you try it! Happy cooking!
Pin this recipe for later so you can always find your way back to this cheesy, peppery goodness!

Creamy Mac and Cheese with Roasted Red Peppers
Ingredients
- 1 lb elbow macaroni
- 1/2 cup unsalted butter
- 1/2 cup all-purpose flour
- 6 cups whole milk, warmed
- 1 tsp salt
- 1/2 tsp black pepper
- 1/4 tsp nutmeg
- 4 cups shredded sharp cheddar cheese
- 2 cups shredded Gruyu00e8re or Fontina cheese
- 2 large red bell peppers, roasted, peeled, seeded, and diced
- 1 cup panko breadcrumbs
- 2 tbsp melted butter (for topping)
- Optional: Pinch of paprika for topping
Instructions
- Step 1 Preheat oven to 375°F (190°C). Grease a 9x13 inch baking dish.
- Step 2 Cook macaroni according to package directions until al dente. Drain and set aside.
- Step 3 In a large saucepan or Dutch oven, melt 1/2 cup butter over medium heat. Whisk in flour and cook for 2 minutes, stirring constantly, to create a roux.
- Step 4 Gradually whisk in warm milk until smooth. Bring to a gentle simmer, whisking occasionally, until the sauce thickens and coats the back of a spoon, about 5-7 minutes.
- Step 5 Remove from heat. Stir in salt, pepper, and nutmeg. Add shredded cheeses, a handful at a time, stirring until completely melted and smooth. The sauce should be creamy.
- Step 6 Gently fold in the cooked macaroni and diced roasted red peppers into the cheese sauce until everything is well combined.
- Step 7 Pour the mixture into the prepared baking dish. In a small bowl, combine panko breadcrumbs with 2 tbsp melted butter and paprika (if using). Sprinkle evenly over the mac and cheese.
- Step 8 Bake for 25-30 minutes, or until bubbly and the topping is golden brown and crisp. For extra browning, you can broil for the last 2-3 minutes, watching carefully to prevent burning.
- Step 9 Let rest for 5-10 minutes before serving. Enjoy!