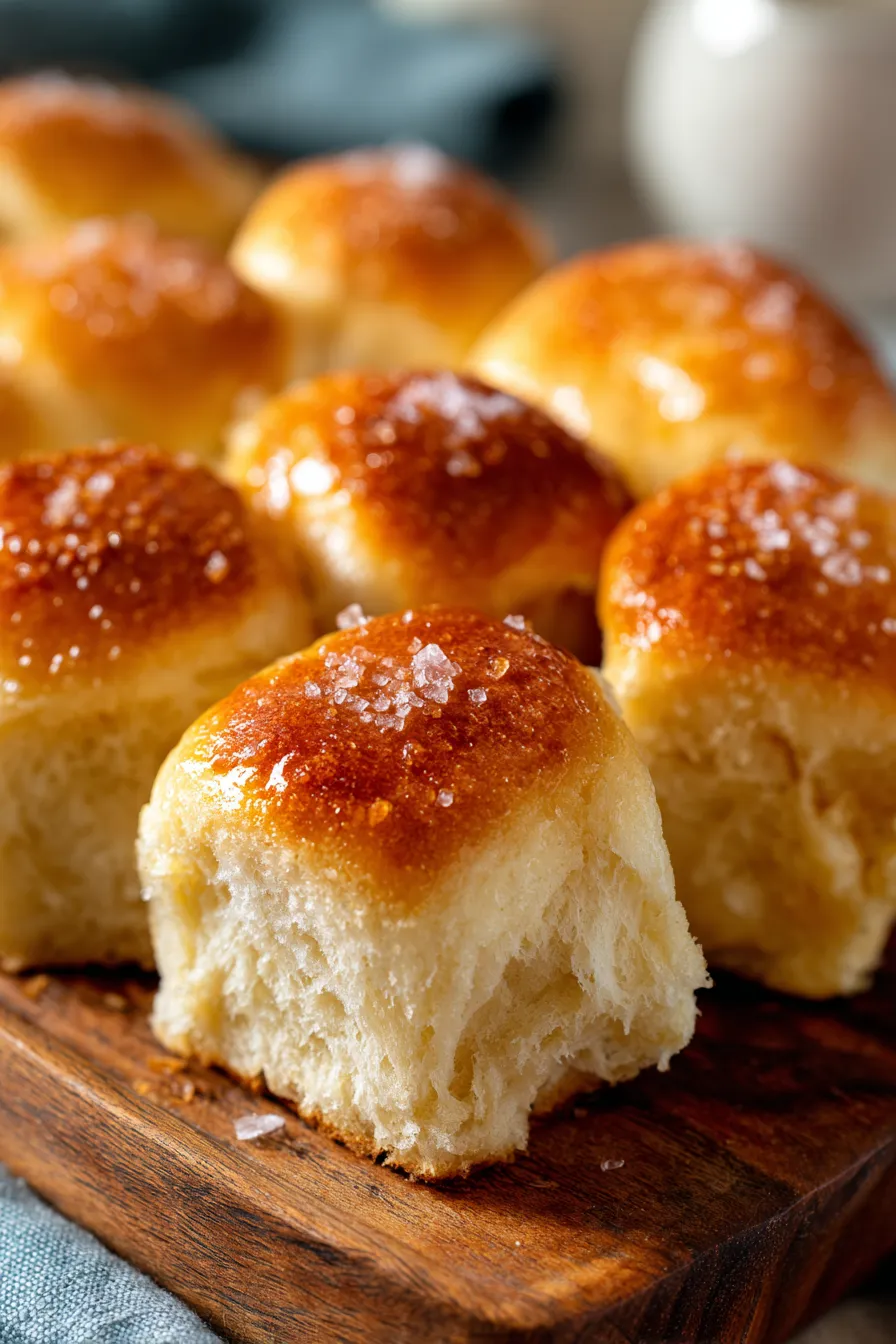
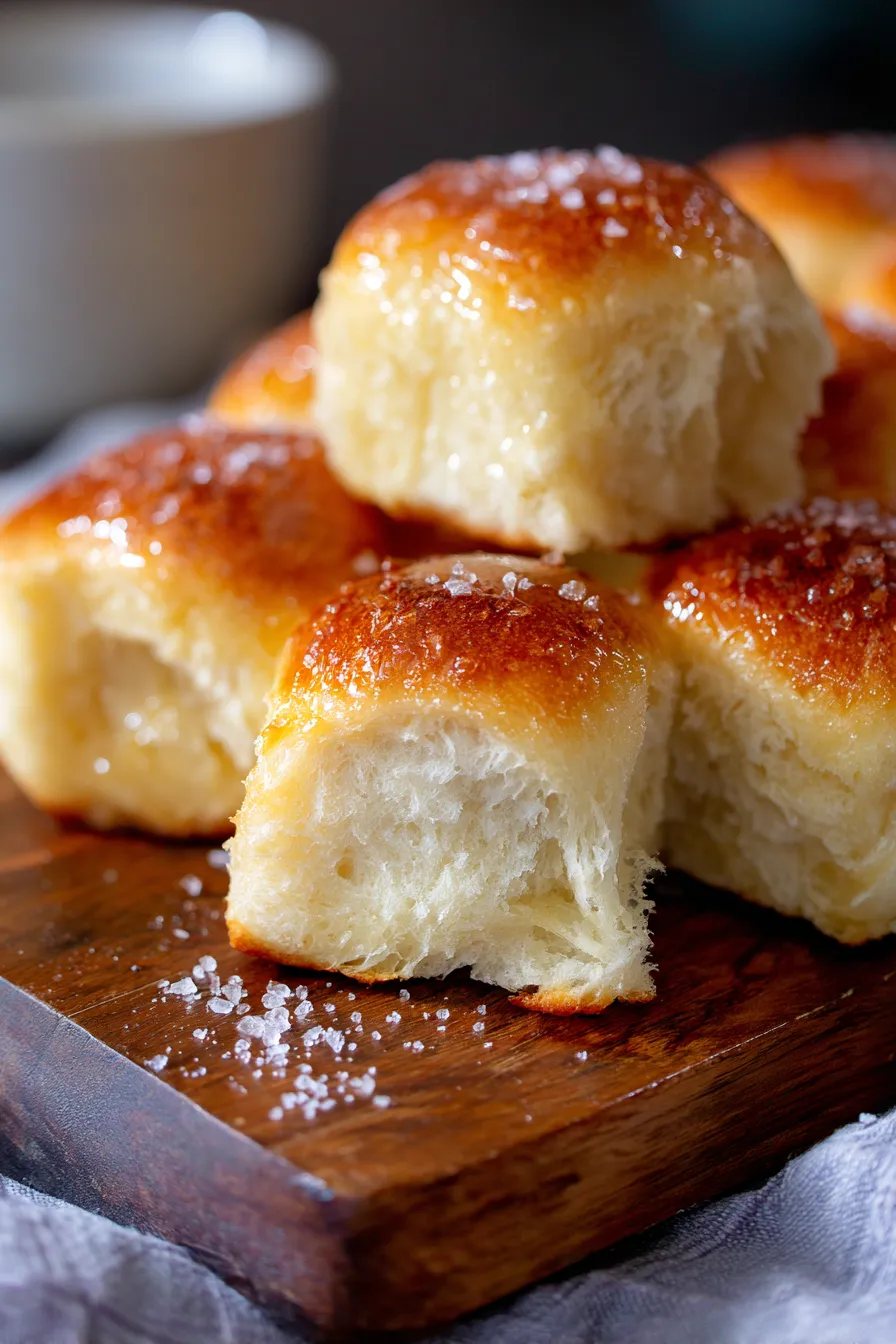
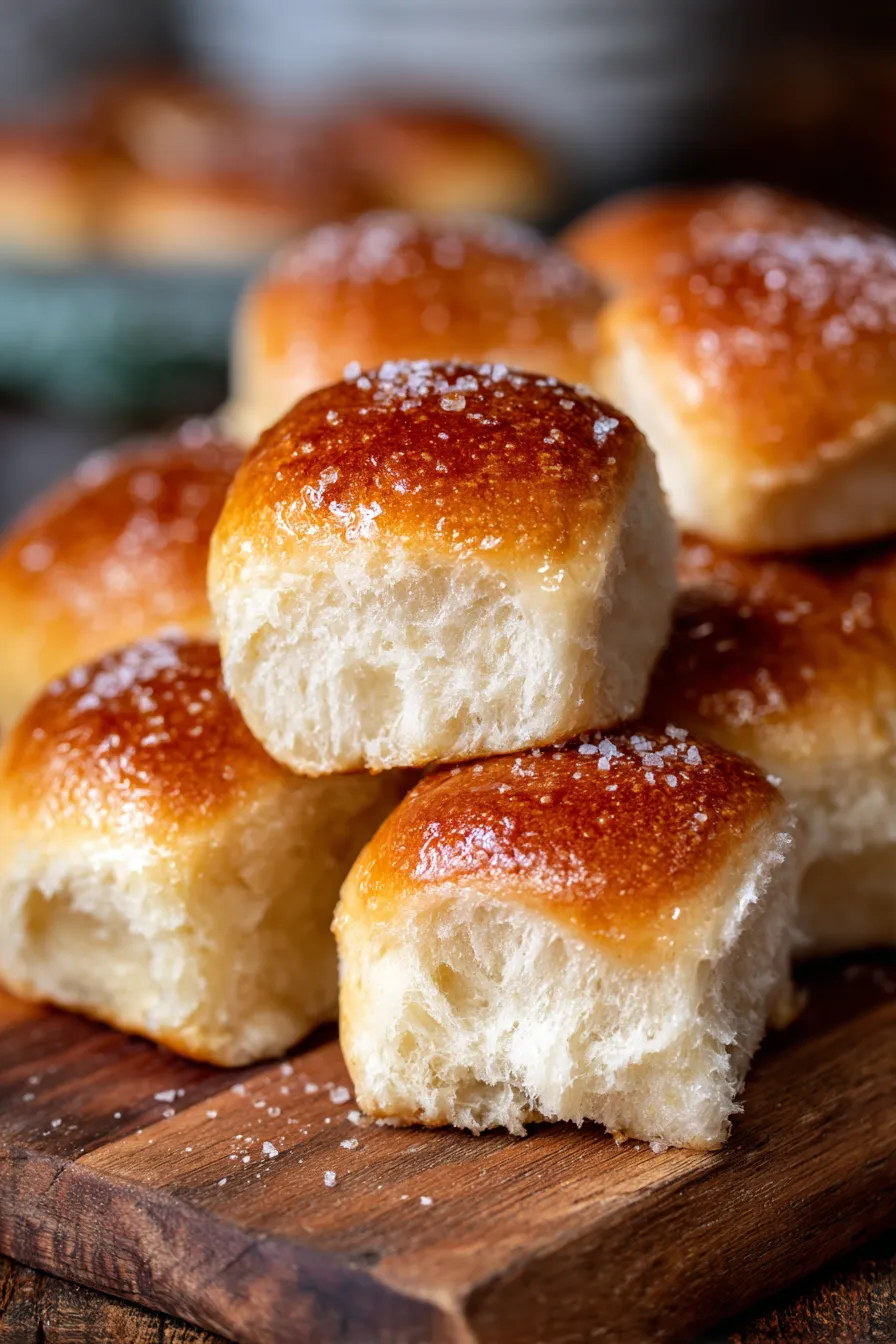
The Best Ever Easy 30-Minute Dinner Rolls (Soft & Homemade!) Oh, the magic of freshly baked bread! There’s simply nothing like it. I remember those chilly Sunday afternoons growing up, the kind where the rain outside begged for warmth and comfort indoors. My mom, a wizard in the kitchen, would often whip up a batch…
The Best Ever Easy 30-Minute Dinner Rolls (Soft & Homemade!)
Oh, the magic of freshly baked bread! There’s simply nothing like it. I remember those chilly Sunday afternoons growing up, the kind where the rain outside begged for warmth and comfort indoors. My mom, a wizard in the kitchen, would often whip up a batch of her famously fluffy dinner rolls. The aroma of yeast and warm butter would fill our home, drawing everyone to the kitchen long before dinner was even ready. It’s a memory steeped in comfort, love, and the simple joy of sharing.
That feeling, that incredible aroma and taste, is exactly what inspired me to perfect these Easy 30-Minute Dinner Rolls (Soft & Homemade). I wanted to capture that homemade essence without spending hours kneading and waiting. This recipe has become my go-to for quick comfort food, busy weeknights, and last-minute potlucks. It’s truly a tried-and-tested family favorite that brings joy every time.
I’ve made these rolls for countless gatherings, surprising everyone with how quickly they come together. They’re perfect alongside any meal, from a hearty stew to a simple salad, making them the ultimate easy dinner companion. Get ready to impress yourself and your loved ones!
❤️ Why You’ll Love This Recipe
- Speedy Satisfaction: Forget long proofing times! These rolls are designed to go from mixing bowl to your dinner table in just 30 minutes, thanks to a clever technique that maximizes yeast activity. Perfect for those last-minute cravings or unexpected dinner guests.
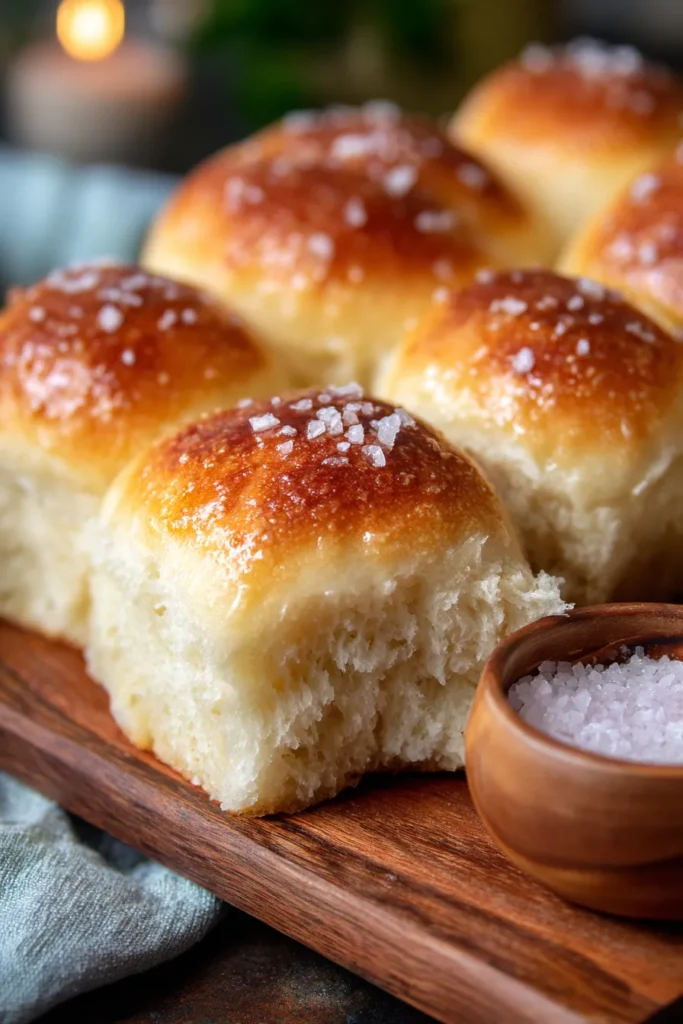
- Unbelievably Soft & Fluffy: Each roll boasts an airy, tender crumb that practically melts in your mouth. We achieve this delightful texture through precise ingredient ratios and a gentle mixing process. They’re soft enough for even the youngest eaters!
- Homemade Goodness, Effortlessly: There’s no substitute for the taste and aroma of fresh, homemade bread. This recipe proves that you don’t need to be an expert baker to achieve professional-level results. It’s surprisingly simple, making it accessible for beginners and seasoned bakers alike.
- Perfect Pairing for Any Meal: Whether you’re serving a rich beef stew, a vibrant salad, a creamy soup, or just need something to soak up gravy, these dinner rolls are the ideal accompaniment. They’re versatile and elevate any meal.
- Pantry Staple Ingredients: You likely already have everything you need in your kitchen! Basic flour, yeast, sugar, salt, milk, and butter are all it takes to create this magic. No special trips to the store required.
- Customizable & Fun: While perfect plain, these rolls are a fantastic canvas for your culinary creativity. Add a sprinkle of garlic powder and herbs, a touch of parmesan, or a honey-butter glaze after baking. The possibilities are endless!
- Freezer-Friendly: Make a double batch and freeze some for later! They reheat beautifully, giving you fresh rolls whenever the craving strikes without the extra work. This makes meal prep a breeze and ensures you always have a delicious side ready.
What You Need
You only need a few simple pantry staples for this recipe! We’re talking basic ingredients that come together to create something truly extraordinary. Check the full printable recipe card below for detailed measurements of flour, yeast, milk, and more.
💡 Expert Tips for Perfect Rolls Every Time
- Activate Your Yeast Correctly: The key to quick-rising rolls is active yeast! Ensure your milk is warmed to the perfect temperature – around 105-115°F (40-46°C). Too cold, and the yeast won’t activate; too hot, and you’ll kill it. Look for a foamy layer on top after a few minutes; if it doesn’t foam, your yeast might be old or the temperature was off, and it’s best to start again.
- Measure Flour Accurately: Flour measurement can make a huge difference in the texture of your rolls. For the most accurate results, weigh your flour using a kitchen scale. If you don’t have one, use the “spoon and level” method: spoon flour into your measuring cup until it’s overflowing, then level it off with the back of a knife. Never scoop directly from the bag, as this compacts the flour and adds too much.
- Don’t Overmix the Dough: While a little kneading is good for gluten development, overmixing can lead to tough rolls. Mix just until the ingredients are combined and a soft, slightly sticky dough forms. A minute or two of light hand-kneading after mixing is usually sufficient.
- Create a Warm Rising Environment: For a quick rise, a warm spot is crucial. If your kitchen is cool, you can preheat your oven to its lowest setting (around 170°F/75°C) for a few minutes, then turn it off and place the rolls inside (covered, of course!). Alternatively, a microwave with a cup of hot water placed inside can create a perfect humid, warm environment.
- Proper Shaping is Key: Aim for uniformly sized rolls for even baking. Gently cup the dough in your hand and roll it against a clean, unfloured surface to create a smooth, taut ball. This technique helps build surface tension, resulting in a beautifully round roll with a soft interior.
- Use a Hot Oven: A high initial oven temperature helps these rolls puff up quickly and develop a beautiful golden crust. Make sure your oven is fully preheated before placing the rolls inside. An oven thermometer can help verify accuracy.
- Brush with Butter (Optional, but Recommended!): Brushing the hot rolls with melted butter immediately after they come out of the oven adds an incredible shine, a delicate flavor, and an extra layer of tenderness. It’s that final touch that makes them truly irresistible.
- Don’t Peek Too Soon: Resist the urge to open the oven door during the first 10-12 minutes of baking. This can cause the rolls to deflate and affect their rise. Let them bake undisturbed to ensure maximum fluffiness.
Variations & Substitutions
These dinner rolls are wonderfully versatile!
- Herby Garlic Rolls: Add 1-2 teaspoons of dried Italian herbs and a half teaspoon of garlic powder to the dry ingredients. After baking, brush with garlic butter.
- Whole Wheat Twist: For a slightly heartier roll, substitute up to half of the all-purpose flour with whole wheat flour. Note that this might require a tiny bit more liquid and could result in a denser roll, slightly increasing the proofing time.
- Sweet Rolls: Increase the sugar by 1-2 tablespoons and add a pinch of cinnamon for a lightly sweetened version perfect for breakfast or brunch.
- Dairy-Free/Vegan: Use a plant-based milk (like almond or soy milk) and a dairy-free butter substitute (like vegan butter sticks or coconut oil) in equal amounts. Ensure your yeast is vegan-friendly (most are, but some brands may use animal products in processing).
- Gluten-Free: While a 30-minute gluten-free yeast roll is challenging due to the lack of gluten structure, you can experiment with a 1:1 gluten-free baking flour blend. You might need to adjust liquid amounts and expect a slightly different texture and rise time. Look for blends with xanthan gum.
Storage & Freezing
These rolls are best enjoyed fresh, warm from the oven! However, if you have leftovers (a rare occurrence!), here’s how to store them:
- Room Temperature: Store cooled rolls in an airtight container or a resealable plastic bag at room temperature for up to 2-3 days. To refresh, simply warm them briefly in the microwave for 10-15 seconds or in a preheated oven at 300°F (150°C) for 5-7 minutes.
- Freezing Baked Rolls: Once completely cooled, place rolls in a single layer on a baking sheet and freeze until solid (about 1-2 hours). Transfer the frozen rolls to a freezer-safe bag or airtight container, removing as much air as possible. They will keep well for up to 2-3 months.
- Reheating from Frozen: To reheat, thaw rolls overnight in the refrigerator or on the counter for a few hours. Then warm in a 350°F (175°C) oven for 10-15 minutes, or until heated through and soft. You can also brush with a little melted butter before reheating for extra deliciousness.
Frequently Asked Questions
Q: Why are my rolls tough or dense?
A: This is often due to too much flour or overmixing. Ensure you’re measuring your flour accurately (using a scale or spoon and level method). Also, knead the dough just until it comes together and is smooth, but not overworked. Overdeveloped gluten can lead to a chewy, dense texture instead of soft and fluffy.
Q: Can I make the dough ahead of time?
A: While this recipe is designed for a quick 30-minute turnaround, you can prepare the dough up to a point. After the first mix, you can cover and refrigerate the dough for up to 12-24 hours. When ready to bake, let it come to room temperature for about 30-60 minutes, then shape and proceed with the recipe, allowing a bit more time for the final proof if needed.
Q: What kind of yeast should I use?
A: This recipe works best with active dry yeast or instant yeast. If using instant yeast, you can mix it directly with the dry ingredients and skip the activation step with the milk and sugar, though activating it first ensures it’s alive and well. For active dry yeast, always proof it in the warm milk and sugar first.
Q: How do I know when the rolls are done baking?
A: The rolls are done when they are deeply golden brown on top and sound hollow when tapped on the bottom. An internal temperature of about 200-210°F (93-99°C) is ideal for perfectly baked bread. Keep an eye on them, as oven temperatures can vary.
Conclusion
There you have it – a recipe for heavenly, homemade dinner rolls that come together in a flash. No more store-bought rolls when you can have this soft, buttery perfection ready in just 30 minutes! I truly hope these Easy 30-Minute Dinner Rolls (Soft & Homemade) bring as much warmth and joy to your table as they do to mine. Don’t forget to give them a try and let me know what you think in the comments below. Happy baking, and happy eating! Pin this recipe for later so you always have deliciousness at your fingertips.
Easy 30-Minute Dinner Rolls: Soft, Fluffy & Homemade!
Ingredients
- 2 ¼ cups all-purpose flour, plus more for dusting
- 2 ¼ teaspoons active dry yeast (1 packet)
- 2 tablespoons granulated sugar
- 1 teaspoon salt
- 1 cup warm milk (105-115°F / 40-46°C)
- ¼ cup unsalted butter, melted, plus 2 tablespoons for brushing
Instructions
- Step 1 1. In a large bowl, combine warm milk, sugar, and yeast. Let sit for 5-7 minutes until foamy.
- Step 2 2. Stir in 1/4 cup melted butter, salt, and 2 cups of flour. Gradually add remaining flour until a soft, slightly sticky dough forms. Knead lightly for 1 minute.
- Step 3 3. Divide dough into 12 equal pieces. Shape each into a smooth ball and arrange on a greased baking sheet (or 9x13 inch pan).
- Step 4 4. Cover with a clean kitchen towel and let rise in a warm place for 10-15 minutes (or in a warm oven for a quicker rise).
- Step 5 5. Preheat oven to 400°F (200°C).
- Step 6 6. Bake rolls for 10-15 minutes, or until golden brown.
- Step 7 7. Immediately brush hot rolls with remaining 2 tablespoons melted butter. Serve warm.