The Ultimate Pin on Выпечка: Your New Favorite Fluffy Sweet Treat There’s a special kind of comfort that only comes from the scent of something baking in your own kitchen. For me, it instantly transports me back to my grandmother’s house on a rainy Sunday afternoon. She always had something warm and sweet pulled from…
The Ultimate Pin on Выпечка: Your New Favorite Fluffy Sweet Treat
There’s a special kind of comfort that only comes from the scent of something baking in your own kitchen. For me, it instantly transports me back to my grandmother’s house on a rainy Sunday afternoon. She always had something warm and sweet pulled from the oven, a simple gesture that made every moment feel like a cherished memory.
This “Pin on Выпечка” recipe, my take on a wonderfully fluffy and lightly sweet baked good, captures that very essence. It’s an easy baking project that promises pure bliss without any fuss. This tested, family-favorite recipe is the ultimate comfort food, guaranteed to bring a smile to everyone’s face, just like my grandmother’s treats always did.
It’s time to create those heartwarming moments in your own home. Get ready for an irresistible, homemade treat that’s perfect for breakfast, brunch, or a cozy evening snack.
❤️ Why You’ll Love This Recipe
- Incredibly Easy to Make: Forget complicated techniques! This recipe is designed for bakers of all skill levels, from beginners to seasoned pros. It comes together quickly, making it ideal for those spontaneous cravings or when you need a delicious treat without spending hours in the kitchen. The straightforward steps and minimal active time ensure a stress-free baking experience every time.
- Pure Comfort Food: There’s something undeniably comforting about a warm, freshly baked good. The fluffy texture and subtle sweetness of these buns make them the ultimate pick-me-up. Whether you’re enjoying them with a cup of coffee in the morning or as an evening indulgence, they provide a cozy warmth that soothes the soul.
- Versatile for Any Occasion: These sweet treats are wonderfully adaptable. Serve them as a delightful breakfast pastry, a light and satisfying snack, or even a simple dessert after dinner. They’re perfect for brunch gatherings, afternoon tea, or simply enjoying a quiet moment to yourself. Their universal appeal makes them suitable for any time of day or special event.
- Aroma That Fills Your Home: One of the best parts of baking is the incredible aroma that permeates every corner of your house. The moment these buns start baking, your kitchen will be filled with a sweet, buttery fragrance that is absolutely intoxicating. It’s an instant mood booster and a welcoming scent for anyone who walks through your door.
- Customizable to Your Taste: While delicious on their own, these buns are also a fantastic canvas for customization. You can easily add your favorite spices, dried fruits, or citrus zests to make them uniquely yours. From a hint of cinnamon to a handful of raisins, the possibilities are endless for tailoring this recipe to your family’s preferences.
- Crowd-Pleasing Perfection: Expect rave reviews! These fluffy, golden buns are universally loved. They disappear quickly at potlucks, family gatherings, and holiday brunches. Their delightful taste and inviting appearance make them a guaranteed hit, leaving everyone asking for the recipe.
- Freshly Baked Goodness: Nothing beats the taste and texture of something baked fresh right in your own oven. The difference between store-bought and homemade is immense, and this recipe truly highlights the superior quality and unparalleled flavor that comes from baking from scratch. You’ll taste the love in every bite!
What You Need
You only need a few simple pantry staples for this incredibly satisfying “Pin on Выпечка” recipe! Most of these ingredients are likely already in your kitchen, making it super convenient to whip up a batch whenever the craving strikes. Check the full printable recipe card below for detailed measurements and a complete list.

💡 Expert Tips
- Keep Your Butter Cold: This is perhaps the most crucial tip for achieving that perfect, flaky, and tender texture. Cold butter creates pockets of steam in the oven, which leads to a light and airy interior. Make sure your butter is well-chilled and cut into small cubes before incorporating it into the dry ingredients. If your kitchen is warm, you can even chill your flour mixture for 10-15 minutes before adding the butter.
- Don’t Overmix the Dough: Overmixing develops gluten, which can make your baked goods tough and chewy instead of light and fluffy. Mix the wet and dry ingredients only until they are just combined and no streaks of dry flour remain. A few small lumps are perfectly fine and even desirable for a tender crumb. Stop mixing as soon as everything comes together.
- Gentle Handling is Key: Once your dough is mixed, handle it as little as possible. When you turn it out onto your floured surface and pat it into a round, use a light touch. Overworking the dough at this stage can also lead to toughness. Think of it as coaxing the dough into shape rather than aggressively kneading it.
- Use Fresh Baking Powder: Baking powder loses its potency over time, which can result in flat, dense baked goods. To test if your baking powder is still active, mix a teaspoon with about a quarter cup of hot water. If it fizzes vigorously, it’s good to go! If not, it’s time for a fresh container. This small step makes a big difference in rise.
- Buttermilk for Tenderness: Buttermilk reacts with baking powder to create a softer, more tender crumb and a slight tang that enhances the flavor. If you don’t have buttermilk on hand, you can easily make a substitute: simply add 1 tablespoon of lemon juice or white vinegar to a measuring cup, then fill the rest with regular milk until it reaches ¾ cup. Let it sit for 5-10 minutes until it slightly curdles before using.
- Even Thickness for Even Baking: When patting your dough into a round, try to ensure it’s of uniform ¾-inch thickness. This ensures that all your pieces bake evenly and are cooked through at the same time. If some parts are thicker than others, you might end up with some underbaked centers or overbaked edges.
- Brush with Milk for a Golden Top: A light brush of milk (or even cream for extra richness) on top of your shaped dough before baking isn’t just for aesthetics. It helps achieve that beautiful, golden-brown crust and a slightly richer flavor. It also prevents the tops from drying out too quickly during baking.
- Don’t Peek Too Early: Resist the urge to open the oven door frequently, especially during the first 15 minutes of baking. Each time you open the oven, the temperature drops, which can disrupt the rising process and lead to a less fluffy result. Trust your oven and your timer!
Variations & Substitutions
This “Pin on Выпечка” recipe is wonderfully versatile, allowing you to easily adapt it to your preferences or dietary needs. Get creative and make it truly your own!
- Flavor Boosters: For an extra layer of flavor, try adding 1 teaspoon of ground cinnamon or a pinch of nutmeg to the dry ingredients. You can also incorporate the zest of one lemon or orange for a bright, citrusy note. A teaspoon of almond extract instead of vanilla can also provide a delicious twist.
- Sweet Add-ins: Fold in ½ cup of your favorite sweet additions just before you combine the wet and dry ingredients. Think plump raisins, dried cranberries, chopped nuts (walnuts, pecans, almonds), or even mini chocolate chips for a decadent touch.
- Gluten-Free Option: If you’re looking for a gluten-free version, substitute the all-purpose flour with a 1:1 gluten-free baking flour blend that contains xanthan gum. The texture might be slightly different, but it will still be delicious!
- Dairy-Free Alternative: To make these dairy-free, simply swap the buttermilk for your favorite non-dairy milk (like almond or soy milk) mixed with 1 tablespoon of lemon juice or apple cider vinegar. For the butter, use a good quality dairy-free butter substitute.
- Egg-Free Option: For an egg-free version, you can try using a ‘flax egg’ (1 tablespoon ground flaxseed meal mixed with 3 tablespoons water, let sit for 5 minutes) as a substitute for the large egg. The texture may be slightly denser, but it will still work.
- Sugar Reduction: If you prefer a less sweet treat, you can reduce the granulated sugar by ¼ cup without significantly impacting the texture. For a sugar-free option, use a granulated sugar substitute that is suitable for baking.
Storage & Freezing
These fluffy sweet buns are best enjoyed fresh, warm from the oven. However, if you have leftovers (which is rare!), they can be stored to maintain their deliciousness.
- Room Temperature: Store cooled buns in an airtight container at room temperature for up to 2-3 days. To refresh, simply warm them gently in the microwave for 10-15 seconds or in a toaster oven.
- Freezing: For longer storage, you can freeze the baked and cooled buns. Wrap each bun individually in plastic wrap, then place them in a freezer-safe bag or container for up to 2-3 months. Thaw at room temperature and warm before serving for that freshly baked taste.
FAQ
Q: Can I prepare the dough ahead of time?
A: Yes, you can! You can mix the dry ingredients and cut in the butter the night before and store it in the refrigerator. In the morning, simply add the wet ingredients, mix, and bake. You can also mix the entire dough, shape the buns, and then refrigerate them on a parchment-lined baking sheet for up to 12 hours. Just take them out of the fridge about 30 minutes before baking to let them warm up slightly, then brush with milk and bake as directed.
Q: What kind of flour is best for these sweet buns?
A: All-purpose flour works perfectly for this recipe, providing a good balance of structure and tenderness. If you want a slightly softer texture, you could try using a pastry flour, but it’s generally not necessary. Avoid using bread flour, as its higher protein content would result in a chewier bun, which isn’t the desired fluffy texture here.
Q: How do I know when the buns are fully cooked?
A: The buns are fully cooked when they are beautifully golden brown on top and a toothpick inserted into the center comes out clean. You can also check their internal temperature with an instant-read thermometer; they should register around 200-205°F (93-96°C). If they’re browning too quickly, you can loosely tent them with foil for the last few minutes of baking.
Q: My buns didn’t rise much, what went wrong?
A: There are a few common culprits. Firstly, ensure your baking powder is fresh and active. Secondly, avoid overmixing the dough, as this can inhibit rise. Thirdly, make sure your buttermilk (or milk substitute) is at room temperature before mixing, as very cold liquid can hinder the chemical reaction. Lastly, always ensure your oven is fully preheated to the correct temperature, as consistent heat is crucial for proper rising.
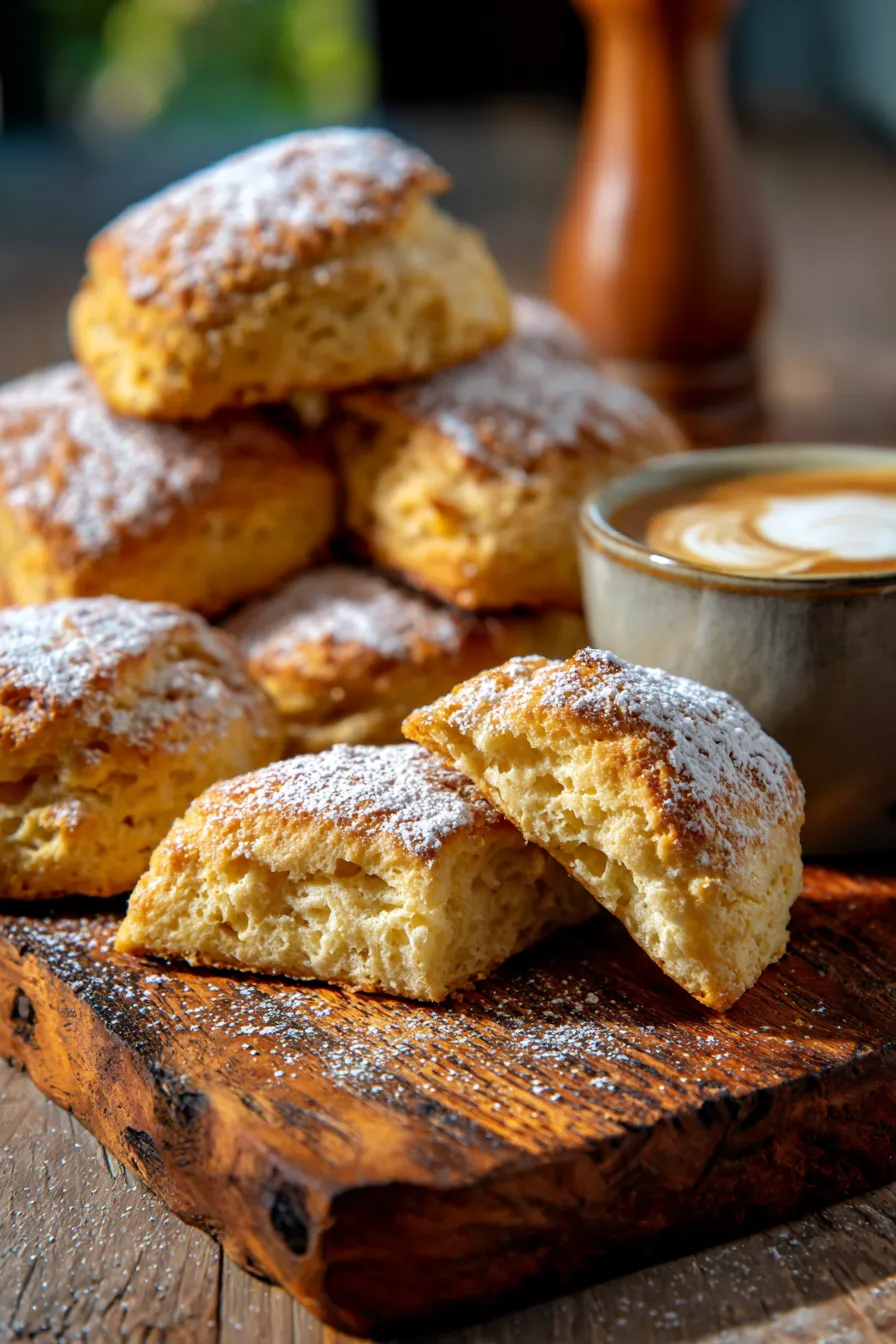
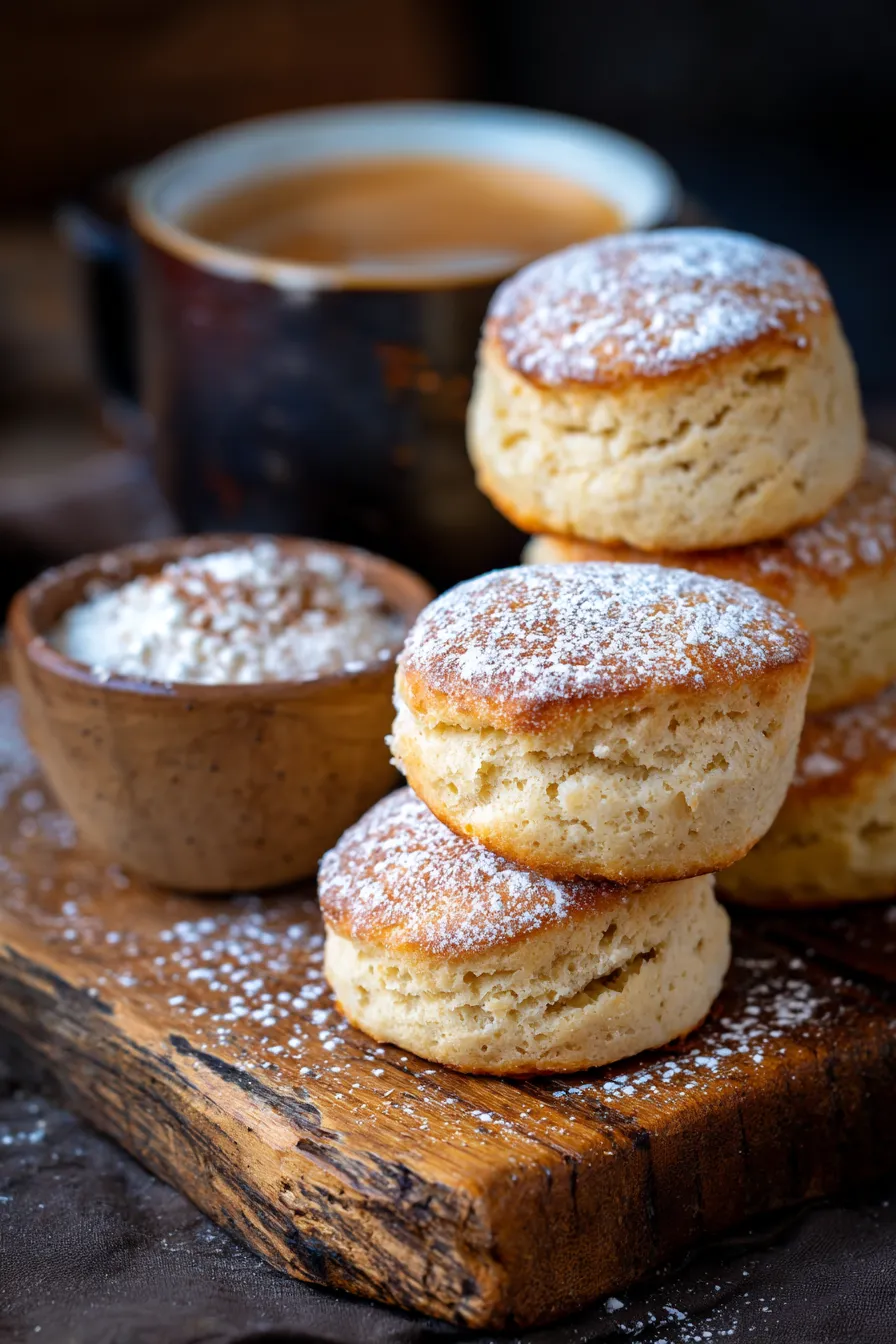
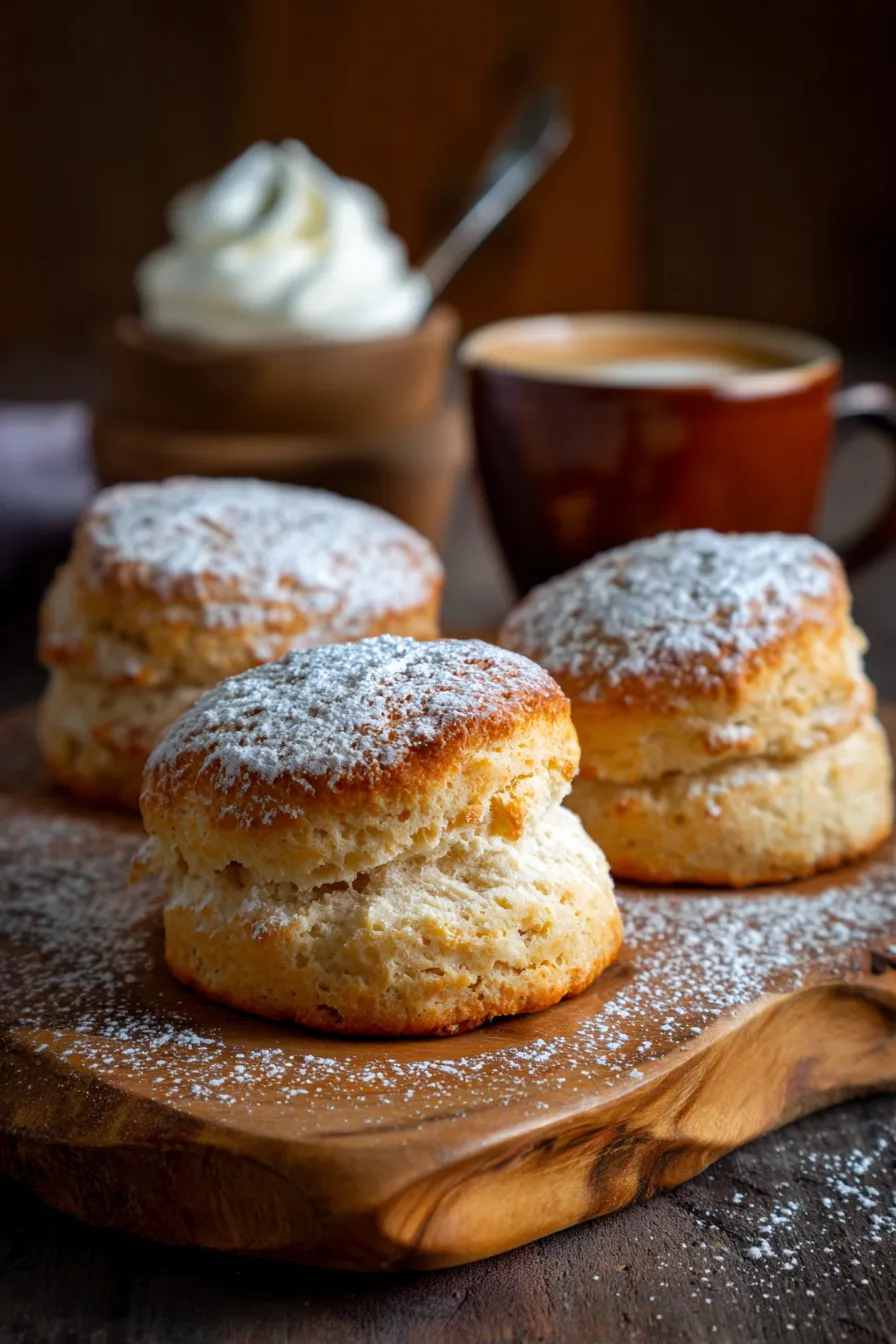
There you have it – a truly delightful “Pin on Выпечка” recipe that’s sure to become a cherished part of your home baking repertoire. These fluffy sweet buns are more than just a treat; they’re a little slice of comfort, a hug from the oven, and a reminder of the simple joys in life. Whether you’re making them for a special occasion or just because, they’re guaranteed to bring warmth and happiness to your kitchen and your table. Don’t forget to pin this recipe for later so you can revisit this golden goodness whenever you need a sweet escape!

Fluffy Pin on Выпечка: Easy Homemade Sweet Buns
Ingredients
- 2 ½ cups all-purpose flour
- ½ cup granulated sugar
- 1 tbsp baking powder
- ½ tsp salt
- ½ cup cold unsalted butter, cubed
- 1 large egg, lightly beaten
- ¾ cup buttermilk (or milk + 1 tsp lemon juice)
- 1 tsp vanilla extract
- 1 tbsp milk (for brushing)
Instructions
- Step 1 Preheat oven to 400°F (200°C). Line a baking sheet with parchment paper.
- Step 2 In a large bowl, whisk together flour, sugar, baking powder, and salt.
- Step 3 Cut in the cold butter using a pastry blender or your fingertips until crumbly.
- Step 4 In a separate small bowl, whisk egg, buttermilk, and vanilla.
- Step 5 Pour wet ingredients into dry, mixing gently until just combined. Do not overmix.
- Step 6 Turn dough onto a lightly floured surface. Gently pat into a ¾-inch thick round. Cut into 8 wedges or use a round cutter.
- Step 7 Place scones on the prepared baking sheet. Brush tops with milk.
- Step 8 Bake for 20-25 minutes, or until golden brown and a toothpick inserted comes out clean.
- Step 9 Let cool slightly on a wire rack before serving warm.