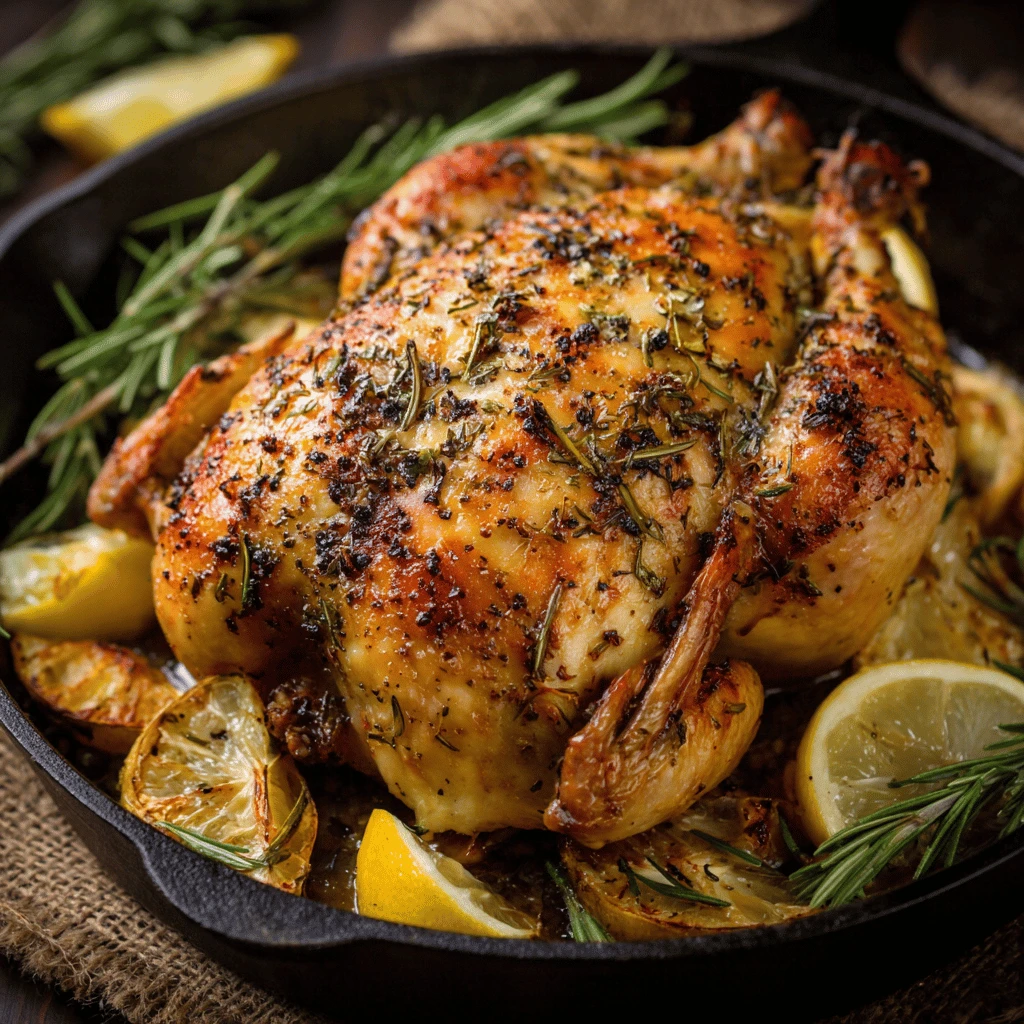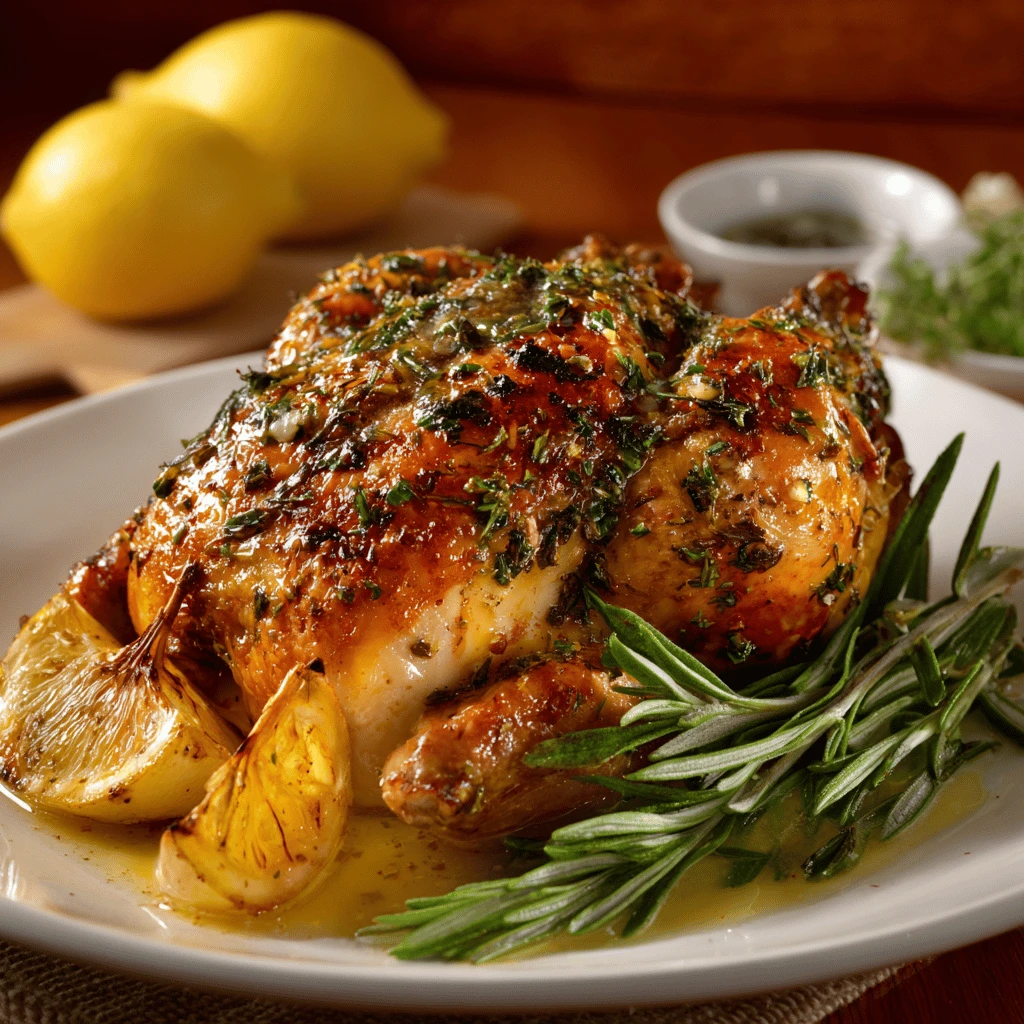
Easy Recipe Lemon Herb Roasted Chicken Roasted chicken is a classic for a reason: it’s comforting, flavorful, and relatively simple to make. This recipe elevates the standard roast chicken with bright lemon and fragrant herbs, creating a dish that’s both elegant enough for a dinner party and easy enough for a weeknight meal. We’ll guide…
Easy Recipe Lemon Herb Roasted Chicken
Roasted chicken is a classic for a reason: it’s comforting, flavorful, and relatively simple to make. This recipe elevates the standard roast chicken with bright lemon and fragrant herbs, creating a dish that’s both elegant enough for a dinner party and easy enough for a weeknight meal. We’ll guide you through each step, ensuring a perfectly cooked, juicy, and delicious Lemon Herb Roasted Chicken every time.
Why This Lemon Herb Roasted Chicken Recipe Works
This isn’t just another roast chicken recipe. The combination of lemon and herbs infuses the chicken with a refreshing and aromatic flavor that’s incredibly appealing. The lemon juice helps to tenderize the meat, while the herb butter creates a crispy, golden skin that’s bursting with flavor. This recipe also focuses on simple techniques to ensure even cooking and maximum juiciness. Here’s why it works:
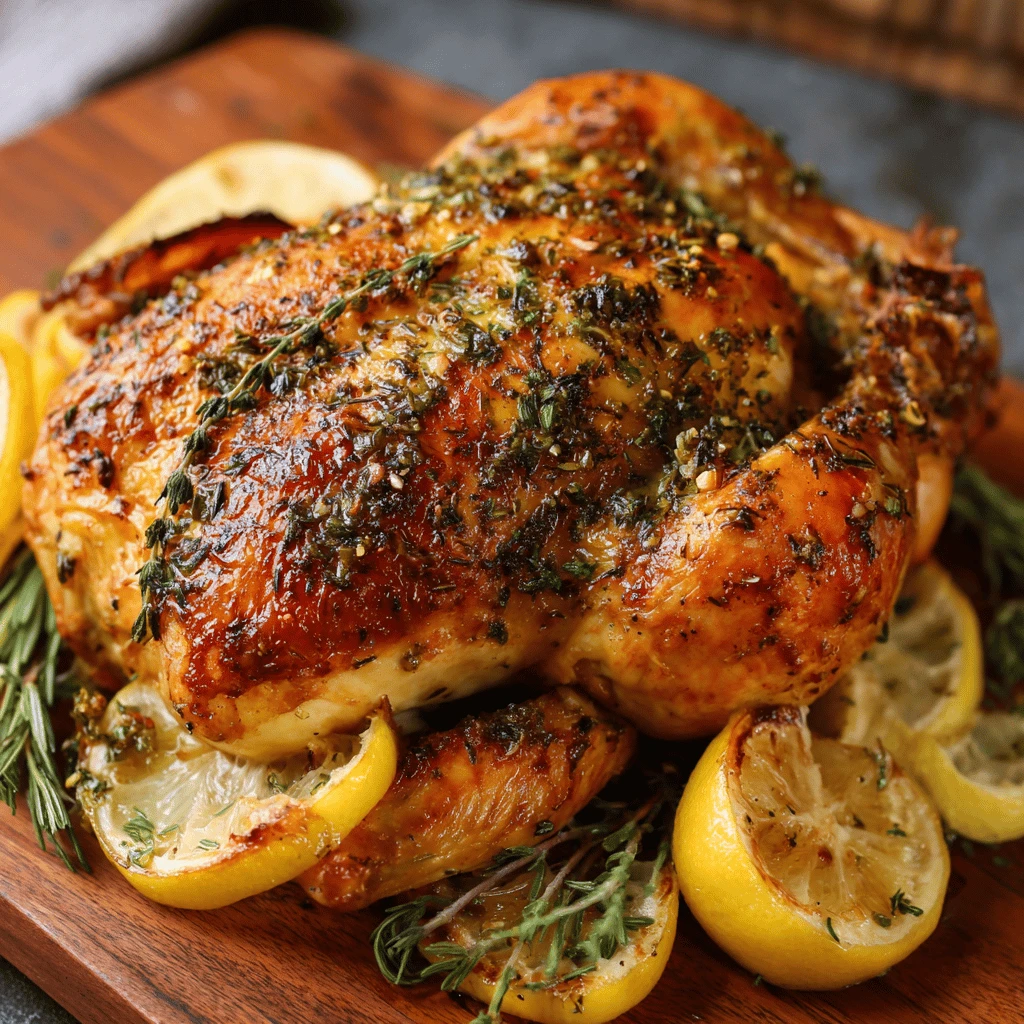
- Lemon Infusion: The lemon not only adds a bright, citrusy flavor but also helps to tenderize the chicken, resulting in a more moist and succulent bird. Lemon slices placed under the skin infuse both the skin and meat with a refreshing aroma.
- Herb Butter Power: A compound butter made with fresh herbs like rosemary, thyme, and parsley creates a flavorful barrier that seals in moisture and crisps up beautifully in the oven. Massaging the butter under the skin ensures maximum flavor penetration.
- Proper Roasting Technique: Roasting at a high initial temperature helps to crisp the skin, while lowering the temperature for the remainder of the cooking time ensures that the chicken cooks evenly without drying out. Using a meat thermometer guarantees perfect doneness.
- Resting Time is Key: Allowing the chicken to rest after roasting is crucial. This allows the juices to redistribute throughout the meat, resulting in a more tender and flavorful final product.
Ingredients & Preparation: The Foundation of Flavor
Before you begin roasting, gathering your ingredients and prepping the chicken is essential for a smooth and successful cooking process. Quality ingredients make a difference, so opt for fresh herbs and a good-quality chicken if possible.
Ingredients:
- 1 whole chicken (3-4 pounds)
- 1 lemon, halved, plus 1 sliced
- 1/4 cup unsalted butter, softened
- 2 cloves garlic, minced
- 2 tablespoons fresh rosemary, chopped
- 2 tablespoons fresh thyme, chopped
- 2 tablespoons fresh parsley, chopped
- 1 tablespoon olive oil
- Salt and black pepper to taste
- Optional: 1 onion, quartered, and 2 carrots, chopped (for the roasting pan)
Preparation Steps:
1. Preheat and Prepare: Preheat your oven to 450°F (232°C). While the oven heats, remove the chicken from the refrigerator and let it sit at room temperature for about 30 minutes. This helps the chicken cook more evenly.
2. Pat Dry: Use paper towels to thoroughly pat the chicken dry, inside and out. This is a crucial step for achieving crispy skin.
3. Make the Herb Butter: In a small bowl, combine the softened butter, minced garlic, chopped rosemary, thyme, and parsley. Mix well until all the ingredients are evenly distributed.
4. Season the Chicken: Generously season the cavity of the chicken with salt and pepper. Stuff the cavity with one lemon half.
5. Prepare the Skin: Gently loosen the skin on the breast of the chicken by sliding your fingers between the skin and the meat. Be careful not to tear the skin.
6. Apply Herb Butter: Spread the herb butter under the skin of the breast, as well as on the outside of the chicken. This will infuse the meat with flavor and help the skin to crisp up.
7. Lemon Slices: Place lemon slices under the skin of the breast, distributing them evenly.
8. Truss the Chicken (Optional): Trussing the chicken helps it cook more evenly and gives it a more appealing shape. If you don’t know how to truss a chicken, you can simply tie the legs together with kitchen twine.
9. Prepare the Roasting Pan: If using, place the quartered onion and chopped carrots in the bottom of the roasting pan. This will add flavor to the drippings and prevent the chicken from sticking to the pan.
10. Position the Chicken: Place the chicken on top of the vegetables in the roasting pan or directly on a roasting rack. Drizzle the chicken with olive oil and season with additional salt and pepper.
Roasting to Perfection: A Step-by-Step Guide
With your chicken prepped and ready, it’s time to roast it to golden-brown perfection. This section breaks down the roasting process, focusing on temperature control, timing, and ensuring a juicy and flavorful result.
1. Initial High Heat: Place the roasting pan with the chicken in the preheated oven at 450°F (232°C) for 15 minutes. This initial high heat helps to crisp the skin quickly.
2. Reduce Temperature: After 15 minutes, reduce the oven temperature to 350°F (175°C). Continue roasting for approximately 1 hour to 1 hour and 15 minutes, or until the internal temperature of the thickest part of the thigh reaches 165°F (74°C).
3. Basting (Optional): For extra flavor and moisture, you can baste the chicken with pan drippings every 20-30 minutes during the roasting process.
4. Check for Doneness: The most accurate way to determine if the chicken is done is to use a meat thermometer. Insert the thermometer into the thickest part of the thigh, making sure not to touch the bone. The chicken is done when the internal temperature reaches 165°F (74°C). The juices should also run clear when you pierce the thigh with a fork.
5. Resting Time: Once the chicken is cooked, remove it from the oven and transfer it to a cutting board. Tent it loosely with aluminum foil and let it rest for at least 15-20 minutes. This allows the juices to redistribute throughout the meat, resulting in a more tender and flavorful chicken.
Carving & Serving: The Final Touches
Carving the chicken properly ensures that you get the most out of your roast, making it easier to serve and enjoy. This section provides a simple guide to carving and serving your Lemon Herb Roasted Chicken, along with suggestions for complementary side dishes.
1. Remove the Legs: Place the chicken breast-side up on a cutting board. Using a sharp carving knife, cut through the skin and joint connecting the leg to the body. Pull the leg away from the body and cut through the remaining joint to remove the entire leg. Repeat on the other side.
2. Separate the Thigh and Drumstick: Place each leg on the cutting board and locate the joint connecting the thigh and drumstick. Cut through the joint to separate the two pieces.
3. Remove the Wings: Locate the joint where the wing connects to the body. Cut through the skin and joint to remove the wing. Repeat on the other side.
4. Carve the Breast: Using a sharp knife, slice the breast meat diagonally, starting from the center of the breast and working your way outwards. Aim for even slices to ensure consistent portions.
5. Serving Suggestions: Serve the carved chicken with the pan drippings drizzled over the top. The roasted onions and carrots from the pan can also be served as a side dish.
Complementary Side Dishes:
- Roasted Vegetables: Roasted potatoes, Brussels sprouts, asparagus, or sweet potatoes are all excellent choices.
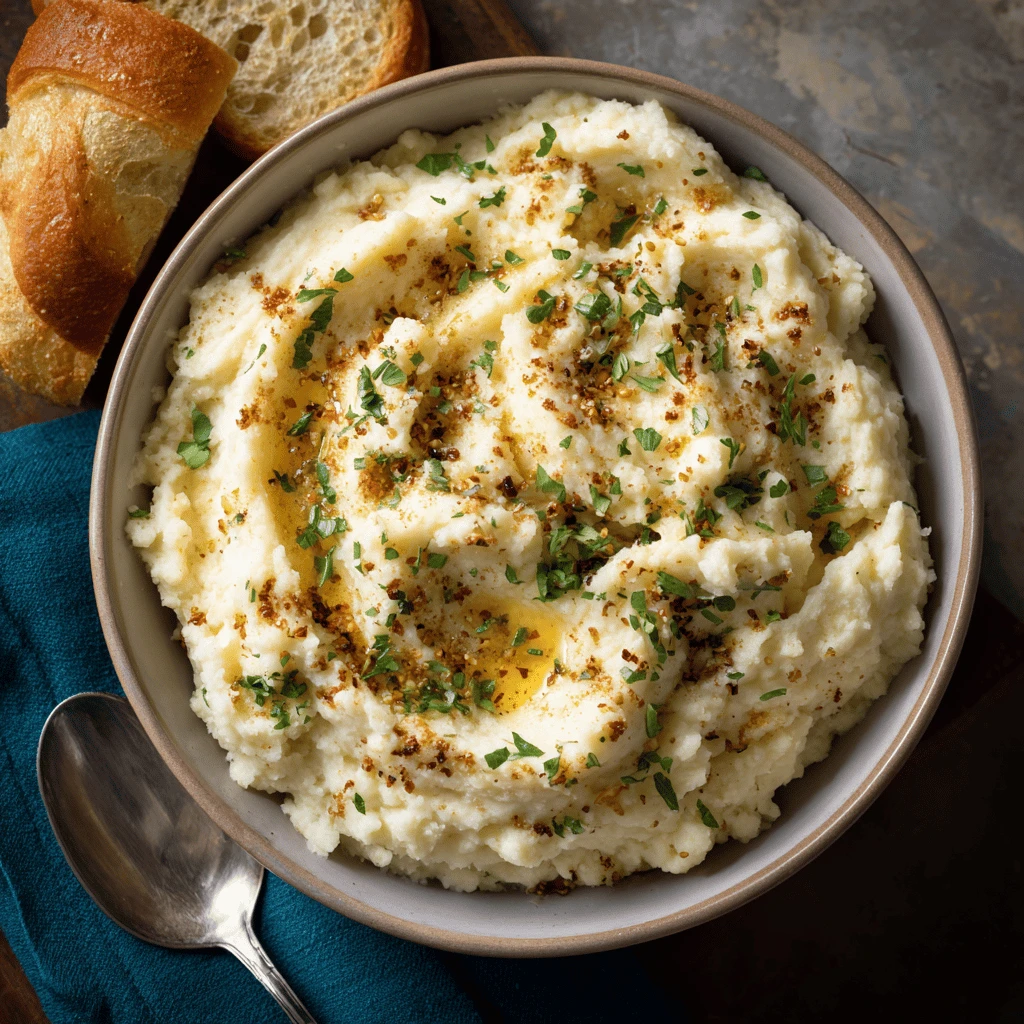
- Mashed Potatoes: Creamy mashed potatoes are a classic pairing with roasted chicken.
- Salad: A fresh green salad with a lemon vinaigrette provides a light and refreshing contrast to the richness of the chicken.
- Rice or Quinoa: These grains make a hearty and satisfying side dish.
- Bread: Crusty bread is perfect for soaking up the delicious pan drippings.
Tips, Variations, and Troubleshooting
Even with a straightforward recipe like this, questions can arise. Here are some helpful tips, variations, and troubleshooting advice to ensure a successful and delicious Lemon Herb Roasted Chicken:
Tips for Success:
- Use a Meat Thermometer: This is the most reliable way to ensure that your chicken is cooked to a safe internal temperature without overcooking it.
- Don’t Overcrowd the Pan: If you’re roasting vegetables alongside the chicken, make sure there’s enough space for air to circulate. Overcrowding the pan can lead to steamed vegetables instead of roasted ones.
- Let the Chicken Rest: Resting the chicken after roasting is crucial for ensuring a juicy and flavorful result. Don’t skip this step!
- Use Fresh Herbs: Fresh herbs will provide the best flavor for this recipe. If you only have dried herbs on hand, use about half the amount called for in the recipe.
- Adjust Roasting Time: Roasting time will vary depending on the size of your chicken and the accuracy of your oven. Use a meat thermometer to ensure the chicken is cooked to the proper internal temperature.
Variations:
- Add Citrus: Experiment with adding other citrus fruits, such as oranges or grapefruits, to the cavity of the chicken.
- Spice it Up: Add a pinch of red pepper flakes to the herb butter for a touch of heat.
- Use Different Herbs: Feel free to substitute other herbs, such as sage or oregano, for the rosemary, thyme, and parsley.
- Make a Pan Sauce: After roasting the chicken, deglaze the pan with white wine or chicken broth to create a delicious pan sauce.
Troubleshooting:
- Chicken Skin Not Crispy: Make sure to pat the chicken dry thoroughly before roasting. Also, make sure your oven temperature is accurate. If your oven tends to run low, you may need to increase the temperature slightly.
- Chicken is Dry: Make sure you’re not overcooking the chicken. Use a meat thermometer to ensure it reaches the proper internal temperature. Also, resting the chicken after roasting is crucial for retaining moisture.
- Chicken is Undercooked: If your chicken is not cooked through, return it to the oven and continue roasting until it reaches the proper internal temperature.
Frequently Asked Questions
Q: How do I know when the chicken is done?
A: The best way to tell is by using a meat thermometer. Insert it into the thickest part of the thigh, avoiding the bone. The chicken is done when the internal temperature reaches 165°F (74°C).
Q: Can I roast the chicken with vegetables?
A: Absolutely! Roasting vegetables like potatoes, carrots, and onions alongside the chicken is a great way to make a complete meal. Just toss them with olive oil, salt, and pepper before adding them to the roasting pan.
Q: Can I use dried herbs instead of fresh?
A: Yes, but fresh herbs will provide a more vibrant flavor. If using dried herbs, use about half the amount called for in the recipe.
Q: How long should I let the chicken rest?
A: Let the chicken rest for at least 15-20 minutes before carving. This allows the juices to redistribute, resulting in a more tender and flavorful chicken.
Q: Can I prepare the chicken ahead of time?
A: You can prepare the herb butter and stuff the chicken a few hours in advance. Store it in the refrigerator until you’re ready to roast it.
Q: What can I do with leftover roasted chicken?
A: Leftover roasted chicken can be used in a variety of dishes, such as sandwiches, salads, soups, and casseroles.