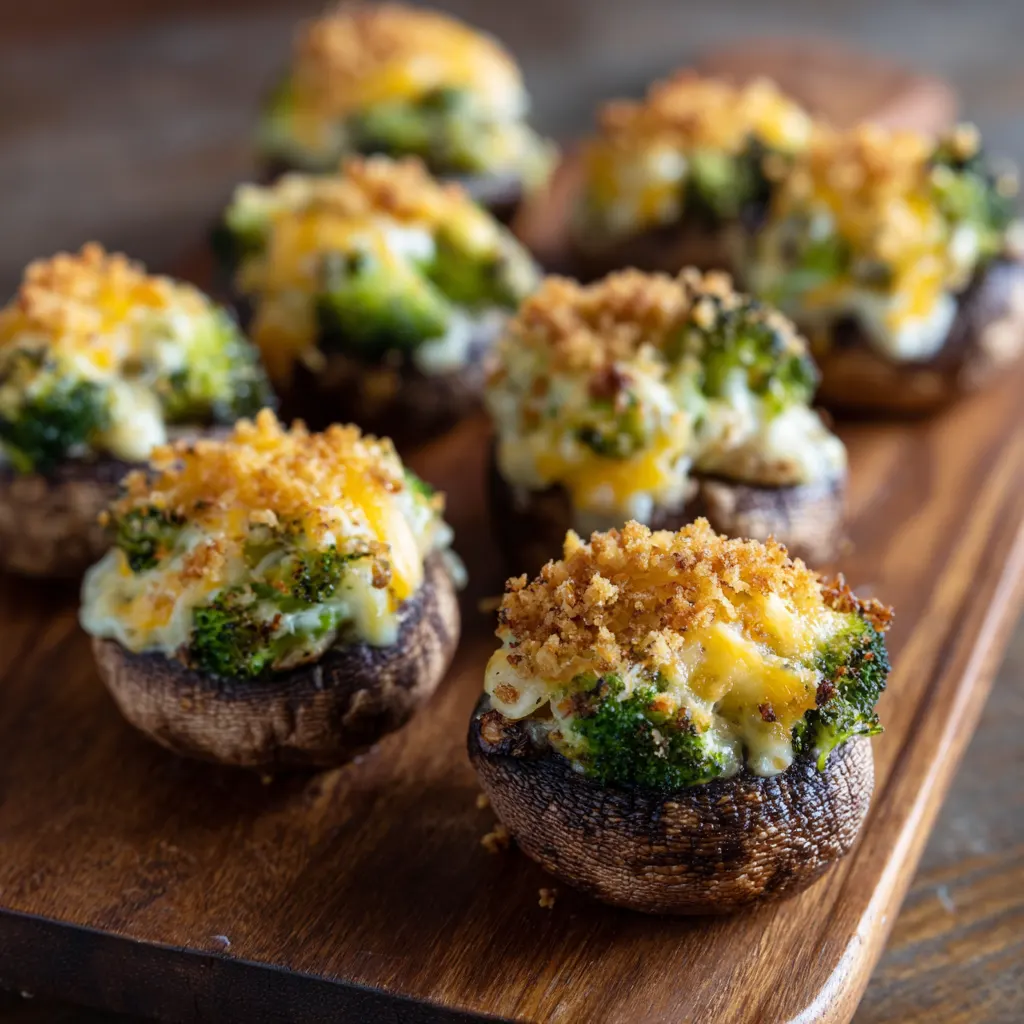
Stuffed mushrooms are a timeless appetizer, but the combination of earthy mushrooms, rich melted cheese, and tender, slightly crisp broccoli florets elevates this classic finger food into something truly irresistible. Whether prepared as a show-stopping holiday hors d’oeuvre or a satisfying vegetarian main course, these savory caps offer a perfect blend of textures and deeply…
Stuffed mushrooms are a timeless appetizer, but the combination of earthy mushrooms, rich melted cheese, and tender, slightly crisp broccoli florets elevates this classic finger food into something truly irresistible. Whether prepared as a show-stopping holiday hors d’oeuvre or a satisfying vegetarian main course, these savory caps offer a perfect blend of textures and deeply comforting flavor. This recipe is designed for maximum flavor and optimal texture, ensuring a creamy interior and a perfectly cooked, non-soggy mushroom base.
Ingredients
-
20 large white or cremini mushrooms (about 1.5 lbs), wiped clean
-
2 tablespoons olive oil, divided
-
1/2 cup finely minced yellow onion or shallot
-
2-3 cloves garlic, minced
-
1 cup finely chopped mushroom stems (from the cleaned caps)
-
1 cup finely chopped fresh or frozen broccoli florets, thawed and drained thoroughly
-
4 oz (half block) cream cheese, softened
-
1/2 cup shredded sharp cheddar cheese
-
1/4 cup finely grated Parmesan cheese, plus extra for topping
-
1/4 cup plain or Panko breadcrumbs (optional, for texture and binding)
-
1 tablespoon fresh parsley, finely chopped
-
1/2 teaspoon kosher salt, plus more for seasoning
-
1/4 teaspoon black pepper
-
Dash of paprika or onion powder (optional flavor enhancer)
Step-by-Step Instructions
1. Prepare and Pre-Bake the Mushrooms
Preheat your oven to 400°F (200°C). Carefully remove the stems from the mushrooms, setting the caps aside and reserving the stems for the filling. To prevent soggy mushrooms, lightly brush the outside of the caps with 1 tablespoon of olive oil, sprinkle the insides with a pinch of salt, and place them stem-side down on a parchment-lined baking sheet. Bake for 10 minutes to release excess moisture. Remove from the oven and set aside while you prepare the filling, leaving the oven on.
2. Sauté the Aromatics and Vegetables
Finely chop the reserved mushroom stems. In a large non-stick skillet, heat the remaining 1 tablespoon of olive oil over medium heat. Add the minced onion or shallot and sauté for 2-3 minutes until softened. Add the minced garlic and chopped mushroom stems and cook for another 3 minutes until the stems soften and release their moisture. Add the finely chopped broccoli florets, salt, pepper, and paprika (if using). Cook for 4-5 minutes, stirring occasionally, until the broccoli is tender-crisp. Remove the skillet from the heat.
3. Mix and Stuff the Filling
In a large mixing bowl, combine the softened cream cheese, shredded cheddar, 1/4 cup Parmesan cheese, chopped parsley, and the sautéed broccoli and vegetable mixture. If using, mix in the breadcrumbs at this stage to act as a binder. Stir vigorously until all ingredients are evenly incorporated and the filling is creamy and uniform.
4. Bake to Perfection
Using a small spoon or scoop, generously fill each pre-baked mushroom cap with the prepared mixture, mounding it slightly over the top. Place the stuffed caps back on the baking sheet. Sprinkle the tops of the mushrooms with the extra grated Parmesan cheese. Bake for 15-20 minutes, or until the mushroom caps are tender, the filling is piping hot, and the cheese topping is golden brown and bubbly. Serve immediately.
The Anatomy of a Perfect Stuffed Mushroom
Crafting the perfect stuffed mushroom begins long before the oven is preheated; it lies in the careful selection and preparation of the core ingredients. The mushroom itself acts as both the vessel and a key component, and its treatment is essential for achieving a desirable, non-watery result.
Choosing the Ideal Cap
For appetizers, the best choices are large button mushrooms, often called white mushrooms, or cremini (baby bellas). The key is size: select the largest, firmest caps available. Mushrooms inherently shrink during cooking, and small ones can become nearly impossible to stuff effectively. If you are serving the dish as a main course, use full-sized Portobello caps. When using Portobello mushrooms, remember to gently scrape out the dark gills using a spoon before filling, as they contain a large amount of moisture that can make the final dish soggy.
Mastering Moisture Control
The number one challenge in stuffed mushroom preparation is preventing the finished dish from becoming watery. Mushrooms are over 90% water, and baking them releases this moisture. The solution is two-fold:
-
Cleaning Technique: Never soak mushrooms in water. Instead, gently wipe them clean with a damp cloth or paper towel.
-
The Pre-Bake Step: As detailed in the recipe, pre-baking the empty mushroom caps for 10 minutes at a high temperature (around 400°F) is a critical step. This forces the mushroom to shed its excess moisture before the filling is added, guaranteeing that the final product has a firm cap and a creamy, dry filling.
Preparing the Broccoli
The texture of the broccoli is paramount to the quality of the filling. The best technique is to use very finely chopped or grated florets. Grating is highly recommended, as it allows the broccoli to integrate seamlessly with the cheese mixture and ensures it cooks fully in the short oven time. Whether you use fresh or thawed frozen broccoli, it must be well-drained and slightly pre-cooked (sautéed with the aromatics) to prevent a raw or crunchy texture in the final dish. This step also allows the broccoli to absorb the savory flavors of the garlic and onion.
Mastering the Filling: Cheese and Flavor Variations
The true heart of the stuffed mushroom is the filling—a blend of robust, savory ingredients bound together by creamy, melted cheese. While the classic broccoli and cheddar pairing is beloved, exploring different cheese combinations and flavor enhancements can transform the dish to suit any palate or occasion.
The Foundation of Creaminess
The ideal filling requires a creamy base that binds the broccoli and aromatics without becoming overly heavy or greasy.
-
Cream Cheese Base: Many of the best recipes rely on softened cream cheese (or a spreadable Boursin-style cheese) to provide both structure and a luxurious texture. It prevents the filling from crumbling and stabilizes the moisture from the other ingredients.
-
The Roux Thickener: An alternative approach, often used in older recipes, involves creating a quick, thick béchamel sauce: melting butter, whisking in flour, and gradually adding milk until thickened. This mixture is then combined with the broccoli and shredded cheese, creating a richer, slightly softer interior.
Essential Cheese Combos
While the recipe above uses the highly effective trio of Cream Cheese, Cheddar, and Parmesan, endless substitutions are possible:
-
The Classic: Sharp Cheddar (for flavor) and Cream Cheese (for texture).
-
The Italian: Mozzarella (for stretch and melt) and Parmesan (for saltiness and a crispy top).
-
The Gourmet: Garlic & Herb Boursin cheese mixed with Swiss or Gruyère.
-
The Punchy: Pepper Jack or a smoked Gouda to introduce heat or depth of flavor.
Savory Enhancers and Textural Additions
The filling is the perfect canvas for culinary creativity.
-
Aromatics: Always use garlic and onion (or scallions/chives), but consider sautéing them with the chopped mushroom stems. Utilizing the stems prevents food waste and adds an intense, concentrated mushroom flavor back into the filling.
-
The Breadcrumb Question: Breadcrumbs (Panko or traditional) serve two purposes: they absorb residual moisture from the vegetables, and when used as a topping, they provide a delightful golden-brown crunch. For a richer flavor, toast the breadcrumbs lightly in butter before mixing them in.
-
Spice and Herb Profile: While simple salt and pepper suffice, incorporating herbs like fresh thyme, parsley, or dried herbs like Italian seasoning or a dash of nutmeg can significantly enhance the complexity of the “cheese sauce” flavor within the mushroom. A small amount of Dijon mustard, particularly when using Cheddar, is a secret ingredient that brightens the entire filling.
Baking for Optimal Texture and Presentation
The baking phase is where the individual components—the moist cap and the creamy filling—must unify into a perfect appetizer. Proper temperature and timing are crucial to achieving a succulent mushroom that is cooked through, paired with a golden, bubbly top.
Finding the Right Temperature
The ideal oven temperature for stuffed mushrooms is generally between 375°F and 400°F.
-
High Heat (400°F): This is highly recommended, especially after the pre-baking step. High heat ensures the mushroom caps finish cooking relatively quickly (15–20 minutes) without becoming overly sodden, and it encourages the cheese topping to achieve a satisfying caramelization and crust.
-
Low Heat (350°F): While 350°F is sometimes used, it often requires a longer bake time (20–25 minutes), increasing the risk of the mushroom caps releasing more liquid and potentially resulting in a softer, less firm appetizer.
The Golden Crust Technique
The presentation is finished with a perfect golden crust. There are a few ways to achieve this without overcooking the mushroom:
-
Parmesan Topcoat: Finely grated Parmesan cheese sprinkled on top is the easiest method. Its low moisture and high fat content allow it to crisp up beautifully under high heat, providing a salty, savory layer.
-
Breadcrumb Finish: A blend of Panko breadcrumbs and butter or olive oil mixed with a little Parmesan creates a more textured, crunchy topping.
-
The Broiler Finish (Use with Caution): If your mushrooms are cooked but the top is still pale, switch the oven to the broiler setting for 1 to 2 minutes. Watch this carefully, as the transition from golden to burnt is rapid. This technique is especially useful if you assembled the mushrooms in advance and they need a quick refresh and browning.
Troubleshooting: Preventing a Watery Outcome
Beyond the pre-bake, several small adjustments during the stuffing process can guarantee a drier result:
-
Drain the Broccoli: If using frozen broccoli, squeeze it aggressively after thawing to remove all excess water.
-
Dry the Caps: After the pre-bake, you may find a small puddle of liquid in the mushroom cavity. Gently dab this liquid out with a paper towel before spooning in the filling.
-
Stuff Generously: Don’t be shy. A firmly packed, mounded filling ensures the mixture holds together and gives the final product a satisfying, substantive look and feel.
Serving, Storage, and Menu Pairing
Broccoli and Cheese Stuffed Mushrooms are versatile enough to feature as an integral part of any gathering, transitioning easily from a light appetizer to a substantial side dish or even a main course. Understanding the best way to serve them and how to manage leftovers ensures you maximize their flavor and convenience.
Presentation and Course Placement
-
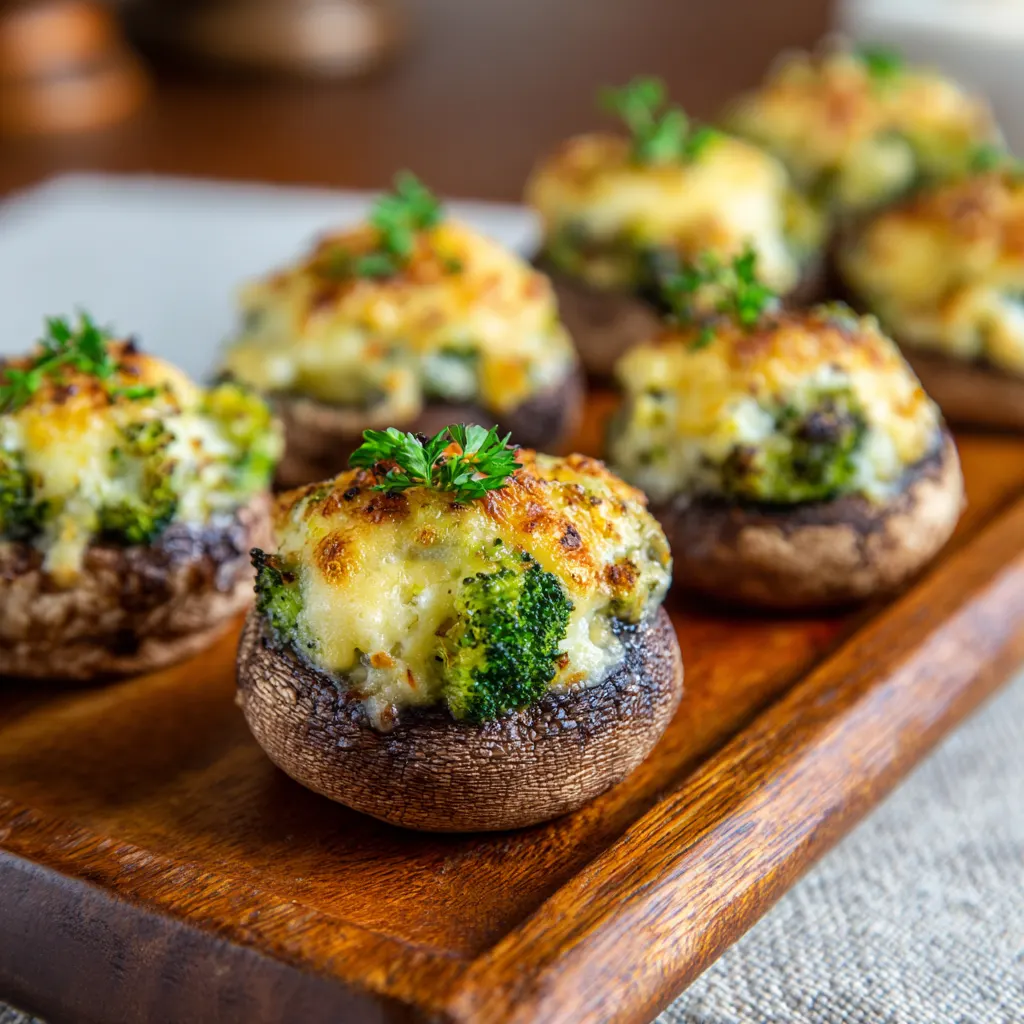
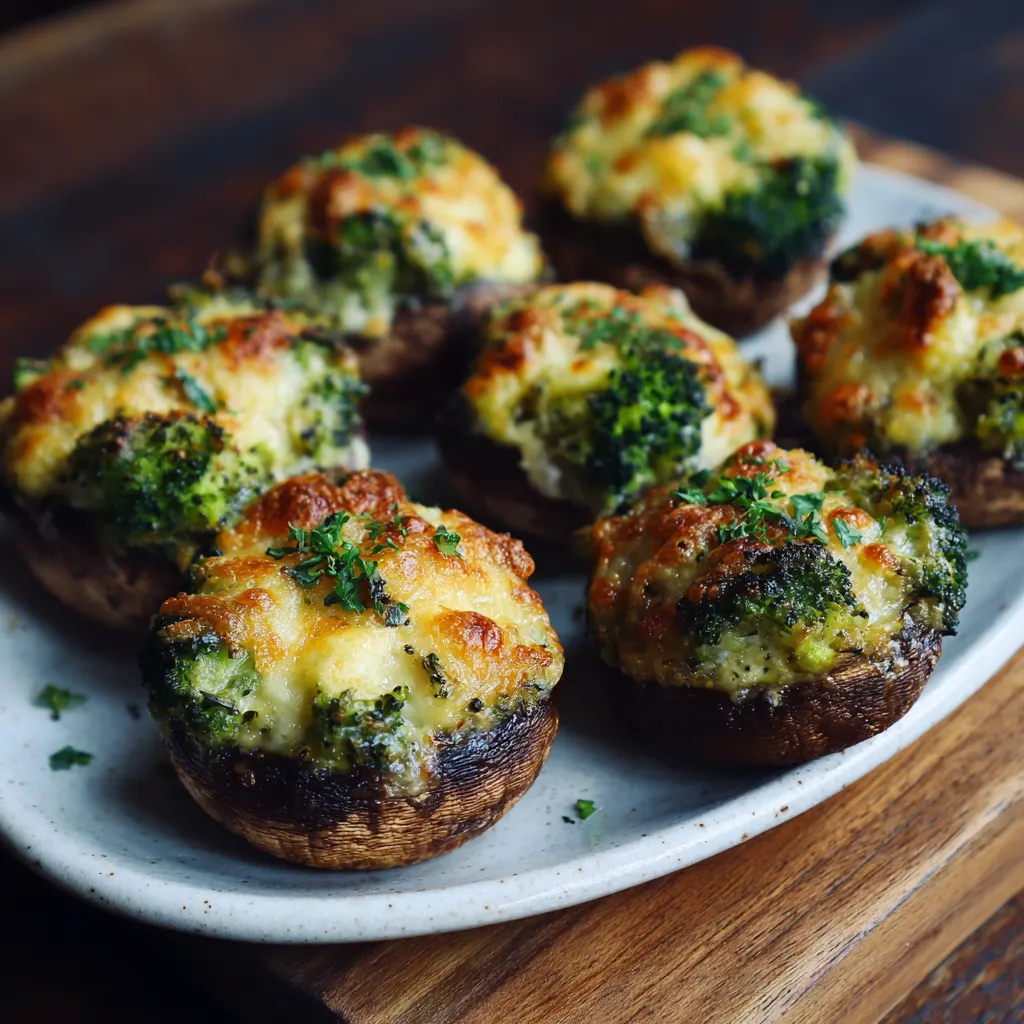
As an Appetizer: Use the smaller cremini or button mushrooms. Arrange them on a platter immediately after they come out of the oven, possibly garnished with fresh parsley or chives. Because their flavor and texture are best when hot, they should be served right away. If preparing for a party, keep them warm in a chafing dish or a warming tray.
-
As a Side or Main Course: Utilize large Portobello caps. A single stuffed Portobello can serve as a fulfilling vegetarian entree. For a main dish presentation, consider drizzling the mushrooms with a light, fresh sauce, such as a balsamic glaze, a simple yogurt-dill sauce, or a light Dijon-cheddar sauce.
Menu Pairing Suggestions
The richness of the cheese filling pairs well with acidic or fresh, light flavors that cut through the fat.
-
Wine Pairings: A crisp, unoaked white wine like Sauvignon Blanc or a light, dry Rosé complements the earthy mushrooms and brightens the broccoli flavor. For a red, choose a light-bodied, low-tannin option like Pinot Noir.
-
Main Dishes: They are an excellent side for simple grilled chicken or steak, roasted fish, or alongside a pasta dish featuring a tomato or pesto sauce.
-
Salads: Serve them next to a simple tossed salad featuring spring greens, a light vinaigrette, and fresh cucumber slices to balance the richness.
Make-Ahead and Storage Tips
Stuffed mushrooms are best served fresh, but the prep work can be done in advance.
-
Make-Ahead Assembly: You can prepare the filling mixture up to three days in advance and store it in an airtight container in the refrigerator. You can also clean, remove stems, and pre-bake the mushroom caps a few hours before assembly. Crucially, do not assemble and refrigerate the mushrooms for long periods. The filling’s moisture will be drawn into the raw mushroom cap, leading to a soggy texture when baked. Assemble them no more than an hour before baking.
-
Storage: Leftovers should be stored in an airtight container in the refrigerator for up to 2-3 days.
-
Reheating: Reheat in a toaster oven or a standard oven at 350°F for 8-10 minutes. Microwaving is possible but can compromise the texture of the mushroom cap, making it rubbery.
Adapting the Recipe: Catering to Dietary Needs
One of the great advantages of broccoli and cheese stuffed mushrooms is how easily the recipe adapts to various dietary requirements, making it a crowd-pleaser for vegetarian, low-carb, and gluten-conscious guests alike.
Keto, Low-Carb, and Gluten-Free Variations
The traditional recipe is already naturally vegetarian, but with a few simple substitutions, it fits perfectly into stricter dietary frameworks:
-
Eliminate High-Carb Binders: To make the recipe strictly Keto or Low-Carb, simply omit the breadcrumbs and any thickening agents like flour or milk (if you were using the roux method). The natural binding power of the cream cheese and melted cheddar is usually sufficient to hold the filling together.
-
Use Keto-Friendly Flours: If a binder is needed, substitute the standard breadcrumbs with an equal amount of coconut flour or almond flour. These flours toast well and lend a pleasant, nutty flavor.
-
Gluten-Free: For those avoiding gluten, ensure you use certified gluten-free breadcrumbs, or opt for the coconut/almond flour substitutions mentioned above. The rest of the core ingredients are naturally gluten-free.
Dairy-Free and Vegan Alternatives
Achieving the same creamy texture without dairy requires creative ingredient swaps that mimic the richness of cheese and cream:
-
The Cheese Substitute: Replace traditional cheese with a high-quality vegan cream cheese and shredded vegan cheddar or mozzarella.
-
Nutritional Yeast Power: To replicate the characteristic savory, umami-rich flavor of cheddar cheese, incorporate 1/4 cup of nutritional yeast (often sold as “nooch”) into the filling mixture. This ingredient is an essential staple in plant-based cooking for its distinct, cheese-like profile.
-
The Creamy Binder: Instead of dairy cream cheese, use a plant-based mayo or a cashew-based cream to bind the mixture.
-
Other Flavor Boosts: Since plant-based cheese often has a lighter flavor than dairy, feel free to enhance the filling with extra garlic powder, onion powder, and a generous pinch of salt.
These simple adaptations allow you to serve this incredible appetizer to virtually any guest, ensuring everyone can enjoy a bite of the creamy, savory perfection of broccoli and cheese stuffed mushrooms.