Best Ever Freezer-Friendly Beef Burritos | Easy Make-Ahead Dinner Life can be a whirlwind, can’t it? I still remember those hectic Tuesday evenings when my kids were little, juggling homework, extracurriculars, and the never-ending question: “What’s for dinner?” There were nights I almost caved and ordered takeout for the third time that week. That’s when…
Best Ever Freezer-Friendly Beef Burritos | Easy Make-Ahead Dinner
Life can be a whirlwind, can’t it? I still remember those hectic Tuesday evenings when my kids were little, juggling homework, extracurriculars, and the never-ending question: “What’s for dinner?” There were nights I almost caved and ordered takeout for the third time that week. That’s when I first perfected these incredible Freezer-Friendly Beef Burritos | Easy Make-Ahead Dinner, and they truly became my weeknight superhero.
My grandmother always said, “A little prep today saves a lot of stress tomorrow,” and she couldn’t have been more right. This recipe isn’t just a meal; it’s a strategic weapon against busy schedules, offering the ultimate comfort food experience with minimal fuss. It’s been tested countless times, passed down to friends, and is now a cherished family favorite that brings warmth and flavor to even the most chaotic evenings.
Imagine coming home after a long day, knowing a hearty, delicious dinner is just minutes away. No chopping, no extensive cooking – just pure, satisfying goodness waiting in your freezer. These burritos are the answer to your meal prep prayers, delivering big on flavor and even bigger on convenience, making them an absolute essential for any busy household looking for an easy dinner solution.
Why You’ll Love This Recipe
❤️ Here’s why these Freezer-Friendly Beef Burritos are about to become your new favorite:
- Effortless Meal Prep: Make a big batch on the weekend, and enjoy delicious, ready-to-go meals all week long. It’s the ultimate time-saver!
- Freezer-Friendly Champion: These burritos are specifically designed to freeze beautifully, maintaining their incredible flavor and texture even after months in the cold.
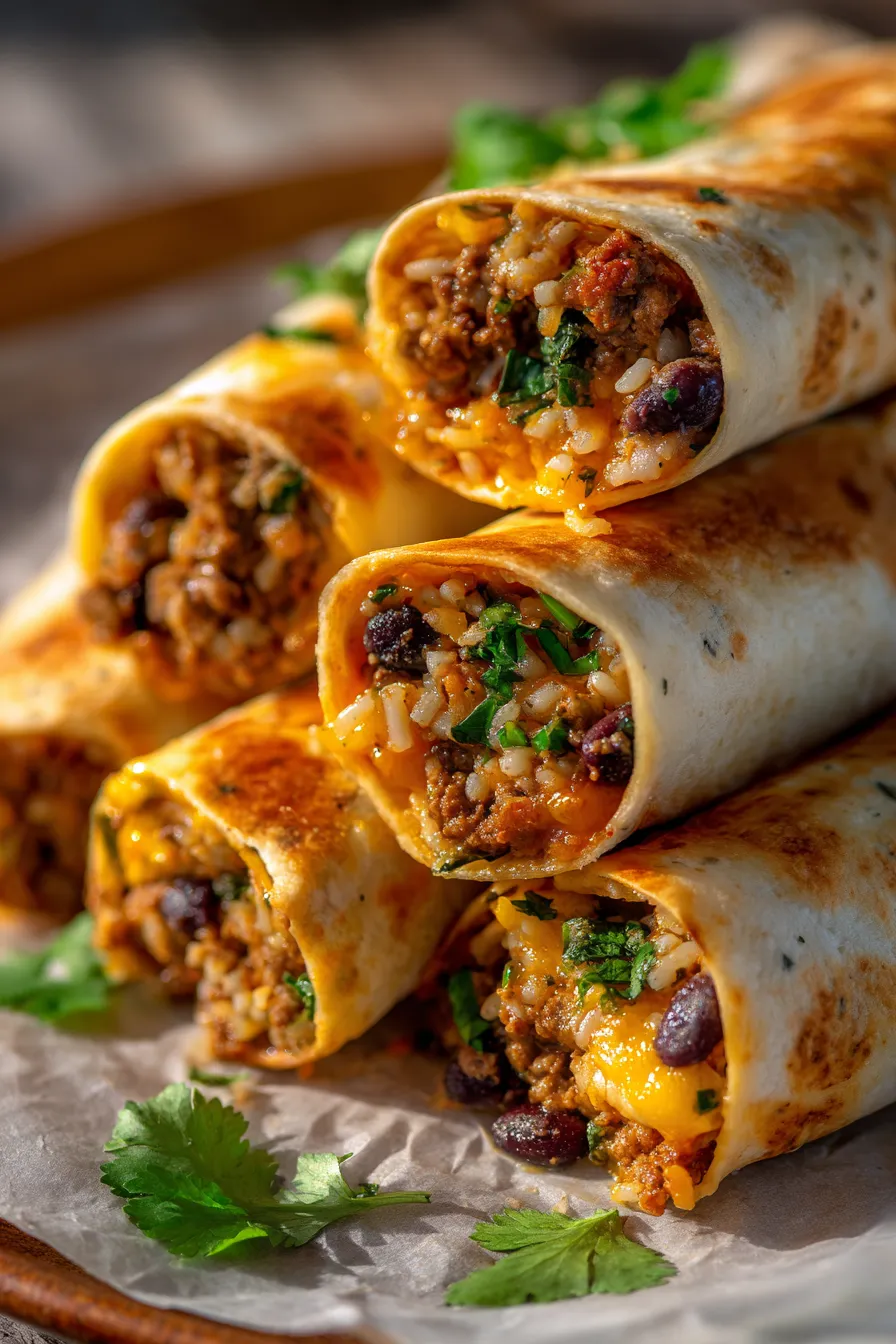
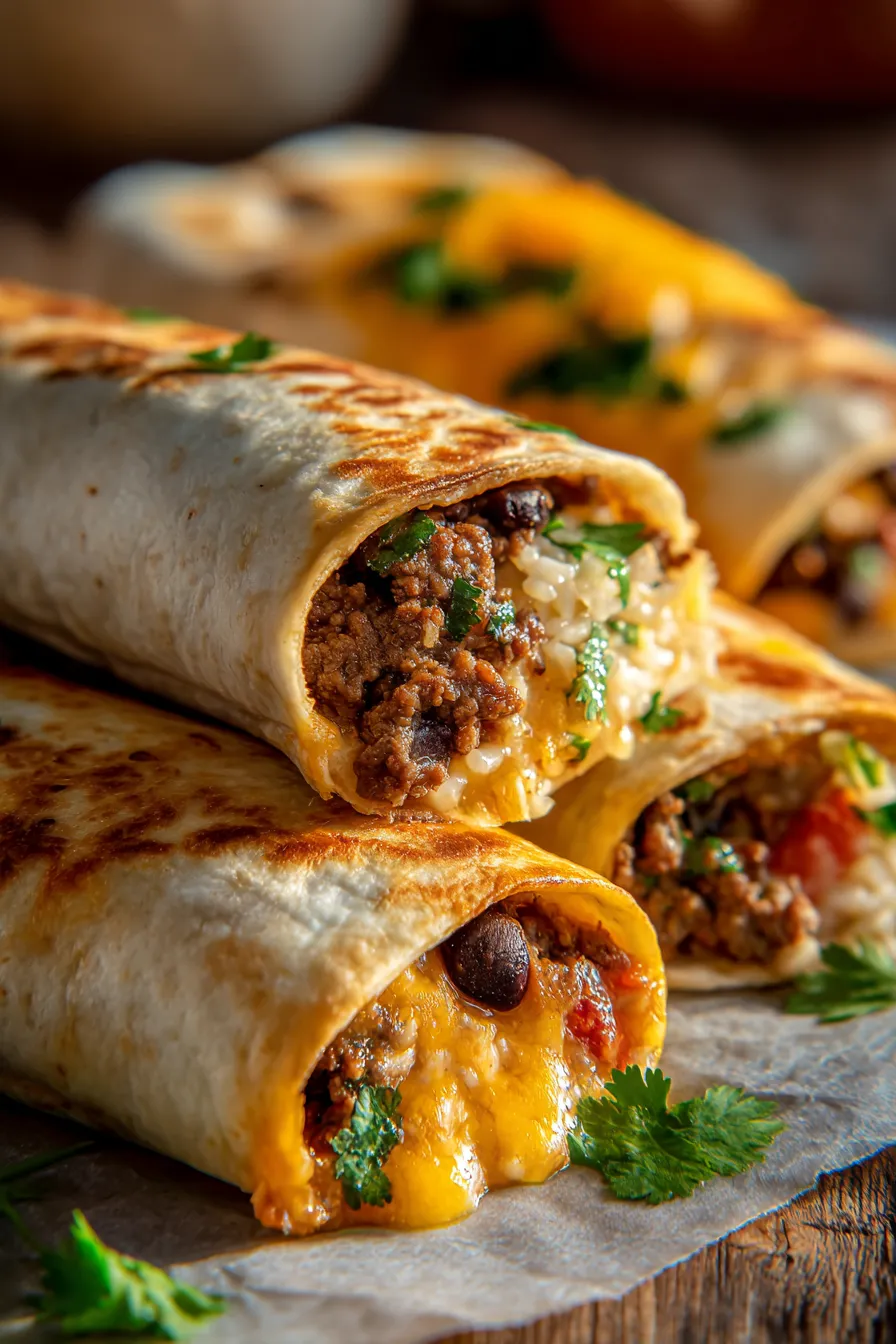
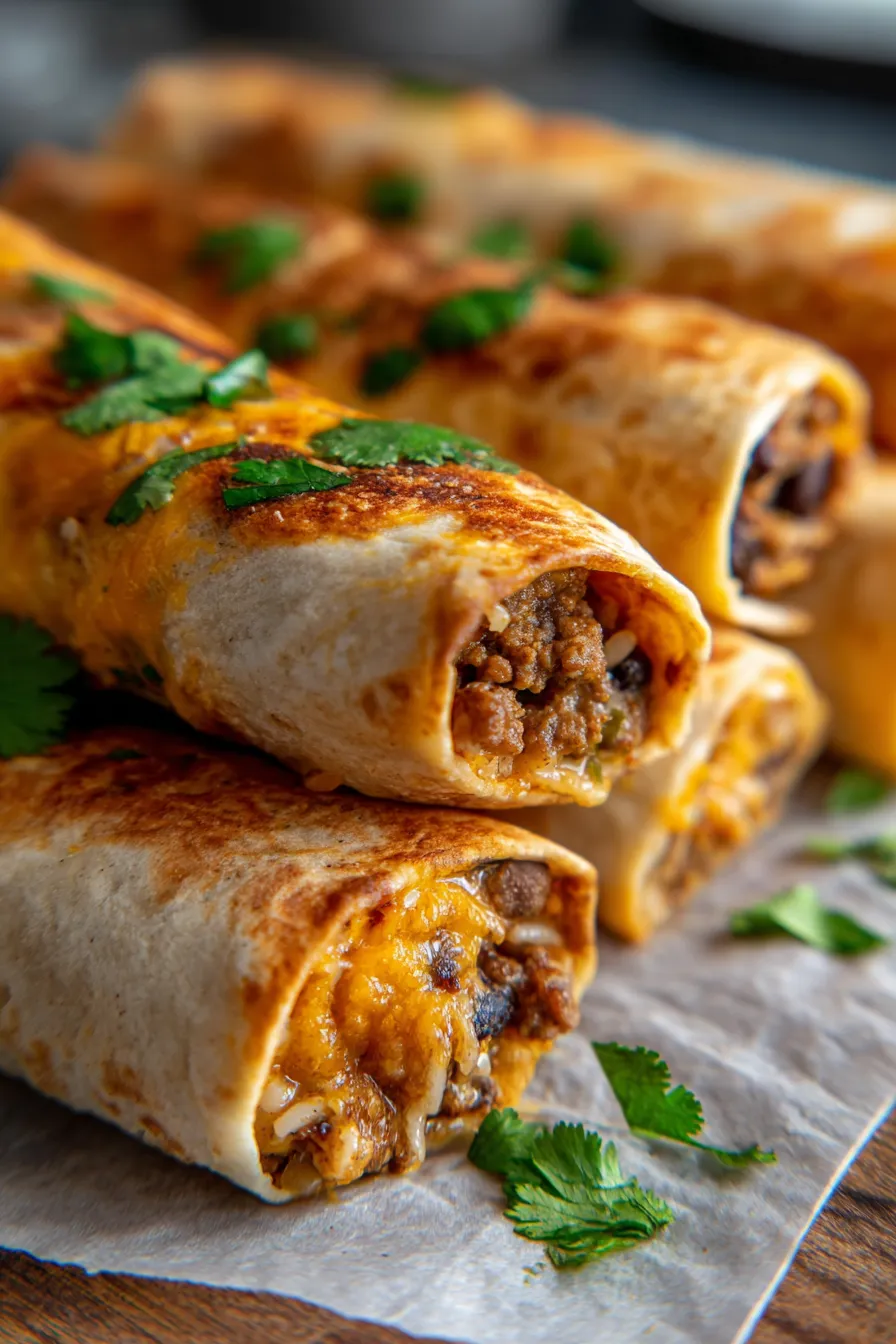
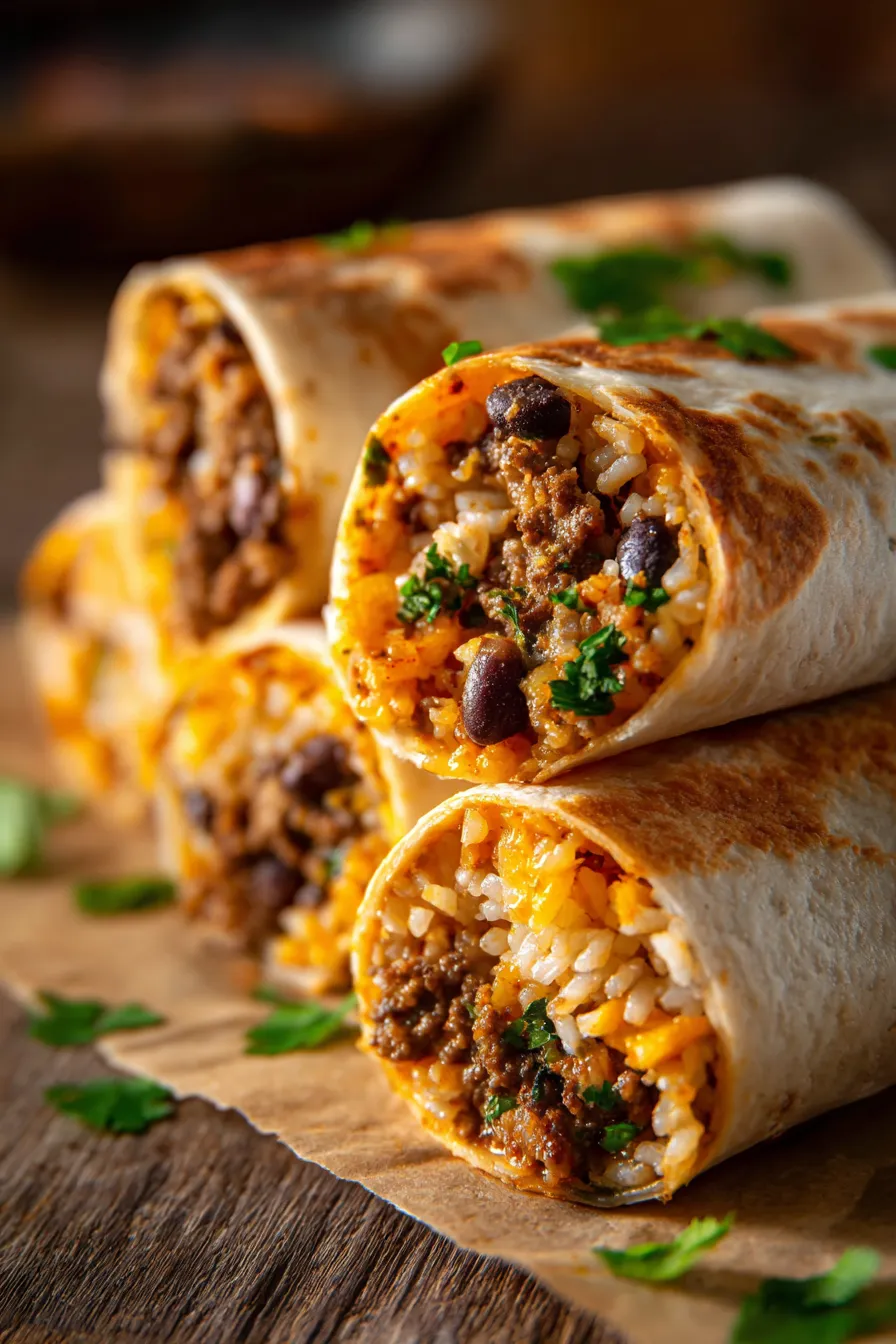
- Crowd-Pleasing Flavor: Packed with savory seasoned ground beef, tender rice, hearty beans, and gooey cheese, they’re a hit with both kids and adults.
- Highly Customizable: Easily adjust the fillings to suit your family’s tastes, dietary needs, or whatever ingredients you have on hand.
- Budget-Friendly: A fantastic way to stretch your grocery budget, using simple, inexpensive ingredients to create multiple satisfying meals.
- Perfect for Busy Lives: Whether it’s a hectic weeknight, a grab-and-go lunch, or feeding hungry teenagers, these burritos are ready when you are.
- Hearty & Satisfying: Each burrito is a complete meal in itself, providing a balanced and filling option that will keep you fueled and happy.
- Versatile Serving Options: Enjoy them as is, or dress them up with your favorite toppings like salsa, sour cream, guacamole, or hot sauce for an extra burst of flavor.
- Reduces Food Waste: A great way to use up leftover rice, beans, or bits of vegetables, ensuring nothing goes to waste in your kitchen.
What You Need
You only need a few simple pantry staples for this recipe! Most of these ingredients you likely already have on hand, making this an accessible and affordable meal. Check the full printable recipe card below for detailed measurements and a complete list of everything you’ll need to create these fantastic make-ahead burritos.
Expert Tips
💡 Master these tips for the best freezer-friendly beef burritos you’ve ever made:
- Perfectly Brown the Beef: Don’t rush this step! Brown your ground beef thoroughly over medium-high heat until it’s deeply caramelized. This adds immense depth of flavor to the entire filling. Drain any excess fat to prevent a greasy burrito.
- Seasoning is Key: Taste your filling as you go. Adjust the taco seasoning, salt, and pepper to your preference. A well-seasoned filling makes all the difference in a delicious burrito. Consider adding a pinch of smoked paprika or cumin for extra complexity.
- Prevent a Soggy Burrito: Ensure your filling isn’t too wet. If using canned tomatoes, drain them well. Excess moisture can make your tortillas soggy when thawed and reheated. Simmering the mixture uncovered for a few extra minutes can help reduce liquid.
- Warm Tortillas for Flexibility: Cold tortillas tend to crack when rolled. Briefly warm your flour tortillas in the microwave (about 15-20 seconds per stack) or quickly in a dry skillet. This makes them pliable and easy to roll without tearing.
- The Art of Rolling: Lay out a tortilla, spoon the filling slightly off-center (towards you). Fold the sides in first, then fold the bottom edge up over the filling, tucking it in tightly. Roll it away from you, keeping it as snug as possible to prevent unraveling. A tight roll is crucial for freezing!
- Cool Completely Before Freezing: This is a non-negotiable step! If you freeze warm burritos, condensation will form, leading to ice crystals and a much soggier texture upon reheating. Let them cool completely to room temperature, or even chill them in the fridge for an hour, before wrapping.
- Individual Wrapping is Best: Wrap each cooled burrito tightly in plastic wrap, then an additional layer of aluminum foil. This double layer protects against freezer burn and helps maintain quality. Label with the date and contents.
- Reheating for Optimal Texture: While microwaving is fastest, reheating in the oven (uncovered from foil, wrapped in parchment) or an air fryer often yields the best results – a slightly crispy tortilla and evenly heated interior. See the “Storage & Freezing” section for detailed reheating instructions.
- Don’t Overfill: While tempting to pack them full, an overstuffed burrito is harder to roll and more prone to bursting. Aim for about 1/2 to 3/4 cup of filling per large tortilla.
- Cheese Integration: Stir the shredded cheese into the warm filling *after* removing it from the heat. This allows it to melt just enough to bind the ingredients without becoming stringy or separating.
Variations & Substitutions
This recipe is incredibly versatile, allowing you to customize it to your heart’s content!
- Vegetarian Option: Swap the ground beef for a can of rinsed and drained black beans, kidney beans, or pinto beans, along with a cup of cooked lentils or crumbled plant-based ground meat substitute. Add some roasted sweet potato cubes for extra sweetness and texture.
- Keto/Low-Carb: Omit the rice and use low-carb tortillas or large lettuce wraps. Focus on the meat, cheese, and a smaller amount of beans. You can also add more non-starchy vegetables like sautéed bell peppers or spinach.
- Gluten-Free: Simply use your favorite gluten-free tortillas. Ensure your taco seasoning is also certified gluten-free.
- Spice Level: Adjust the amount of chili powder or cayenne pepper in your taco seasoning. For more heat, add some diced jalapeños (seeds removed for less heat) to the filling. For a milder version, use less spice.
- Other Meats: Cooked shredded chicken, ground turkey, or even leftover shredded pork carnitas would work wonderfully in place of ground beef.
- Add More Veggies: Feel free to sauté diced zucchini, corn, or extra bell peppers and onions and mix them into the beef filling for added nutrients and flavor.
- Different Cheeses: Experiment with Monterey Jack, pepper jack for a little kick, or a Mexican blend cheese.
- Rice Alternatives: Instead of white rice, try brown rice, quinoa, or even cauliflower rice for a lighter option.
Storage & Freezing
The beauty of these burritos lies in their excellent freezer-friendly nature! Here’s how to store and reheat them perfectly:
To Freeze:
- Cool Completely: After rolling, ensure each burrito is completely cool to room temperature. This prevents ice crystals from forming.
- Wrap Individually: Tightly wrap each cooled burrito first in plastic wrap, ensuring it’s sealed well.
- Double Protect: For extra protection against freezer burn, wrap each plastic-wrapped burrito in a layer of aluminum foil.
- Label and Date: Use a permanent marker to label each foil-wrapped burrito with the contents and date. This is crucial for easy identification later.
- Store in a Freezer Bag: Place the individually wrapped burritos in a large freezer-safe zip-top bag or an airtight container. This adds another layer of protection and keeps them organized.
- Freezer Life: These burritos can be stored in the freezer for up to 3-4 months.
To Thaw & Reheat:
- From Frozen (Oven Method – Best for Texture):
- Preheat your oven to 375°F (190°C).
- Remove the foil and plastic wrap from the frozen burrito. You can re-wrap it loosely in new foil or parchment paper for oven baking to prevent drying out.
- Place on a baking sheet and bake for 30-45 minutes, or until heated through and the tortilla is slightly crispy. Flipping halfway through ensures even heating.
- For an extra crispy finish, remove the foil for the last 5-10 minutes of baking.
- From Frozen (Microwave Method – Fastest):
- Remove the foil (do not microwave foil!). Leave the burrito wrapped in plastic wrap or re-wrap in a paper towel.
- Microwave on high for 2-3 minutes, flip, and continue microwaving in 30-60 second intervals until heated through. Be cautious as parts can heat unevenly.
- From Frozen (Air Fryer Method):
- Remove foil and plastic wrap.
- Place frozen burrito in the air fryer basket.
- Air fry at 350°F (175°C) for 15-20 minutes, flipping halfway, until heated through and golden brown. Cooking time will vary based on air fryer model.
- From Refrigerator (Thawed):
- If you’ve thawed them in the fridge overnight, reheating time will be shorter.
- Oven: 15-20 minutes at 375°F (190°C).
- Microwave: 1-2 minutes.
- Air Fryer: 8-12 minutes at 350°F (175°C).
FAQ
Q: Can I use different types of meat for these burritos?
A: Absolutely! While ground beef is classic, you can easily substitute it with ground turkey, ground chicken, or even shredded chicken or pork. Just ensure the meat is fully cooked and seasoned well.
Q: How long do these beef burritos last in the freezer?
A: When properly wrapped and stored, these freezer-friendly burritos will maintain their best quality for 3-4 months in the freezer. Always make sure they’re tightly wrapped to prevent freezer burn.
Q: What’s the best way to reheat a frozen burrito?
A: For the best texture, reheating in the oven or an air fryer is recommended. This helps the tortilla crisp up nicely. The microwave is faster but can sometimes lead to a slightly softer tortilla. Detailed instructions are in the “Storage & Freezing” section.
Q: Can I make these burritos vegetarian or vegan?
A: Yes! For a vegetarian version, substitute the beef with black beans, lentils, or a plant-based ground meat alternative. For vegan, ensure all other ingredients like cheese and sour cream (if adding to the filling) are plant-based. The recipe is highly adaptable!
Q: Do I need to thaw the burritos before reheating?
A: No, you can reheat them directly from frozen! However, thawing them in the refrigerator overnight will significantly reduce the reheating time, especially if using the oven or air fryer. Always ensure they are heated through to a safe internal temperature.
Ready for Your New Weeknight Hero?
There you have it – your new go-to recipe for effortless weeknight dinners. These Freezer-Friendly Beef Burritos are more than just a meal; they’re a gift of time and flavor to your future self. So, gather your ingredients, enjoy the process, and get ready to revolutionize your meal prep game. Don’t forget to customize them to your heart’s desire and enjoy the delicious convenience!
If you loved this recipe, please share it with your friends and family, and pin it for later! Happy cooking!

Freezer-Friendly Beef Burritos | Easy Make-Ahead Dinner
Ingredients
- 1.5 lbs ground beef (80/20 lean)
- 1 large onion, diced
- 2 cloves garlic, minced
- 1 (1.25 oz) packet taco seasoning
- 1 (15 oz) can black beans, rinsed and drained
- 1 (15 oz) can diced tomatoes with green chilies, undrained
- 1 cup cooked long-grain white rice
- 2 cups shredded cheddar cheese (or Mexican blend)
- 10-12 large (10-inch) flour tortillas
- Optional toppings: salsa, sour cream, guacamole, fresh cilantro
Instructions
- Step 1 In a large skillet, brown ground beef over medium-high heat, breaking it apart. Drain any excess fat.
- Step 2 Add diced onion to the skillet and cook until softened, about 5 minutes. Stir in minced garlic and cook for 1 minute more until fragrant.
- Step 3 Stir in the taco seasoning packet, black beans, diced tomatoes with green chilies (undrained), and cooked rice. Bring to a simmer and cook for 10-15 minutes, stirring occasionally, until the liquid has mostly absorbed and the mixture has thickened.
- Step 4 Remove the skillet from heat and stir in 1.5 cups of the shredded cheese until melted and well combined.
- Step 5 Warm tortillas individually in the microwave for 15-20 seconds or on a dry skillet for a few seconds per side until pliable.
- Step 6 Spoon about 3/4 to 1 cup of the beef mixture onto the center of each warm tortilla. Add a sprinkle of the remaining shredded cheese (if desired).
- Step 7 To roll: Fold in the sides of the tortilla, then fold the bottom edge up over the filling, tucking it in tightly. Roll the burrito tightly from the bottom up.
- Step 8 Allow burritos to cool completely to room temperature before wrapping for freezing. Once cooled, wrap each burrito tightly in plastic wrap, then again in aluminum foil. Label and date.
- Step 9 To reheat from frozen: Remove foil and plastic wrap. Reheat in a preheated oven at 375°F (190°C) for 30-45 minutes, or in an air fryer at 350°F (175°C) for 15-20 minutes, until heated through. Alternatively, microwave for 2-4 minutes, flipping halfway (ensure foil is removed).
- Step 10 Serve warm with your favorite toppings like salsa, sour cream, and guacamole.