Heaven on Earth Cake: Your Ultimate Guide to This Divine Dessert! Some recipes just have a way of capturing your heart, don’t they? For me, the Heaven on Earth Cake: A Delightful Dessert Recipe! is one of those timeless treasures. I remember the first time I tasted it at a potluck years ago. It was…
Heaven on Earth Cake: Your Ultimate Guide to This Divine Dessert!
Some recipes just have a way of capturing your heart, don’t they? For me, the Heaven on Earth Cake: A Delightful Dessert Recipe! is one of those timeless treasures. I remember the first time I tasted it at a potluck years ago. It was a chilly autumn evening, and the warmth of the cake, with its layers of creamy pudding and fluffy whipped topping, felt like a comforting hug. I knew right then I had to master this incredible, easy dessert. It quickly became my go-to for family gatherings and a true showstopper for any occasion.
This isn’t just a recipe; it’s a feeling – pure joy in every bite! After countless experiments and adjustments, I’ve perfected this version, making it a tried-and-true family favorite that consistently earns rave reviews. If you’re looking for a dessert that’s effortlessly elegant, incredibly delicious, and surprisingly simple to assemble, you’ve landed in the right spot. Get ready to impress everyone with this heavenly treat!
Whether you’re a seasoned baker or just starting your culinary journey, this recipe is designed for success. We’ll walk through every step to ensure your Heaven on Earth Cake turns out perfectly layered and utterly irresistible. It’s the ultimate comforting treat, perfect for holidays, celebrations, or just a sweet Sunday afternoon. Let’s dive in!
Why You’ll Love This Recipe
❤️ Here’s why this Heaven on Earth Cake will become an instant favorite in your kitchen:
- Effortlessly Elegant: This cake looks incredibly impressive, yet it’s surprisingly simple to assemble. No complicated techniques or fancy baking skills required! It’s the perfect dessert to wow guests without spending hours in the kitchen.
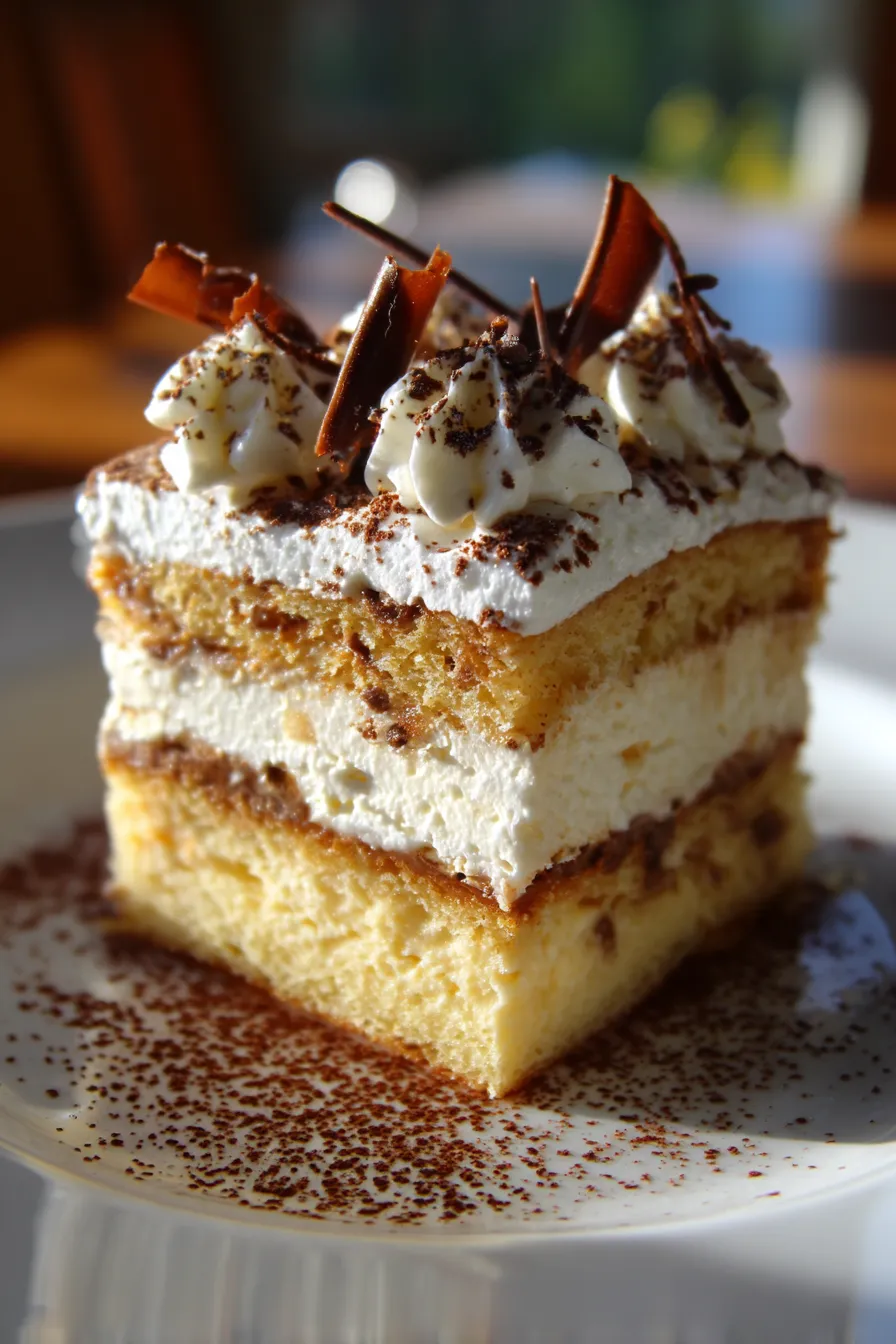
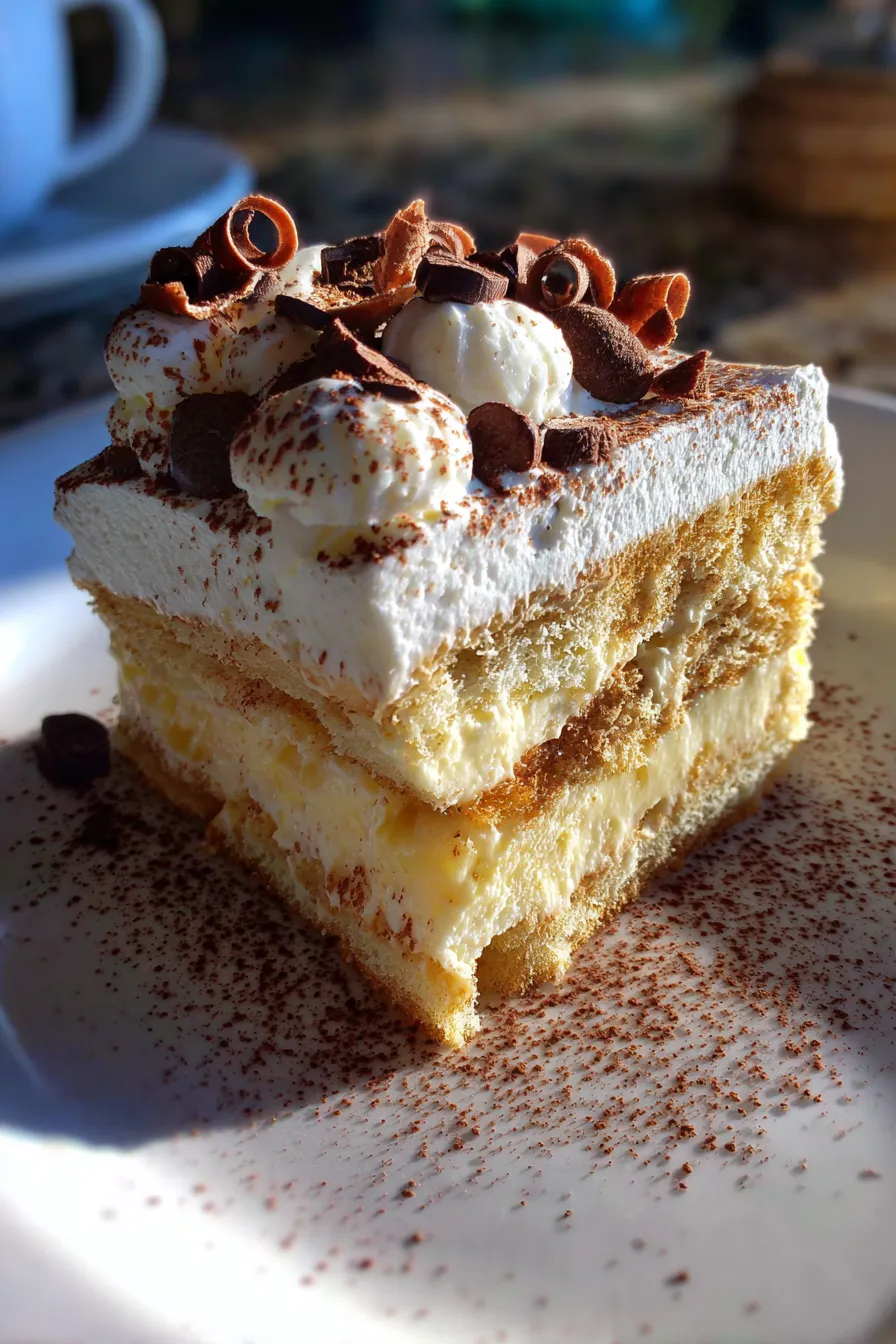
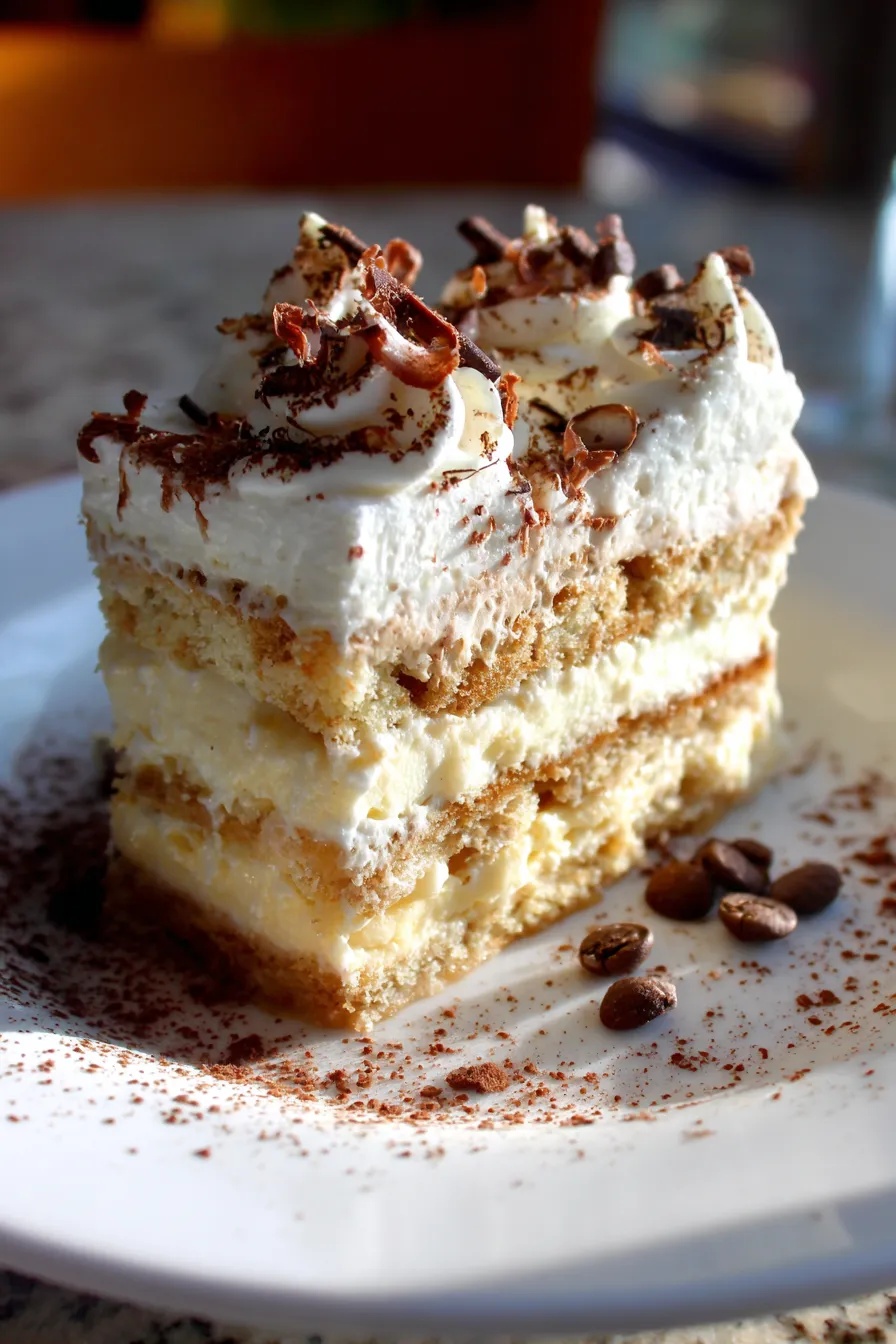
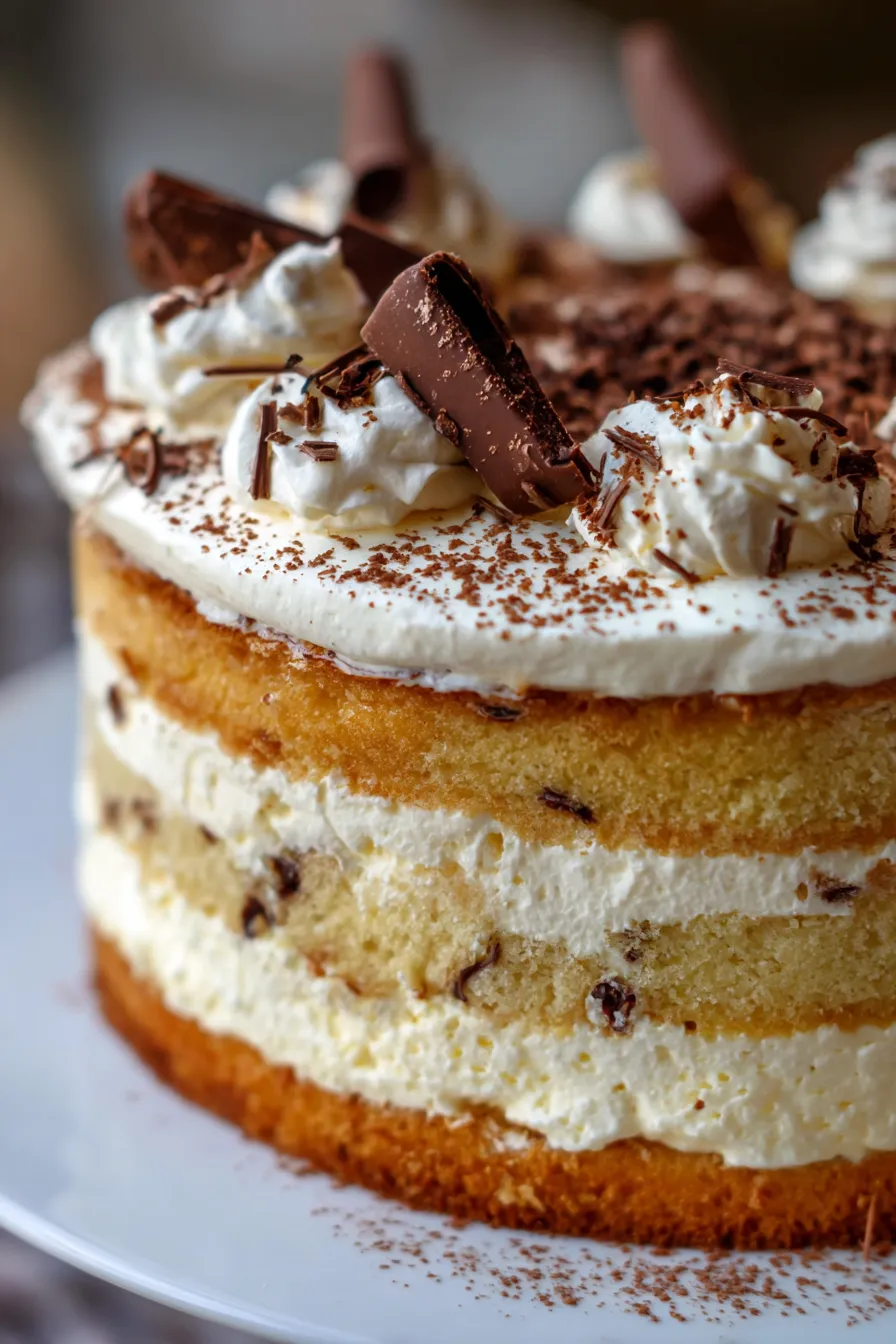
- Layers of Delight: Imagine a soft, moist cake base, followed by a creamy, luscious pudding layer, and then topped with a cloud-like whipped cream or Cool Whip. Each bite offers a delightful symphony of textures and flavors that will leave you craving more.
- Customizable Fun: While the classic version is divine, this recipe is a fantastic canvas for your creativity! Easily switch up pudding flavors, add fruit, or experiment with different toppings. It’s always exciting to make it your own.
- Make-Ahead Marvel: This cake actually tastes even better the next day once the flavors have had a chance to meld and the layers set beautifully. It’s perfect for meal prepping for parties or busy weeknights, saving you precious time.
- Crowd-Pleaser Guaranteed: Seriously, I’ve never met anyone who didn’t fall head over heels for this cake. It’s a nostalgic, comforting dessert that appeals to all ages and palates. Prepare for requests for the recipe!
- Perfect for Any Occasion: From casual family dinners to holiday feasts, birthday parties, or even just a sweet treat for yourself, this Heaven on Earth Cake fits right in. It’s versatile and always a hit.
- Beginner-Friendly: If you’re new to baking or looking for a foolproof recipe, this is it! The steps are straightforward, and the results are consistently stunning. You’ll feel like a professional baker in no time.
- A Taste of Nostalgia: For many, this cake brings back cherished memories of childhood potlucks and family gatherings. It’s a comforting classic that evokes warmth and happiness with every spoonful.
- Incredibly Versatile for Flavor Combinations: Don’t limit yourself to just vanilla! Imagine a chocolate version, a lemon twist, or even a delightful blend of different pudding flavors. This cake is a chameleon, ready to adapt to your wildest dessert dreams. The base cake can be white, yellow, or even a chocolate box mix, offering endless starting points for your flavor adventure.
- Budget-Friendly Ingredients: You won’t need any exotic or expensive ingredients for this showstopper. Most components are readily available pantry staples, making it an economical choice for a large, impressive dessert. This means you can indulge without breaking the bank!
- Transport-Friendly: Need to bring a dessert to a potluck or picnic? This cake travels wonderfully once set. Just cover it well, and it’s ready to go, making you the hero of any gathering without the stress of delicate transportation. Its sturdy layers ensure it holds up beautifully.
What You Need
You only need a few simple pantry staples for this recipe! The beauty of this dessert lies in its accessible ingredients, making it a joy to prepare any time. Check the full printable recipe card below for detailed measurements of each component.
Expert Tips
💡 Master your Heaven on Earth Cake with these pro tips:
- Chill Time is Crucial: Do NOT skimp on the refrigeration time between layers, especially after adding the pudding. This allows each layer to set properly, ensuring clean, distinct layers when you slice the cake. An impatient baker is a messy slicer! At least 2-4 hours for the pudding layer, and another 2 hours for the final whipped topping layer, or ideally, overnight.
- Don’t Overmix the Cake Batter: Mix your cake batter just until combined. Overmixing develops the gluten too much, which can lead to a tough, dry cake. A few lumps are perfectly fine and often result in a tender crumb.
- For a Moist Cake Base: Consider brushing the cooled cake layer with a simple syrup (equal parts sugar and water, boiled then cooled) or a touch of milk before adding the pudding. This adds extra moisture and flavor, making the base even more decadent. Don’t overdo it, a light brush is enough.
- Instant vs. Cook & Serve Pudding: This recipe typically calls for instant pudding for ease and quick setting. If you use cook & serve pudding, ensure it is fully cooled and set before layering, as it might be too warm and melt the other layers. Stick to instant for best results and time efficiency.
- Whipping Cream vs. Cool Whip: For the topping, you can use homemade whipped cream (heavy cream, powdered sugar, vanilla extract) or a thawed container of Cool Whip. Homemade whipped cream offers a richer flavor, while Cool Whip provides stability and convenience. Ensure whichever you use is very cold for best whipping results.
- Even Spreading: Use an offset spatula or the back of a spoon to gently and evenly spread each layer. This creates a beautiful, professional-looking cake with distinct layers. Take your time to get it right.
- Garnish for Visual Appeal: Don’t forget the finishing touch! A sprinkle of chocolate shavings, a dusting of cocoa powder, fresh berries, or even a few chopped nuts can elevate the cake’s presentation and add an extra layer of flavor and texture.
- Room Temperature Ingredients for Cake: When baking the cake base, ensure eggs and milk are at room temperature. This helps them incorporate more smoothly into the batter, leading to a more uniform texture and a better rise. Plan ahead and take them out of the fridge an hour before baking.
- Pre-bake Cake in Advance: You can bake the cake layer a day or two in advance, cool it completely, wrap it tightly, and store it at room temperature. This breaks up the preparation time, making the assembly even quicker on the day you plan to serve.
- Pudding Setting Hacks: If your pudding seems a little loose, try adding an extra tablespoon of dry pudding mix (before adding milk) to help it set firmer. Alternatively, ensure your milk is very cold, which aids in quicker setting.
- Clean Slices Every Time: For picture-perfect slices, warm your knife under hot water, wipe it clean, and then slice. Repeat this process for each cut. This prevents the layers from sticking and creates neat edges. It makes all the difference!
- Don’t Rush the Assembly: While the cake is “easy,” rushing it can lead to a messy presentation. Take your time with each layer, ensuring it’s spread evenly and has adequate time to chill. Patience is a virtue, especially in dessert making!
- Consider Pan Size: This recipe is often made in a 9×13-inch baking dish, which yields generous servings. Adjust ingredients slightly if you’re using a smaller or larger pan to maintain the ideal layer thickness.
Variations & Substitutions
One of the best things about Heaven on Earth Cake is its incredible adaptability! Here are some ideas to make it truly your own:
- Chocolate Lover’s Dream: Swap the yellow cake mix for a chocolate one and use chocolate instant pudding. Top with chocolate shavings for an ultimate cocoa indulgence.
- Lemon Zest: Use a lemon cake mix and lemon instant pudding for a bright, tangy twist. A garnish of lemon zest would be beautiful.
- Fruit Infusion: Fold finely diced fresh berries (strawberries, raspberries) into the whipped topping, or arrange them artfully on top before serving. A layer of thinly sliced bananas could also be added over the pudding.
- Nutty Crunch: Sprinkle a layer of finely chopped pecans, walnuts, or almonds between the cake and pudding layers, or over the final whipped topping for added texture.
- Coffee Kick: Incorporate a teaspoon of instant espresso powder into the cake batter or the pudding mix for a subtle coffee flavor that pairs wonderfully with chocolate or vanilla.
- Dairy-Free/Vegan Option: Use a vegan yellow cake mix, plant-based milk (almond, soy, oat), and vegan whipped topping (like coconut whipped cream). Ensure your instant pudding mix is dairy-free (most instant puddings are, but check ingredients).
- Gluten-Free Version: Simply use your favorite gluten-free yellow cake mix as the base. All other ingredients are typically naturally gluten-free, but always double-check labels.
- Spice It Up: For a fall-inspired treat, add a pinch of cinnamon or nutmeg to the cake batter.
- Extract Enhancements: Play with different extracts! Almond extract in the whipped topping, or a touch of rum extract can add intriguing depth.
Storage & Freezing
Keeping your Heaven on Earth Cake fresh is simple, ensuring you can enjoy its delightful flavors for days!
- Refrigeration: This cake must be stored in the refrigerator due to its dairy-based layers (pudding and whipped topping). Cover it tightly with plastic wrap or aluminum foil to prevent it from drying out or absorbing odors from other foods.
- Shelf Life: When properly stored, the cake will remain fresh and delicious for 3-4 days in the refrigerator. The flavors often deepen and meld beautifully on the second day!
- Freezing: While you *can* freeze this cake, the texture of the whipped topping and pudding can change slightly upon thawing, potentially becoming a bit watery or icy.
- To Freeze: If you choose to freeze, ensure the cake is completely set. Wrap individual slices or the entire cake (if fully assembled and chilled) very tightly in plastic wrap, then an additional layer of aluminum foil.
- Freezer Life: It can be stored in the freezer for up to 1 month.
- Thawing: Thaw frozen cake slowly in the refrigerator overnight.
- Note on Freezing Topping: If using homemade whipped cream, it may not hold up as well as a commercial whipped topping (like Cool Whip) when frozen and thawed. Keep this in mind for optimal texture.
FAQ
Q: Can I make this cake ahead of time for a party?
A: Absolutely! This cake is a fantastic make-ahead dessert. In fact, it often tastes even better the next day once all the flavors have had a chance to meld and the layers are perfectly set. You can prepare it up to 24 hours in advance and keep it refrigerated.
Q: What if my pudding layer doesn’t set properly?
A: The most common reasons for a runny pudding layer are not using cold enough milk, not whisking long enough, or using “cook and serve” pudding instead of “instant.” Ensure your milk is ice-cold and whisk vigorously for at least 2 minutes. If it’s still a bit loose, try adding a tablespoon more of dry instant pudding mix (before adding milk, or whisk into a small amount of milk and add to the main batch) and whisking again.
Q: Can I use homemade whipped cream instead of Cool Whip?
A: Yes, definitely! For a richer, fresher taste, you can absolutely use homemade whipped cream. Just whip heavy cream with a little powdered sugar and vanilla extract until stiff peaks form. Be aware that homemade whipped cream is less stable than Cool Whip, especially for freezing.
Q: How do I get clean slices?
A: For perfectly neat slices, ensure the cake is thoroughly chilled – ideally overnight. Before each cut, dip a sharp knife into hot water, wipe it clean, and then slice. This trick helps prevent the layers from sticking to the knife and creates smooth, defined edges. It’s a game-changer for presentation!
Q: Can I use any flavor of cake mix or pudding?
A: Absolutely! That’s one of the beauties of this recipe. While classic yellow cake with vanilla pudding is popular, feel free to experiment. Chocolate cake with chocolate pudding, lemon cake with lemon pudding, or even a strawberry cake with vanilla pudding are all delicious variations. Just ensure you use instant pudding mix for best results.
There you have it – the ultimate guide to creating a truly divine Heaven on Earth Cake: A Delightful Dessert Recipe! This isn’t just a cake; it’s an experience, a memory-maker, and a guaranteed crowd-pleaser. Whether you’re whipping it up for a special occasion or simply treating yourself to something sweet, its layers of joy are sure to bring smiles.
Don’t forget to pin this recipe for later and share your creations with us! Happy baking, sweet friends!

Heaven on Earth Cake: Easy Layered Dessert Recipe!
Ingredients
- 1 box yellow cake mix (plus ingredients per box instructions)
- 2 (3.4 oz) packages instant vanilla pudding mix
- 4 cups cold milk
- 1 (8 oz) container whipped topping, thawed (like Cool Whip)
- Chocolate shavings, for garnish (optional)
Instructions
- Step 1 Prepare cake mix according to package directions. Bake in a 9x13 inch pan. Let cool completely.
- Step 2 In a large bowl, whisk together instant pudding mixes and cold milk for 2 minutes until thickened.
- Step 3 Pour pudding mixture evenly over the cooled cake. Refrigerate for at least 2-4 hours, or until set.
- Step 4 Once pudding is set, carefully spread the thawed whipped topping over the pudding layer.
- Step 5 Refrigerate for at least another 2 hours, or until fully chilled. Garnish with chocolate shavings if desired.
- Step 6 Slice and serve cold.