Irresistible Lemon Lavender Cookies: Your New Favorite Spring Treat There’s something truly magical about the arrival of spring, isn’t there? It always takes me back to my grandmother’s garden, bursting with fragrant blooms and the promise of warmer, sunnier days. She had a small patch of lavender that she adored, and the scent would drift…
Irresistible Lemon Lavender Cookies: Your New Favorite Spring Treat
There’s something truly magical about the arrival of spring, isn’t there? It always takes me back to my grandmother’s garden, bursting with fragrant blooms and the promise of warmer, sunnier days. She had a small patch of lavender that she adored, and the scent would drift through the open windows, mixing with the aroma of her baking.
It was on one of those beautiful, memory-filled spring afternoons that I first experimented with these exquisite Lemon Lavender Cookies. The idea sparked from a desire to capture that feeling of calm, coupled with a burst of fresh, zesty sunshine. After countless tests and tweaks, this recipe became a cherished family favorite, a guaranteed crowd-pleaser that embodies the essence of the season.
These aromatic cookies are more than just a dessert; they’re an experience. They’re simple to make, yet elegant enough for any gathering, offering a refreshing dessert that truly stands out. Get ready to fall in love with their delicate floral notes and bright citrus zing!

Why You’ll Love This Recipe
- A Unique Flavor Combination: The pairing of bright, zesty lemon and soothing, fragrant lavender creates a sophisticated and unforgettable taste. It’s a delightful dance between citrusy zing and subtle floral elegance that will surprise and impress.
- Perfectly Balanced Sweetness: These cookies aren’t overly sweet, allowing the nuanced flavors of lemon and lavender to truly shine. The simple lemon glaze adds just the right touch of sweetness and a beautiful finish.
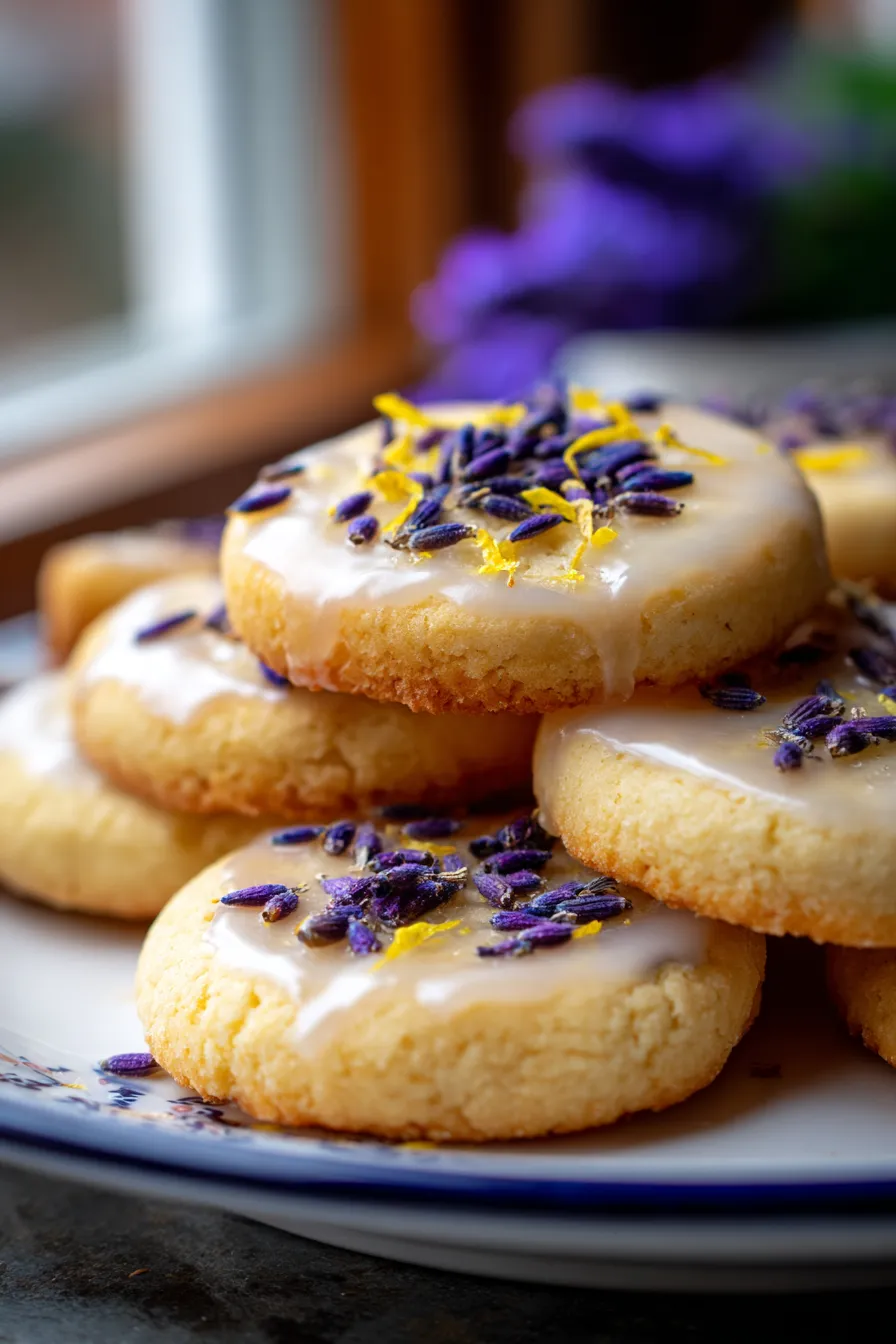
- Tender, Buttery Texture: Imagine a melt-in-your-mouth cookie that’s both slightly crisp at the edges and wonderfully tender in the center. That’s exactly what you get with these buttery shortbread-style treats.
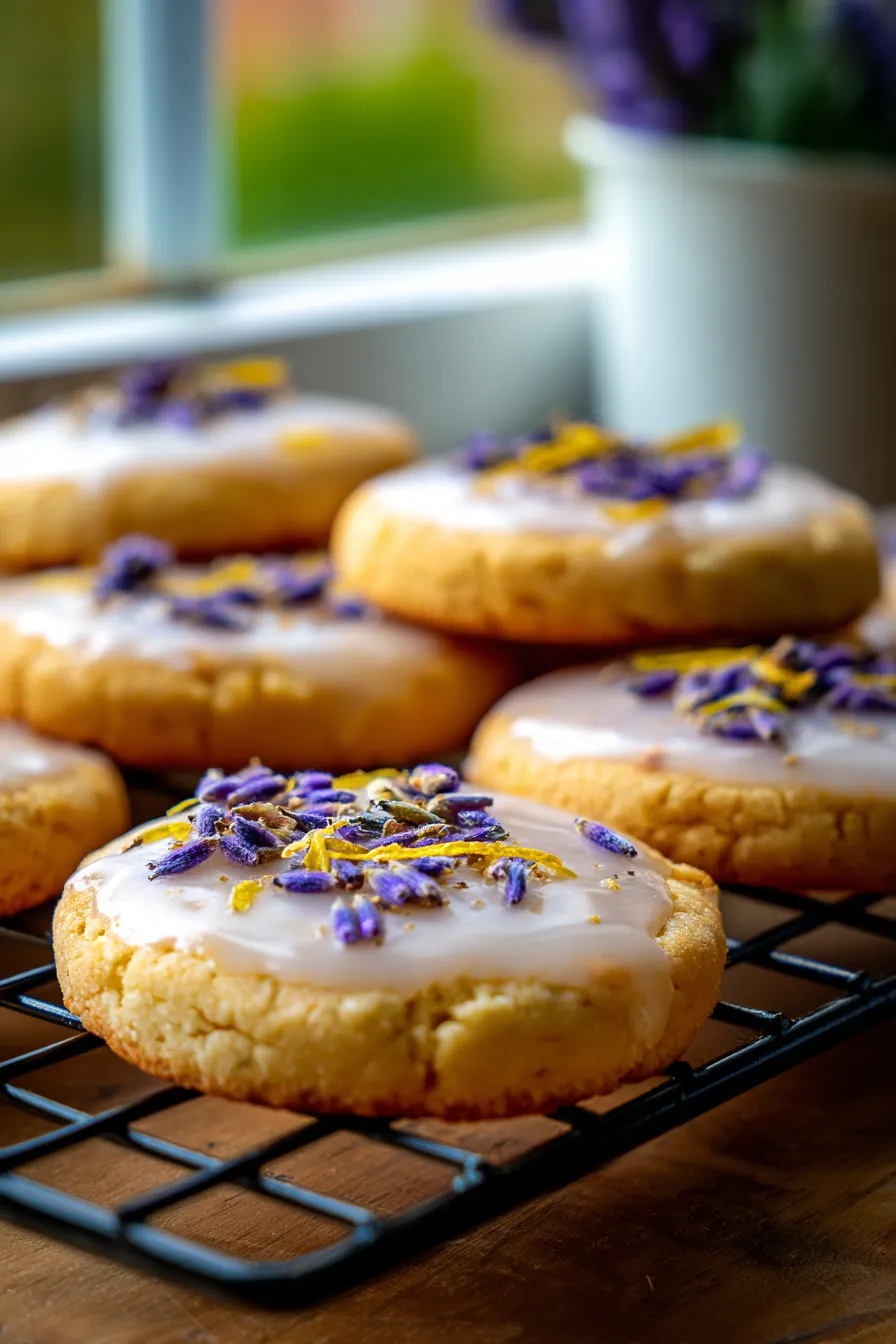
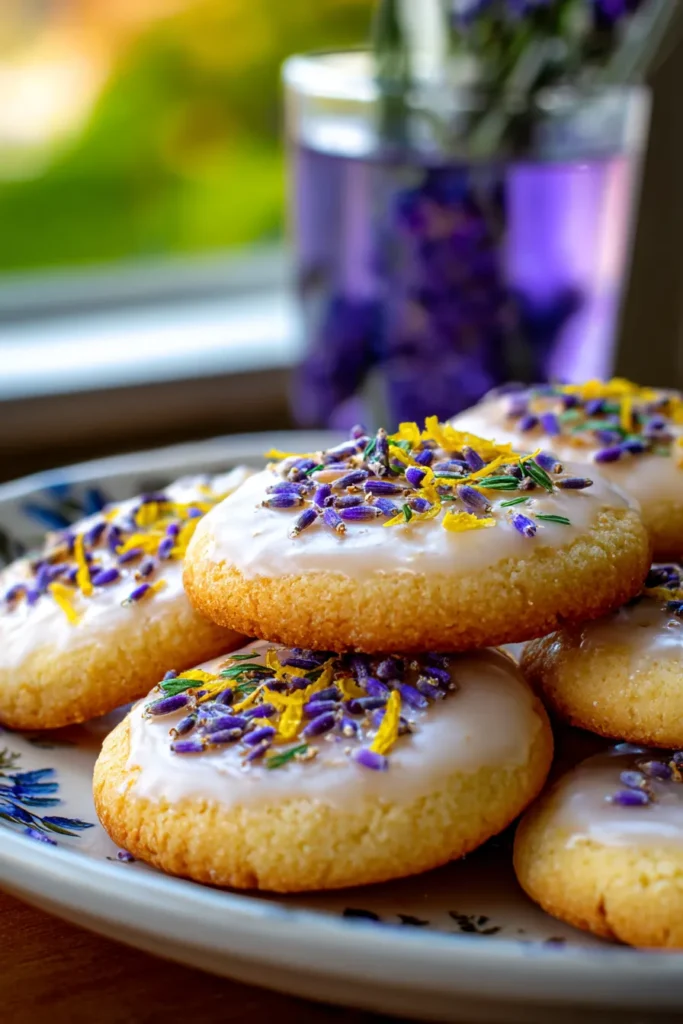
- Visually Stunning & Pinterest-Worthy: With their delicate pale yellow hue, a hint of purple lavender flecks, and a glistening lemon glaze, these cookies are as beautiful to look at as they are to eat. They’re perfect for showcasing on your spring dessert table!
- Surprisingly Simple to Make: Don’t let their elegant appearance fool you! This recipe uses straightforward ingredients and basic baking techniques, making it accessible for bakers of all skill levels. You’ll be whipping up a batch in no time.
- Incredibly Aromatic: The scent of these cookies baking will fill your kitchen with the most delightful aroma, a perfect blend of fresh citrus and calming floral notes. It’s an aromatherapy session disguised as baking!
- Versatile for Any Occasion: Whether you’re hosting a spring brunch, a garden party, a bridal shower, or simply enjoying a quiet afternoon tea, these Lemon Lavender Cookies fit right in. They make wonderful edible gifts too!
- Tested and Proven: This recipe has been perfected over many batches, ensuring consistent results every time. You can trust that you’re getting a reliable, delicious recipe that works.
- A Breath of Fresh Air: Tired of the same old chocolate chip? These cookies offer a refreshing change of pace, introducing exciting new flavors to your baking repertoire. They’re a true taste of spring!
What You Need
You only need a few simple pantry staples for this recipe! Most of these ingredients you likely already have on hand, making it a convenient and accessible bake. Check the full printable recipe card below for detailed measurements of everything you’ll need.
Expert Tips for Perfect Lemon Lavender Cookies
- Use Culinary-Grade Lavender: This is crucial! Regular garden lavender may be sprayed with pesticides or have a much stronger, more medicinal flavor. Look for culinary lavender in spice shops, specialty food stores, or online. A little goes a long way, so don’t overdo it.
- Don’t Skimp on the Lemon Zest: The zest contains all the potent essential oils that give lemons their vibrant flavor. Use a microplane zester for fine zest that incorporates beautifully into the dough. Avoid the white pith, as it can be bitter.
- Room Temperature Butter is Key: Ensure your butter is truly softened, but not melted. It should give slightly when pressed. This allows it to cream properly with the sugar, creating a light, airy base for your cookies, which impacts texture significantly.
- Measure Flour Correctly: For consistent results, always spoon your flour into the measuring cup and then level it off with a straight edge. Scooping directly from the bag can compact the flour, leading to too much flour and dry, crumbly cookies.
- Chill the Dough: This step is non-negotiable for perfectly shaped cookies that hold their form. Chilling allows the butter to firm up and the gluten to relax, preventing the cookies from spreading too much in the oven. At least 30 minutes, or even an hour, will make a big difference.
- Don’t Overmix: Once you add the dry ingredients, mix only until just combined. Overmixing develops the gluten, resulting in tough cookies. Stop mixing as soon as you see no more streaks of flour.
- Roll Dough Evenly: Aim for a consistent ¼-inch thickness when rolling out the dough. This ensures that all your cookies bake evenly and have the same delicate texture. Use a ruler if you need to!
- Bake Until Just Golden: These cookies are meant to be tender, so avoid overbaking. Look for lightly golden edges, but the centers should still appear pale. They will firm up as they cool on the baking sheet.
- Cool Completely Before Glazing: Patience is a virtue here! Glazing warm cookies will cause the glaze to melt and run off, creating a messy rather than beautiful finish. Ensure they are fully cooled on a wire rack.
- Adjust Glaze Consistency: For the glaze, add lemon juice one teaspoon at a time until you reach your desired consistency. For a thinner drizzle, add more juice; for a thicker, spreadable glaze, use less.
- Consider Fresh Lavender Garnish: If you’re feeling fancy, sprinkle a few fresh (or dried culinary) lavender buds on top of the wet glaze immediately after applying it. It adds a beautiful visual touch and reinforces the flavor profile.
- Store Properly: Once glazed and set, store the cookies in an airtight container at room temperature to maintain their freshness and delicate texture.
Variations & Substitutions
While the classic Lemon Lavender combination is sublime, don’t hesitate to get creative with your cookies!
- Gluten-Free: Swap out the all-purpose flour for a 1:1 gluten-free baking flour blend. Ensure your blend contains xanthan gum for best results.
- Vegan Option: Replace the butter with a high-quality plant-based butter substitute (like Miyoko’s Kitchen or Earth Balance sticks) and use a ‘flax egg’ (1 tbsp ground flaxseed + 3 tbsp water, let sit for 5 mins) instead of the chicken egg.
- Different Citrus: Experiment with lime zest and juice for a more tropical twist, or orange zest for a sweeter, warmer flavor profile.
- Add Other Herbs: A touch of finely chopped rosemary could add an interesting savory note to complement the lemon. Thyme is another great option.
- White Chocolate Drizzle: Instead of or in addition to the lemon glaze, melt some white chocolate and drizzle it over the cooled cookies for extra sweetness and richness.
- Nut-Free: This recipe is naturally nut-free, making it a great option for those with allergies.
Storage & Freezing
Keeping your Lemon Lavender Cookies fresh ensures they retain their wonderful flavor and texture. Here’s how to store them effectively:
- At Room Temperature: Store glazed and set cookies in an airtight container at room temperature for up to 3-4 days. Layer them between sheets of parchment paper if stacking to prevent sticking.
- In the Fridge: If you live in a very warm climate, or for extended freshness, you can store them in the refrigerator for up to a week. Let them come to room temperature before serving for the best flavor.
- Freezing Baked Cookies: For longer storage, flash freeze the cooled, unglazed cookies on a baking sheet until solid (about 1-2 hours). Then transfer them to a freezer-safe airtight container or zip-top bag, separated by parchment paper, for up to 2-3 months. Thaw at room temperature and then glaze.
- Freezing Dough: The unbaked cookie dough can be wrapped tightly in plastic wrap and then placed in a freezer-safe bag. It will keep for up to 3 months. Thaw in the refrigerator overnight before rolling out and baking.
- Freezing Glaze: It’s best to make the glaze fresh, as frozen glaze can sometimes separate.
FAQ
Q: Can I use fresh lavender instead of dried?
A: Yes, you can! If using fresh lavender, you’ll want to use about twice the amount of dried, so around 3 teaspoons. Ensure it’s culinary-grade lavender that hasn’t been treated with chemicals. Finely chop it before adding to the dough.
Q: Why are my cookies spreading too much?
A: Several factors can cause spreading. Ensure your butter isn’t too warm or melted, that your flour is measured accurately (too little flour can cause spreading), and most importantly, that you’ve chilled your dough sufficiently. A warm baking sheet can also contribute, so use cool sheets or let them cool between batches.
Q: Can I make the dough ahead of time?
A: Absolutely! This dough is fantastic for making ahead. You can prepare it, wrap it tightly in plastic wrap (either as a disc or rolled logs), and refrigerate it for up to 2-3 days. This actually helps develop the flavors even further!
Q: What type of lemon should I use?
A: Any standard bright yellow lemon like Eureka or Lisbon will work beautifully. Organic lemons are often preferred for zest as they typically have thinner skins and are less likely to be treated with waxes or pesticides.
Conclusion
These Lemon Lavender Cookies are truly a ray of sunshine in cookie form, bringing a touch of elegance and fresh flavor to your baking adventures. They’re a testament to how simple ingredients can create something extraordinary and memorable. So go ahead, whip up a batch, and let the delightful aroma fill your home. Don’t forget to pin this recipe for later so you can revisit this spring-inspired delight again and again!
Lemon Lavender Cookies: Aromatic Spring Dessert Recipe
Ingredients
- 2 ½ cups all-purpose flour
- 1 teaspoon baking powder
- ½ teaspoon salt
- 1 cup (2 sticks) unsalted butter, softened
- 1 cup granulated sugar
- 1 large egg
- 1 tablespoon fresh lemon zest (from 2 lemons)
- 2 tablespoons fresh lemon juice
- 1 ½ teaspoons culinary dried lavender
- 1 teaspoon vanilla extract
- For the Glaze:
- 1 ½ cups powdered sugar
- 3-4 tablespoons fresh lemon juice
- Pinch of culinary dried lavender (optional, for garnish)
Instructions
- Step 1 1. In a medium bowl, whisk together flour, baking powder, and salt. Set aside.
- Step 2 2. In a large bowl, cream together softened butter and granulated sugar until light and fluffy, about 2-3 minutes.
- Step 3 3. Beat in the egg, lemon zest, lemon juice, lavender, and vanilla extract until well combined.
- Step 4 4. Gradually add the dry ingredients to the wet ingredients, mixing on low speed until just combined. Do not overmix.
- Step 5 5. Divide the dough in half, flatten into discs, wrap tightly in plastic wrap, and chill for at least 30 minutes (or up to 2 days).
- Step 6 6. Preheat oven to 375°F (190°C). Line baking sheets with parchment paper.
- Step 7 7. On a lightly floured surface, roll out one disc of dough to about ¼-inch thickness. Cut out cookies using a 2-inch round cookie cutter. Reroll scraps as needed.
- Step 8 8. Place cookies 1 inch apart on prepared baking sheets.
- Step 9 9. Bake for 10-12 minutes, or until edges are lightly golden. Let cool on the baking sheet for 5 minutes before transferring to a wire rack to cool completely.
- Step 10 10. Prepare the Glaze: In a small bowl, whisk together powdered sugar and lemon juice until smooth. Add more lemon juice, a teaspoon at a time, until desired consistency is reached.
- Step 11 11. Once cookies are completely cool, drizzle or spread the glaze over each cookie. Garnish with a tiny pinch of lavender, if desired.
- Step 12 12. Let the glaze set before storing.