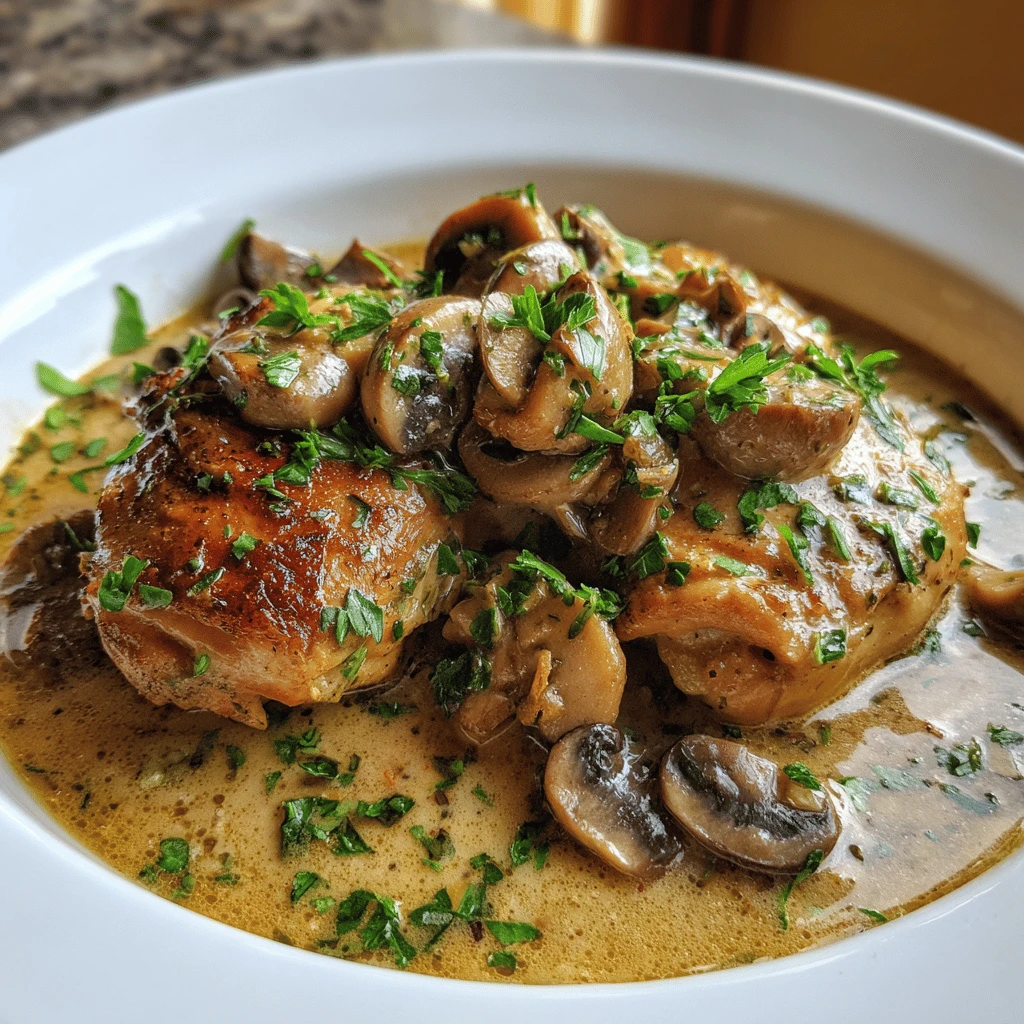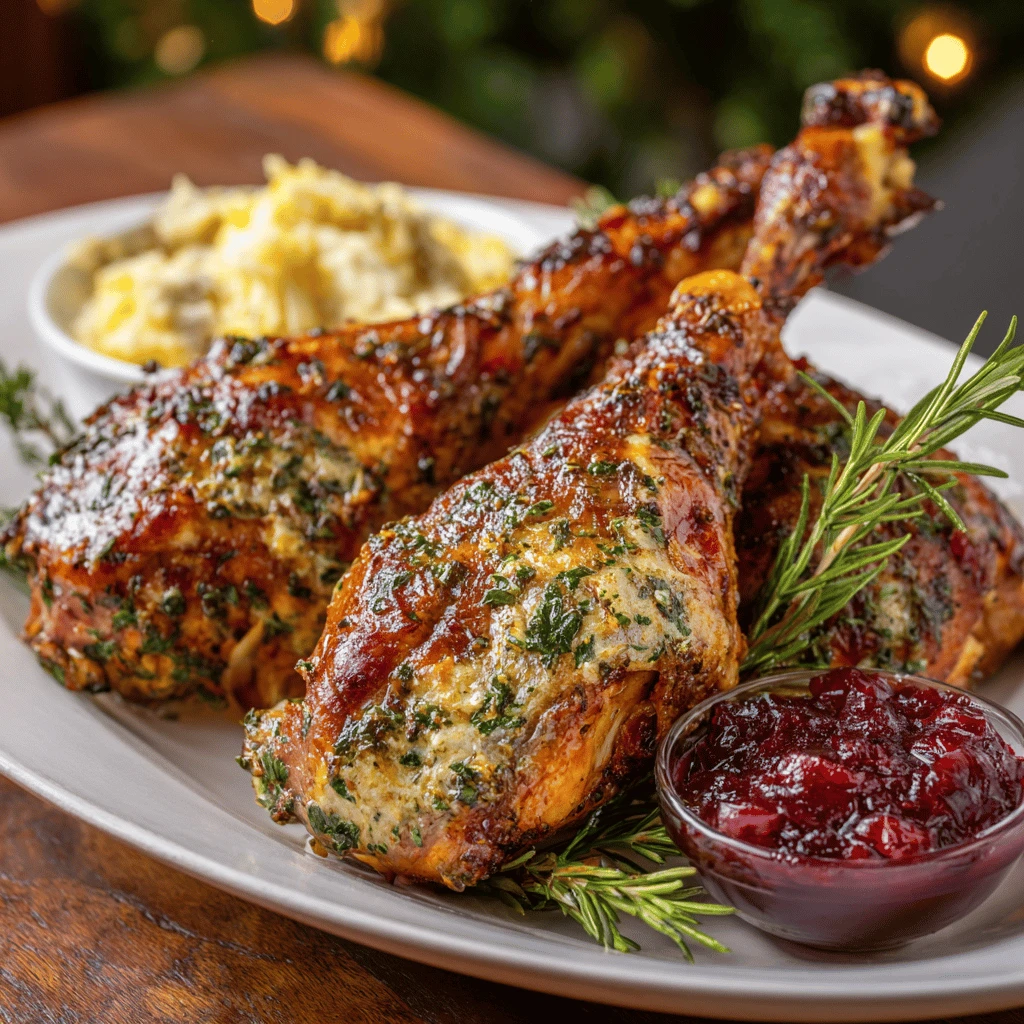
Best Ever One-Pan Garlic Butter Chicken (Simple & Delicious!) There are some weeknights when the mere thought of doing dishes after dinner feels like climbing Mount Everest. We’ve all been there, right? For me, this Garlic Butter Chicken (Simple One-Pan Recipe) became my superhero cape during those hectic times. I remember one particularly rainy Tuesday,…
Best Ever One-Pan Garlic Butter Chicken (Simple & Delicious!)
There are some weeknights when the mere thought of doing dishes after dinner feels like climbing Mount Everest. We’ve all been there, right? For me, this Garlic Butter Chicken (Simple One-Pan Recipe) became my superhero cape during those hectic times. I remember one particularly rainy Tuesday, my kids were buzzing with post-school energy, and my brain was completely fried after a long day of work. All I wanted was something warm, comforting, and utterly delicious that wouldn’t require a stack of pots and pans. This recipe saved the day!
It’s truly a lifesaver for anyone craving a hearty, flavorful meal without the fuss. This recipe is not just easy; it’s packed with so much flavor that your family will think you spent hours in the kitchen. It quickly became a tested family favorite, a guaranteed hit that brings smiles to everyone’s faces. It’s the perfect easy dinner solution and ultimate comfort food, promising minimal cleanup and maximum deliciousness.
From the moment those chicken pieces hit the pan, sizzling and developing a beautiful golden crust, to the rich aroma of garlic and butter filling your home, you’ll know you’re in for a treat. This isn’t just a recipe; it’s a testament to how simple ingredients can create extraordinary moments around the dinner table, making every meal feel like a special occasion.
Why You’ll Love This Recipe
❤️ Here’s why this One-Pan Garlic Butter Chicken will become your new go-to:
- Effortless Cleanup: As the name suggests, it’s all made in one pan! Less mess means more time for you.
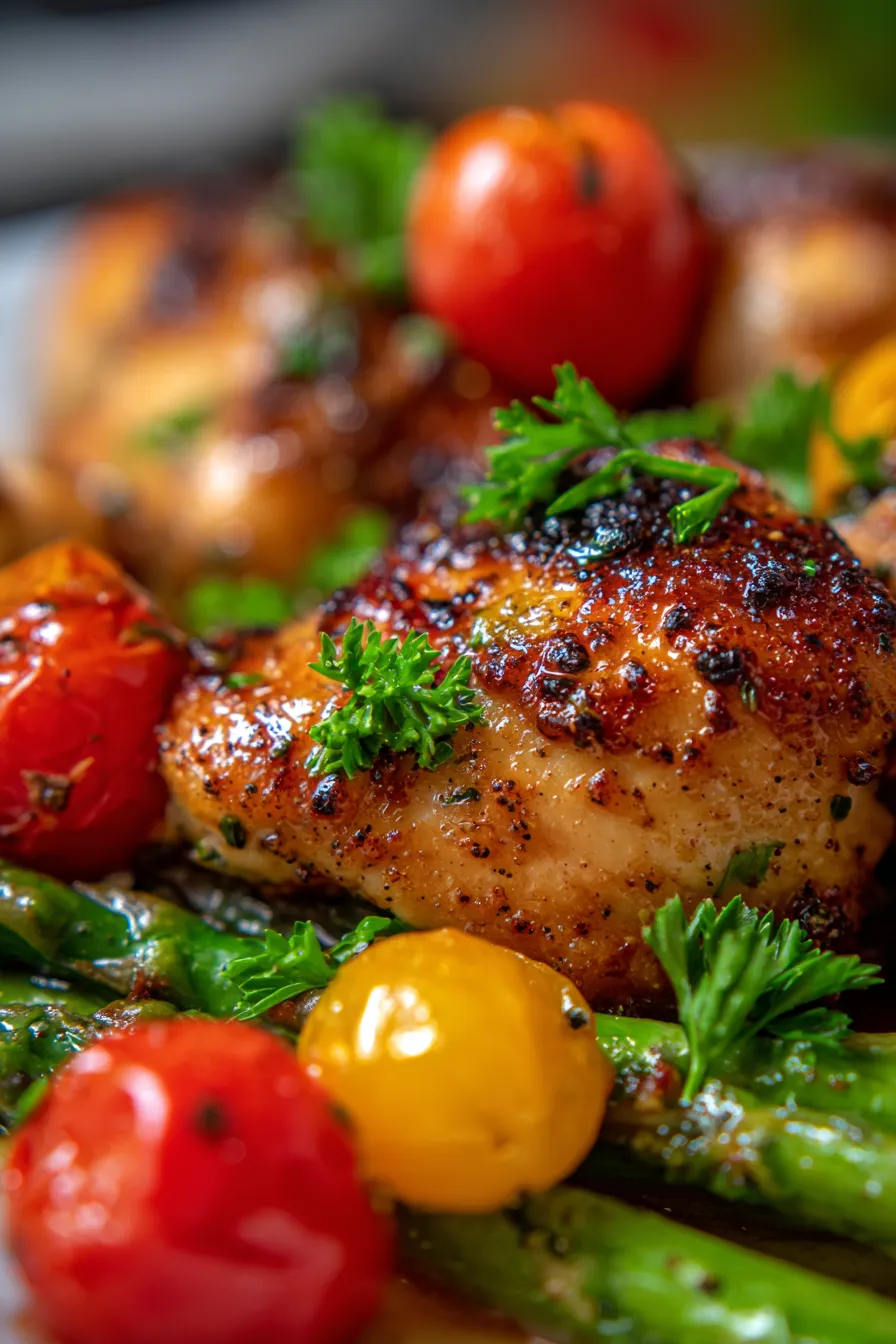
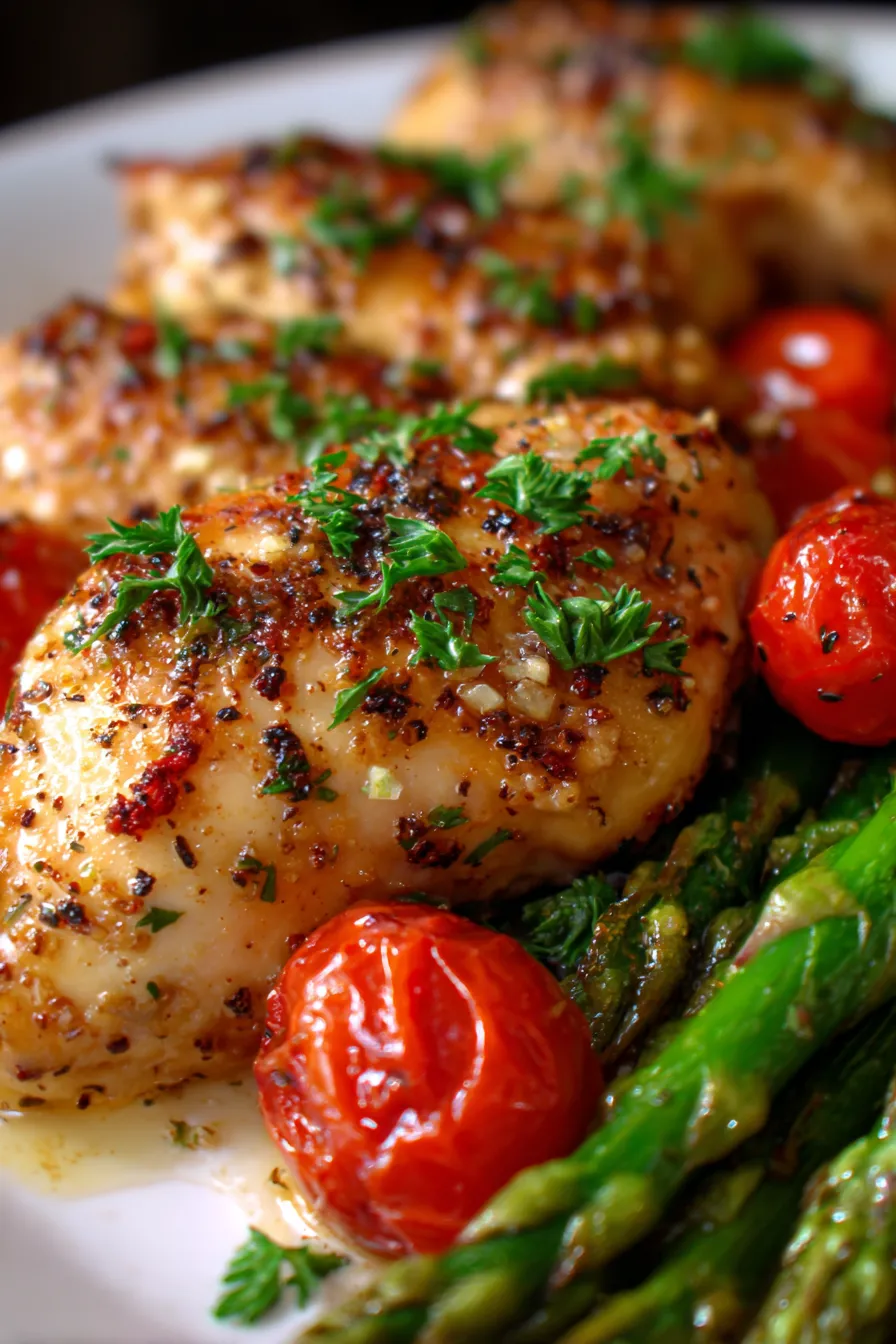
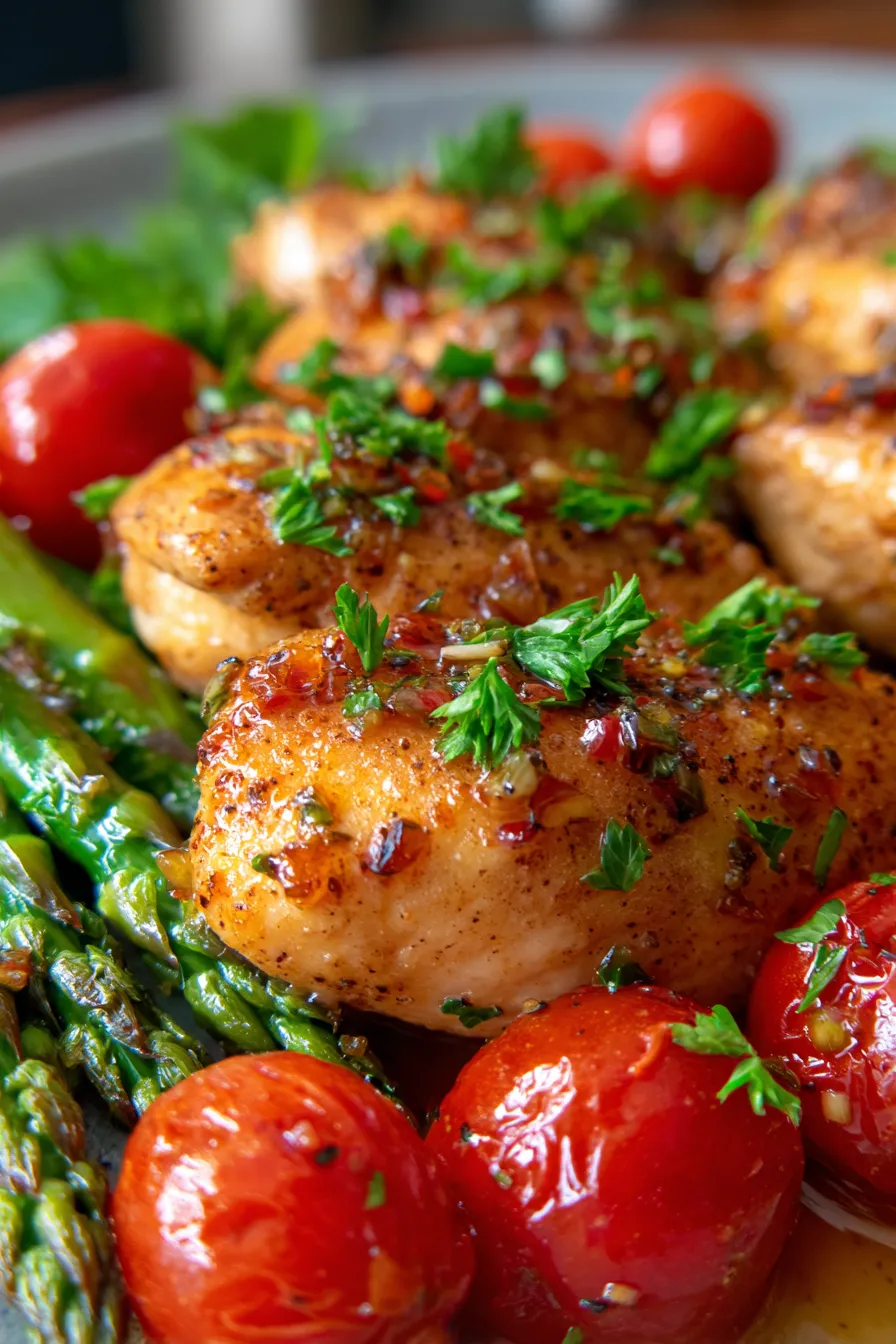
- Bursting with Flavor: Juicy chicken pieces coated in a rich, aromatic garlic butter sauce that’s simply irresistible.
- Weeknight Winner: Perfect for busy evenings when you need a quick, satisfying meal on the table in under an hour.
- Customizable: Easily adapt with your favorite vegetables, making it fresh and exciting every time.
- Family-Friendly: A crowd-pleaser that even picky eaters will adore. It’s mild yet flavorful, appealing to all ages.
- Nutritious & Wholesome: Packed with protein and fresh vegetables, making it a balanced and healthy option for dinner.
- Simple Ingredients: Uses common pantry staples you likely already have on hand, saving you a trip to the grocery store.
- Impressive Results: Looks and tastes like a gourmet meal, but it’s incredibly simple to prepare, making you feel like a kitchen wizard.
- Versatile Pairing: Delicious on its own or served with a variety of sides like rice, pasta, or a fresh salad.
What You Need
You only need a few simple pantry staples for this recipe! The magic truly happens when these basic ingredients come together in one pan, creating a symphony of flavors. Check the full printable recipe card below for detailed measurements of everything you’ll need to create this culinary masterpiece.
Expert Tips
💡 Elevate your One-Pan Garlic Butter Chicken with these pro tips:
- Pat Chicken Dry: Before searing, always pat your chicken pieces thoroughly dry with paper towels. This is crucial for achieving that beautiful, crispy, golden-brown skin and ensuring better flavor development.
- Don’t Overcrowd the Pan: Cook the chicken in batches if necessary. Crowding the pan will steam the chicken instead of searing it, preventing a good crust from forming. Give each piece space!
- Use Fresh Garlic & Herbs: While garlic powder works in a pinch, fresh minced garlic provides a much more robust and aromatic flavor. Fresh parsley or thyme, added at the end, brightens the dish significantly.
- Sear for Flavor: Don’t rush the searing process. Allow the chicken to develop a deep golden-brown crust on both sides before adding other ingredients. This step locks in juices and creates incredible depth of flavor.
- Rest the Chicken: Once cooked, transfer the chicken to a cutting board and let it rest for 5-10 minutes before slicing. This allows the juices to redistribute, resulting in incredibly tender and moist meat.
- Deglaze for Sauce: After searing and removing the chicken, use a splash of chicken broth or white wine to scrape up any browned bits from the bottom of the pan. These bits are pure flavor and will enrich your garlic butter sauce.
- Evenly Cut Vegetables: Ensure your vegetables are cut into similar-sized pieces so they cook evenly and finish at the same time as the chicken. Smaller pieces cook faster.
- Monitor Internal Temperature: The safest way to ensure chicken is perfectly cooked is to use a meat thermometer. Chicken pieces should reach an internal temperature of 165°F (74°C).
- Serve with Lemon: A squeeze of fresh lemon juice over the finished dish brightens all the flavors and adds a zesty tang that cuts through the richness of the butter.
Variations & Substitutions
This recipe is wonderfully versatile, making it easy to adapt to your taste or what you have on hand. Don’t be afraid to get creative!
- Vegetable Swap: Instead of asparagus and cherry tomatoes, try broccoli florets, sliced bell peppers, zucchini, green beans, or even small potato wedges (par-boil potatoes first for even cooking).
- Different Chicken Cuts: While boneless, skinless chicken thighs or cutlets work perfectly, you can also use bone-in pieces or even chicken drumsticks. Just adjust cooking times accordingly to ensure they are cooked through.
- Spice it Up: Add a pinch of red pepper flakes with the garlic for a subtle kick, or a dash of cayenne pepper for more heat.
- Herb Power: Experiment with different fresh herbs like fresh thyme, rosemary, or oregano instead of or in addition to parsley.
- Dairy-Free Option: Use a high-quality dairy-free butter substitute to make this recipe suitable for those with dairy sensitivities.
- Add a Creamy Touch: Stir in a splash of heavy cream or coconut milk (for dairy-free) at the very end to create a richer, creamier sauce.
- Keto-Friendly: This recipe is naturally low-carb! Just ensure your chosen vegetables align with your keto diet, and serve with cauliflower rice or zoodles instead of traditional sides.
- Gluten-Free: This recipe is naturally gluten-free as long as you use gluten-free chicken broth (if adding any).
Storage & Freezing
This Garlic Butter Chicken is fantastic for meal prep! Here’s how to store it and enjoy it later:
- Refrigeration: Allow any leftovers to cool completely. Transfer the chicken and vegetables to an airtight container and store in the refrigerator for up to 3-4 days.
- Freezing: For longer storage, this dish freezes beautifully. Place cooled chicken and vegetables in a freezer-safe container or heavy-duty freezer bag. It can be frozen for up to 2-3 months. Thaw overnight in the refrigerator before reheating.
- Reheating: For best results, reheat in a skillet over medium-low heat with a splash of chicken broth or water to prevent drying out. You can also microwave individual portions, though the chicken skin might not be as crispy.
FAQ
Q: Can I use boneless, skinless chicken pieces?
A: Absolutely! Boneless, skinless chicken thighs or cutlets work wonderfully. They will cook a bit faster, so adjust your cooking time accordingly, usually around 5-7 minutes per side, and always check for an internal temperature of 165°F (74°C).
Q: What are the best side dishes to serve with this chicken?
A: This Garlic Butter Chicken pairs beautifully with a variety of sides! Think fluffy white rice, quinoa, couscous, creamy mashed potatoes, a simple green salad with a light vinaigrette, or some crusty bread to soak up all that delicious garlic butter sauce.
Q: My garlic butter sauce isn’t thickening. What can I do?
A: If your sauce feels too thin, you can remove the chicken and veggies, then simmer the sauce over medium heat for a few minutes to reduce it. You can also mix a teaspoon of cornstarch with a tablespoon of cold water to create a slurry, then whisk it into the simmering sauce until thickened. Make sure to cook for a minute or two after adding the slurry to cook out any starchy taste.
Q: Can I prepare this dish ahead of time for meal prep?
A: Yes! You can definitely prep components. Chop your vegetables and mince your garlic ahead of time. You can also make the garlic butter mixture and store it in the fridge. When it’s time to cook, everything will come together even faster.
Conclusion
There you have it – the ultimate One-Pan Garlic Butter Chicken! It’s truly a recipe that delivers on flavor, convenience, and pure comfort. Whether you’re a seasoned chef or a kitchen novice, this dish is designed for success and maximum enjoyment. It’s perfect for those busy weeknights when you want something satisfying without the stress, or for a cozy weekend meal with loved ones.
I hope this recipe brings as much joy and ease to your kitchen as it has to mine. Give it a try soon, and don’t forget to share your creations! Happy cooking!
One-Pan Garlic Butter Chicken (Easy Weeknight Dinner!)
Ingredients
- 2 lbs bone-in, skin-on chicken thighs (or boneless, skinless cutlets)
- 2 tbsp olive oil
- 4 tbsp unsalted butter
- 6-8 cloves garlic, minced
- 1 tsp dried oregano
- 1/2 tsp red pepper flakes (optional)
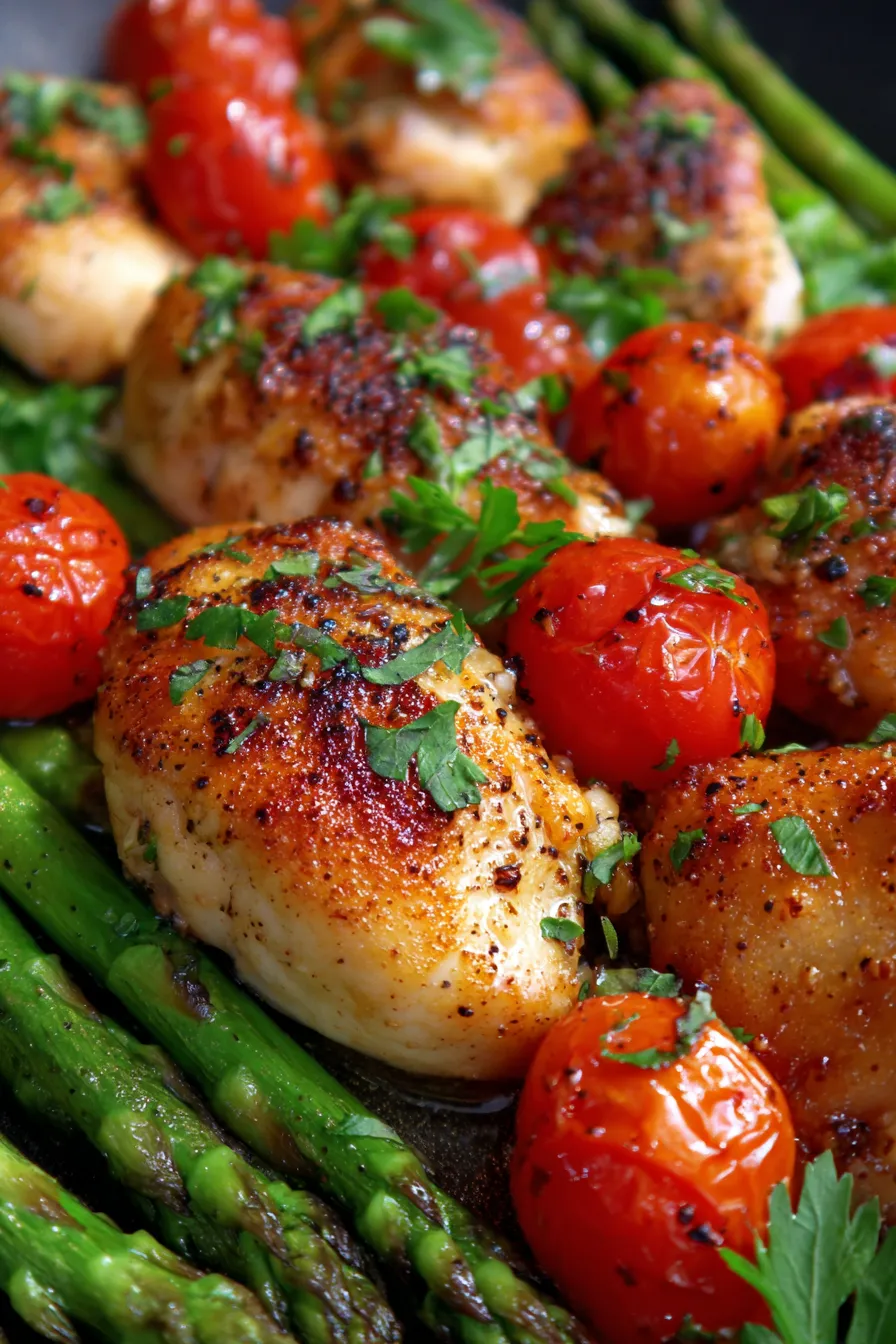
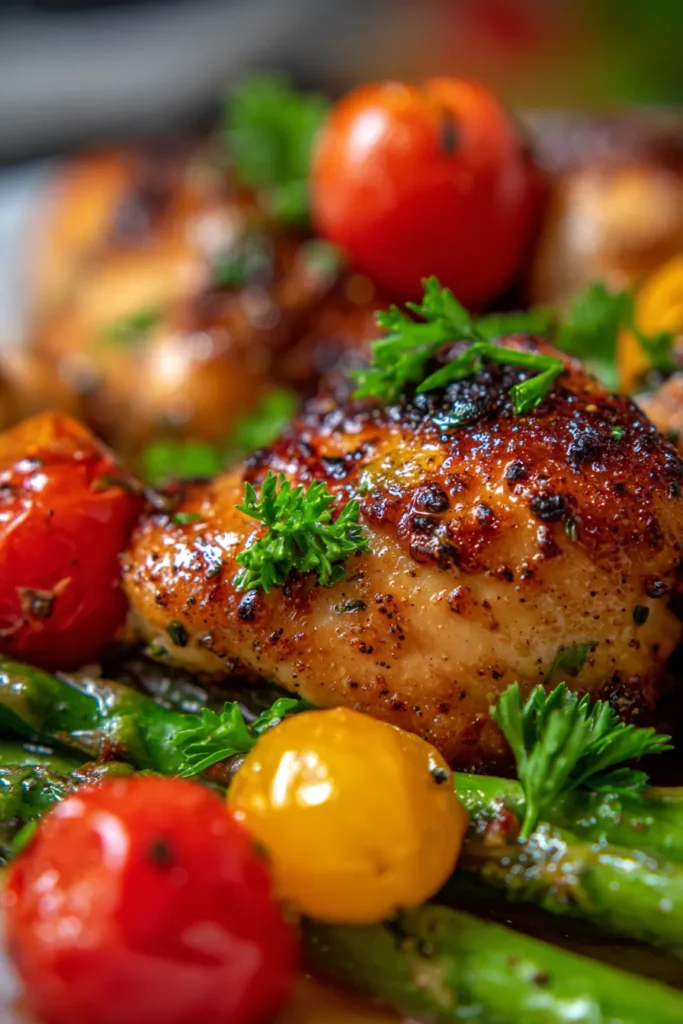
- 1 lb asparagus, trimmed and cut into 1-inch pieces
- 1 cup cherry tomatoes, halved
- 1/4 cup fresh parsley, chopped
- 1 lemon, halved (for serving)
- Salt and freshly ground black pepper to taste
Instructions
- Step 1 Preheat your oven to 400°F (200°C). Pat chicken thighs dry with paper towels and season generously with salt and black pepper.
- Step 2 In a large, oven-safe skillet (preferably cast iron), heat olive oil over medium-high heat. Once hot, place chicken thighs skin-side down and sear for 6-8 minutes until golden brown and crispy. Flip and sear for another 2-3 minutes. Remove chicken from the pan and set aside.
- Step 3 Reduce heat to medium. Add butter to the same skillet. Once melted, add minced garlic, dried oregano, and red pepper flakes (if using). Sautu00e9 for 1 minute until fragrant, being careful not to burn the garlic.
- Step 4 Add asparagus and cherry tomatoes to the skillet. Toss to coat them in the garlic butter sauce. Season lightly with salt and pepper.
- Step 5 Return the seared chicken thighs to the skillet, nestling them among the vegetables. Ensure the chicken pieces are skin-side up.
- Step 6 Transfer the skillet to the preheated oven and bake for 15-20 minutes, or until the chicken reaches an internal temperature of 165°F (74°C) and vegetables are tender-crisp.
- Step 7 Remove from oven. Squeeze fresh lemon juice over the chicken and vegetables, then garnish generously with fresh chopped parsley.
- Step 8 Let the chicken rest in the pan for 5 minutes before serving. Serve hot and enjoy!