Best Ever 🍰🍨🍓 Delightful Dessert Extravaganza: Sweeten Your Day! 🍰🍨🍓 There are some desserts that just transport you back in time, isn’t there? For me, it’s any layered, fruit-filled masterpiece. I remember lazy summer afternoons at my grandmother’s house, the scent of fresh berries filling the air as she’d effortlessly whip up a stunning, cool…
Best Ever 🍰🍨🍓 Delightful Dessert Extravaganza: Sweeten Your Day! 🍰🍨🍓
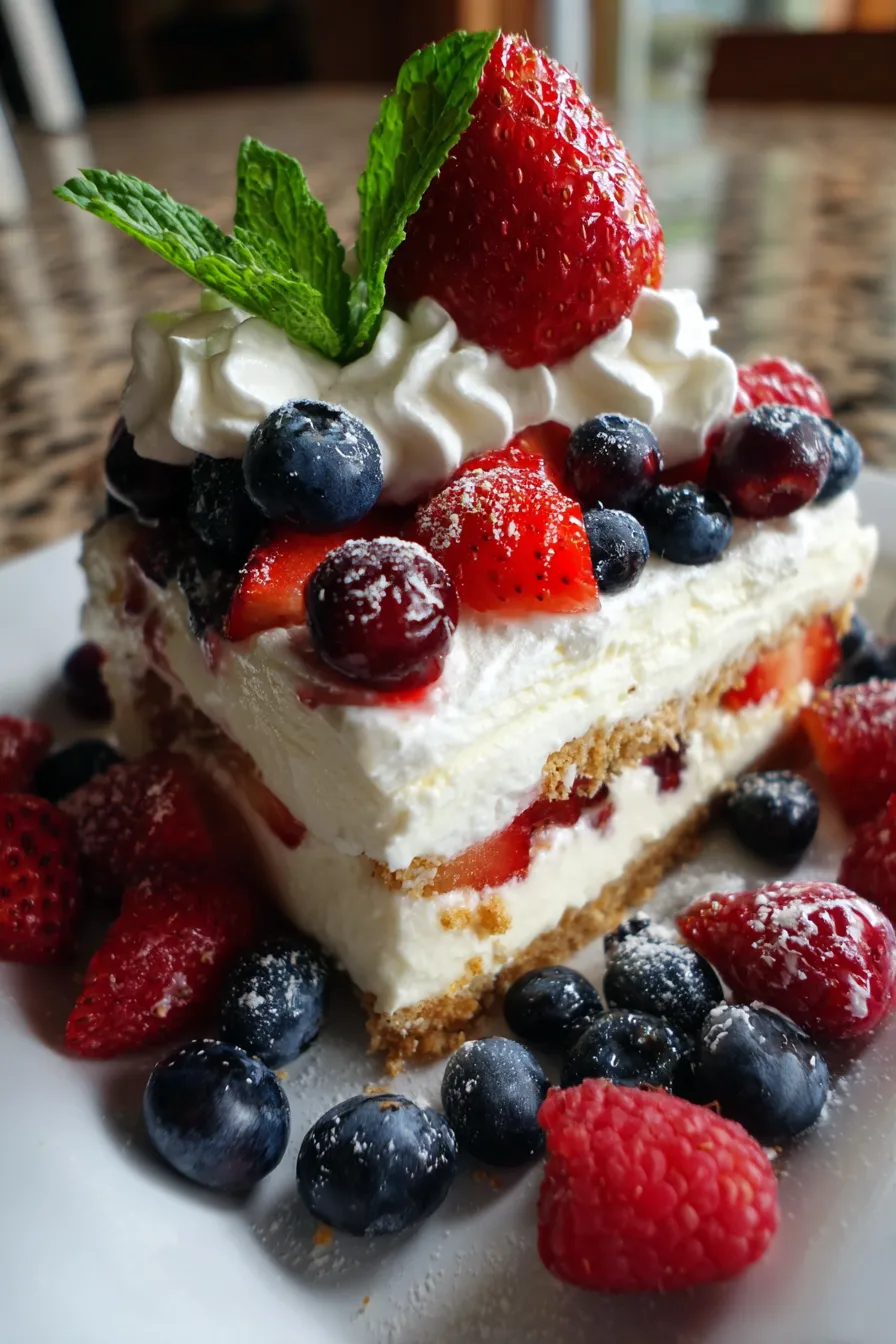
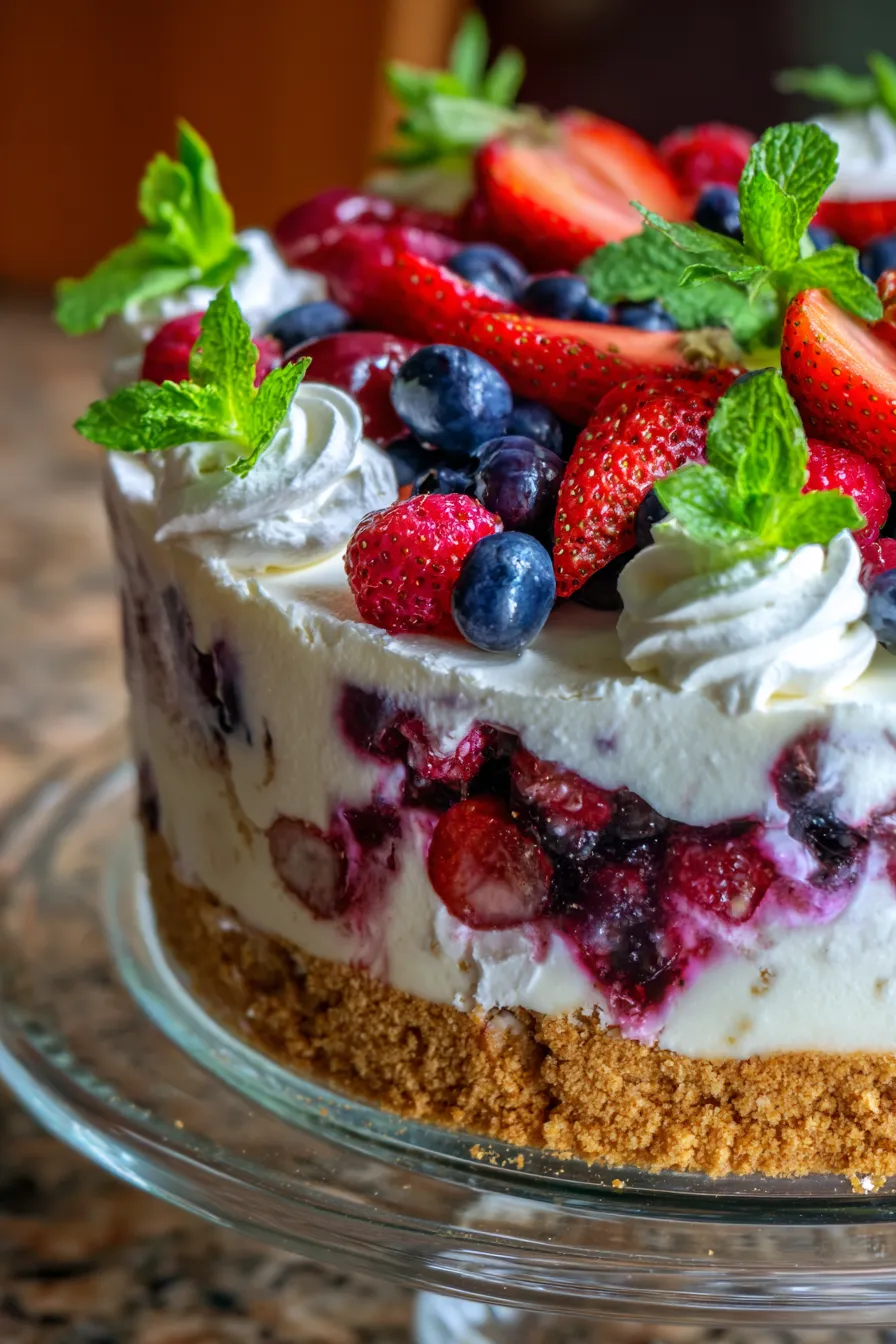
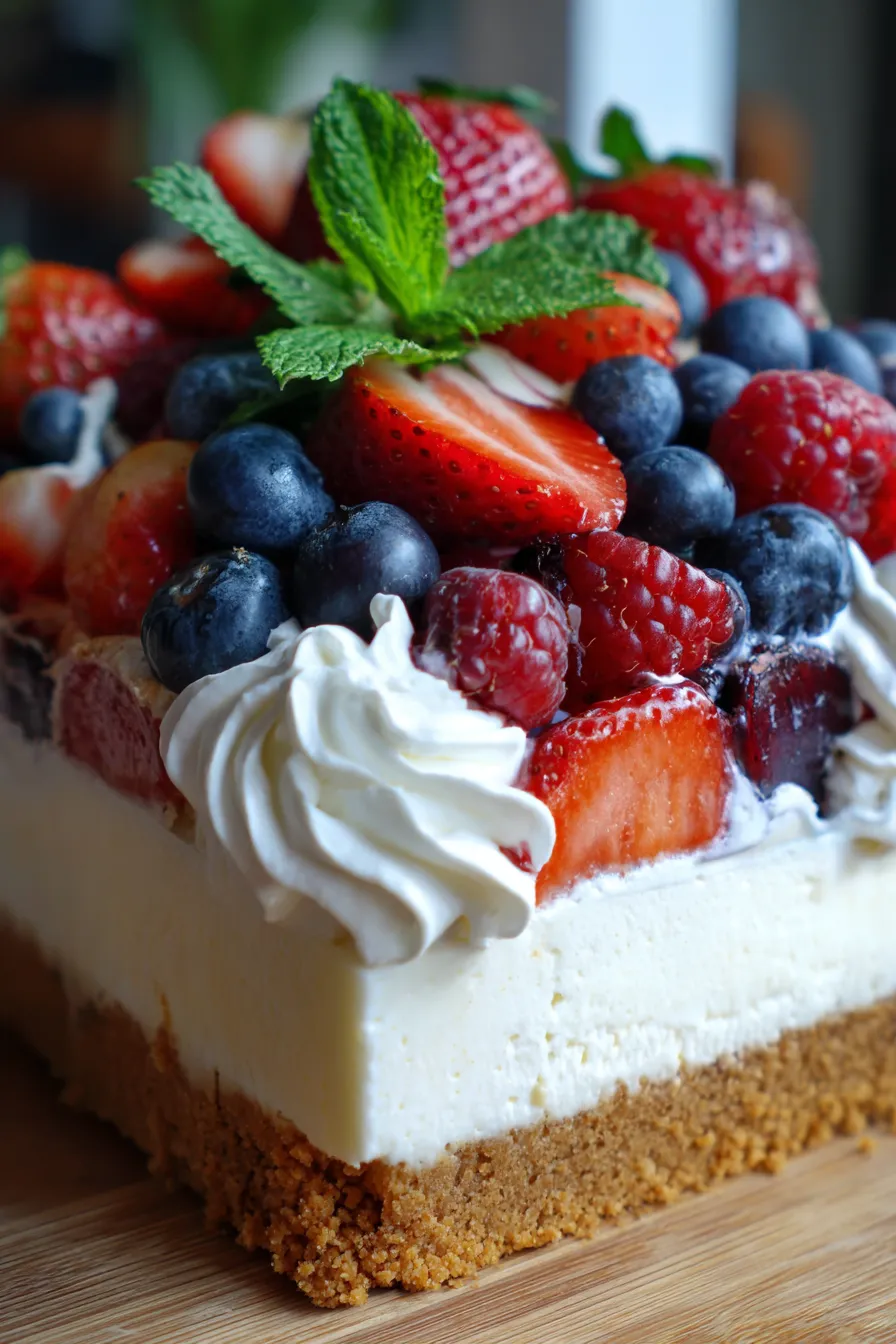
There are some desserts that just transport you back in time, isn’t there? For me, it’s any layered, fruit-filled masterpiece. I remember lazy summer afternoons at my grandmother’s house, the scent of fresh berries filling the air as she’d effortlessly whip up a stunning, cool dessert. It was always the centerpiece, a symphony of flavors and textures that promised pure joy with every spoonful.
That cherished memory sparked a mission: to create a dessert that captures that same magic – effortless elegance, vibrant flavor, and guaranteed smiles. And that, my friends, is how this 🍰🍨🍓 Delightful Dessert Extravaganza: Sweeten Your Day! 🍰🍨🍓 was born! It’s an easy dessert recipe, a true crowd-pleaser, and a delicious testament to simple ingredients creating something truly spectacular. This recipe has been tested countless times and has become a family favorite for every special occasion treat.
Why You’ll Love This Recipe
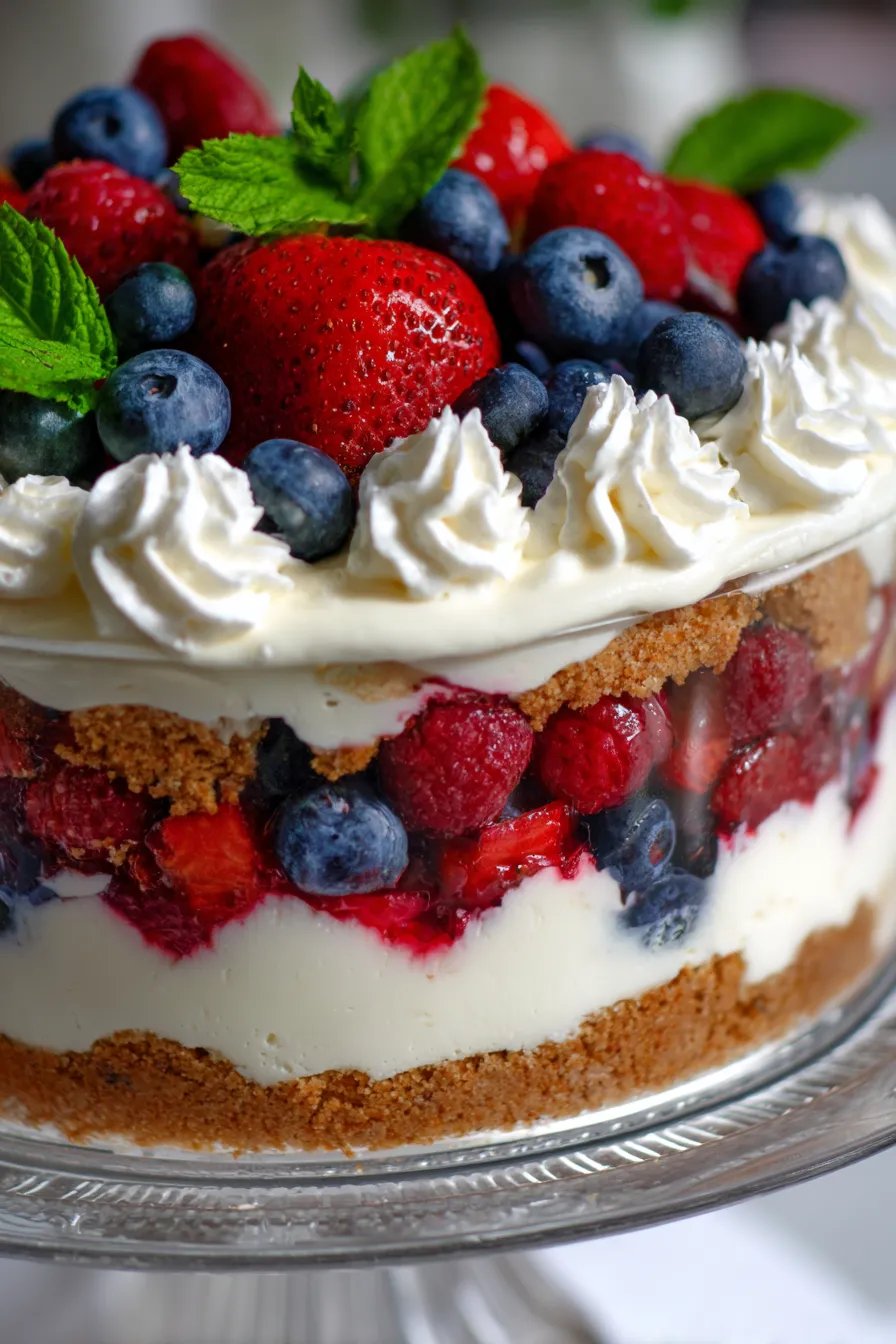
- ❤️ Effortlessly Elegant & No-Bake Wonder: Forget the oven! This dessert comes together beautifully with minimal fuss, making it perfect for impressing guests without breaking a sweat. Its layered design looks incredibly sophisticated, promising a delightful reveal with every slice.
- ❤️ A Symphony of Flavors: Each bite delivers a harmonious blend of sweet, tangy, and creamy. The rich, velvety cream cheese filling perfectly complements the vibrant burst of fresh berries, all grounded by a subtly sweet, buttery crust. It’s a flavor profile that truly satisfies every single craving.
- ❤️ Visually Stunning & Pinterest-Perfect: With its distinct, colorful layers of fruit, creamy filling, and golden crust, this Delightful Dessert Extravaganza is an absolute showstopper. It’s designed to be mobile-friendly and utterly Instagrammable, making it a joy to share with friends and family, both in person and online.
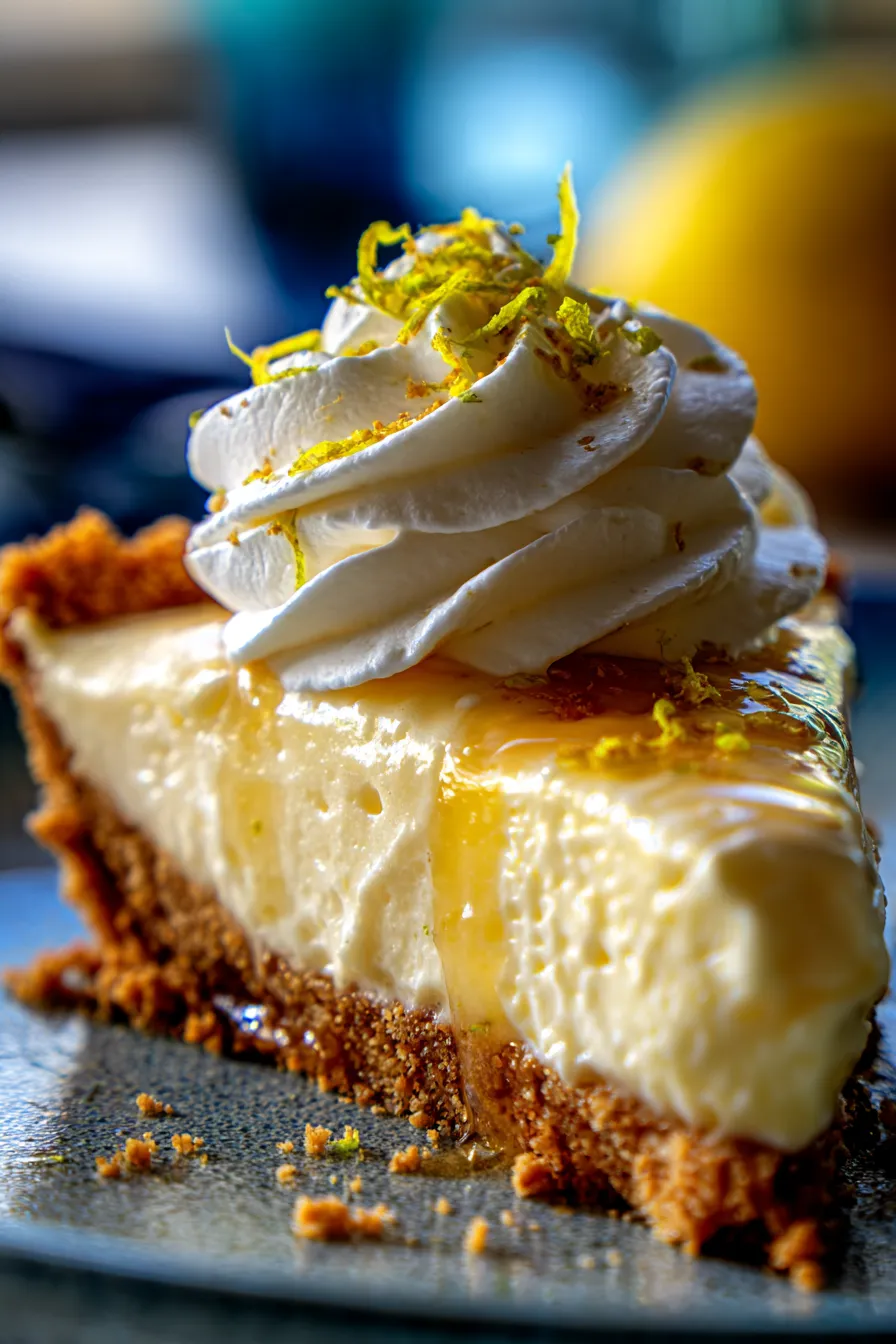
- ❤️ Incredibly Versatile & Customizable: This recipe is a canvas for your culinary creativity! Easily swap out fruits based on seasonality or personal preference – think peaches, mangoes, or even a tropical blend. You can also experiment with different crusts or add a hint of citrus zest to the creamy layer for an extra pop.
- ❤️ The Ultimate Make-Ahead Marvel: Planning a party or a special dinner? This dessert is your best friend. It needs time to chill and set, which means you can assemble it hours, or even a day, in advance. This frees you up to enjoy your event, knowing dessert is already perfected and waiting.
- ❤️ Guaranteed Crowd-Pleaser & Memory Maker: I’ve never served this dessert without getting rave reviews and requests for the recipe. It has a magical way of bringing people together, sparking conversations, and creating lasting, sweet memories. It’s truly a dessert that tastes like pure happiness and celebration.
- ❤️ Accessible Ingredients, Incredible Results: You don’t need obscure or expensive ingredients to create this masterpiece. Simple, fresh components combine to create a dessert that tastes far more luxurious than its humble beginnings suggest. It’s proof that the best things in life are often the simplest.
What You Need
You only need a few simple pantry staples and fresh ingredients for this recipe! Check the full printable recipe card below for detailed measurements and a complete list of what you’ll need to create this delightful treat.
Expert Tips
- 💡 Embrace Fresh, Ripe Berries: The success of this dessert truly hinges on the quality of your fruit. Choose plump, vibrant, and perfectly ripe strawberries, blueberries, and raspberries. Give them a gentle rinse and dry them thoroughly before layering to prevent any excess moisture from affecting the dessert’s texture.
- 💡 Chilling is Critical: Patience is a virtue, especially with no-bake desserts! Each layer needs adequate time in the refrigerator to set properly. Resist the urge to rush this step; firm layers ensure clean slices and a beautifully structured dessert. Aim for at least 2-4 hours, or even overnight, for optimal results.
- 💡 Achieving Perfect Layers: When spreading the creamy filling over the crust, do so gently and evenly using an offset spatula or the back of a spoon. For the fruit layer, arrange the berries carefully to create a visually appealing, distinct layer. Don’t press down too hard, allowing the fruit to sit nicely on top of the cream.
- 💡 Temperature Matters for Cream Cheese: Ensure your cream cheese is at room temperature before you begin mixing. This is crucial for achieving a smooth, lump-free creamy layer. Cold cream cheese will result in a lumpy mixture, which isn’t ideal for a luscious, velvety filling.
- 💡 Whip Cream to Stiff Peaks: For the most luxurious and stable creamy layer, whip your heavy cream until it forms stiff peaks. This will give your dessert a light, airy texture and prevent it from becoming too dense. Be careful not to over-whip, as it can turn grainy.
- 💡 Garnish for Grandeur: Elevate your Extravaganza with a thoughtful garnish! A sprinkle of powdered sugar, a few fresh mint leaves, chocolate shavings, or a few extra berries can turn a delicious dessert into an edible work of art. Presentation truly makes a difference.
- 💡 Clean Slices Every Time: To get those picture-perfect slices, warm your knife under hot water, wipe it dry, and then make your cut. Repeat this process for each slice. This trick helps the knife glide through the layers without dragging, leaving you with neat, defined portions.
- 💡 Preventing a Soggy Crust: If you’re concerned about your graham cracker crust becoming too soft, consider brushing a very thin layer of melted white chocolate or dark chocolate over the chilled crust before adding the creamy filling. This creates a barrier that helps maintain its crispness.
- 💡 Sweetness Adjustment: Taste the creamy filling before spreading it. If you prefer a sweeter dessert, feel free to add a little more powdered sugar, a tablespoon at a time, until it meets your preference. The beauty of homemade is customization!
Variations & Substitutions
One of the best things about this Delightful Dessert Extravaganza is how adaptable it is! Feel free to get creative and make it your own.
- Fruit Fanatics: While berries are classic, consider swapping them for sliced peaches, kiwi, mangoes, or a tropical fruit medley. Just ensure your chosen fruits aren’t too watery.
- Crust Creativity: Instead of graham cracker crumbs, try crushed Oreo cookies (for a chocolatey twist), shortbread cookies, or even gluten-free digestive biscuits for dietary needs.
- Creamy Layer Options: For a richer flavor, you can substitute some of the cream cheese with mascarpone. For a dairy-free option, use full-fat coconut cream (chilled overnight) whipped until stiff with a dairy-free cream cheese alternative.
- Flavor Boosts: Add a teaspoon of lemon zest or orange zest to the creamy filling for a bright citrus note. A splash of liqueur, such as Chambord (raspberry liqueur) or Grand Marnier, can also add a sophisticated touch.
- Dietary Adaptations: For a gluten-free version, simply use gluten-free graham crackers or cookies for the crust. For a reduced-sugar option, use a sugar substitute in the filling and ensure your fruits are naturally sweet.
Storage & Freezing
This dessert is best enjoyed fresh, but it stores wonderfully for a few days! Keep any leftovers tightly covered with plastic wrap in the refrigerator for up to 3-4 days. While technically possible, freezing is not recommended as the texture of the cream cheese filling and fresh fruit can change significantly upon thawing, becoming somewhat watery and grainy. It’s truly a dessert best served chilled, not frozen.
FAQ
Q: Can I make this Delightful Dessert Extravaganza a day ahead?
A: Absolutely! This dessert is perfect for making in advance. In fact, an overnight chill allows all the flavors to meld beautifully and ensures the layers are perfectly set, making it an ideal choice for entertaining.
Q: What are the best fruits to use for this recipe?
A: Soft, ripe fruits like strawberries, blueberries, raspberries, and blackberries work exceptionally well. Sliced peaches, kiwi, or mangoes can also be delightful. Avoid fruits with high water content or those that brown quickly.
Q: How do I prevent the graham cracker crust from getting soggy?
A: A good, firm chill after pressing the crust into the pan helps. You can also brush a very thin layer of melted white chocolate or dark chocolate over the chilled crust before adding the creamy filling. Once set, this creates a barrier against moisture.
Q: Is this dessert suitable for a large party?
A: Yes, it is! You can easily double the recipe and prepare it in a larger rectangular pan or a trifle dish. Its impressive appearance and crowd-pleasing flavors make it a fantastic option for gatherings and celebrations.
So, there you have it! A dessert that’s not just delicious, but also brings a touch of effortless elegance and joy to any table. Whether you’re celebrating a special occasion or simply craving a sweet escape, this 🍰🍨🍓 Delightful Dessert Extravaganza is sure to brighten your day. Give it a try, share it with loved ones, and savor every delightful bite. Don’t forget to Pin this recipe for later so you can revisit this sweet sensation whenever the craving strikes!

Delightful Dessert Extravaganza: Easy Layered Fruit Treat
Ingredients
- 1 ½ cups graham cracker crumbs
- ¼ cup granulated sugar
- ½ cup unsalted butter, melted
- 16 oz (2 blocks) cream cheese, softened
- 1 cup powdered sugar
- 1 tsp vanilla extract
- 2 cups heavy cream, divided
- 2 cups mixed berries (strawberries, blueberries, raspberries), fresh
- 1 tbsp granulated sugar (for berries)
- ½ tsp lemon juice (optional, for berries)
- Fresh mint leaves for garnish
Instructions
- Step 1 Prepare the crust: In a medium bowl, combine graham cracker crumbs, ¼ cup granulated sugar, and melted butter. Mix until well combined. Press the mixture firmly into the bottom of a 9x13 inch baking dish. Place in the refrigerator to chill for at least 30 minutes while preparing the filling.
- Step 2 Make the cream cheese layer: In a large bowl, using an electric mixer, beat the softened cream cheese until smooth and creamy. Gradually add the powdered sugar and vanilla extract, beating until fully incorporated and light. In a separate cold bowl, whip 1 cup of heavy cream until stiff peaks form.
- Step 3 Gently fold the whipped cream into the cream cheese mixture until no streaks remain. Spread this creamy mixture evenly over the chilled graham cracker crust. Return the dish to the refrigerator and chill for at least 2 hours, or until the cream cheese layer is firm.
- Step 4 Prepare the fruit layer: In a small bowl, gently combine the mixed berries with 1 tablespoon of granulated sugar and optional lemon juice. Let sit for 10 minutes to allow juices to release slightly. Carefully arrange the berries over the set cream cheese layer.
- Step 5 Whip remaining cream and garnish: In a clean cold bowl, whip the remaining 1 cup of heavy cream until stiff peaks form. Spread or pipe this whipped cream over the fruit layer. Garnish with fresh mint leaves and any remaining berries, if desired.
- Step 6 Chill thoroughly: Return the dessert to the refrigerator and chill for at least 2 more hours, or preferably overnight, to allow all the layers to set completely and flavors to meld. Once fully chilled, slice with a warm, clean knife and serve immediately.