Caramel Apple Tart for Thanksgiving: A Delightful Autumn Dessert Thanksgiving is a time for tradition, family, and, of course, delicious food. While pumpkin pie often takes center stage, why not shake things up this year with a stunning Caramel Apple Tart? This dessert combines the comforting flavors of fall – crisp apples, warm spices, and…
Caramel Apple Tart for Thanksgiving: A Delightful Autumn Dessert
Thanksgiving is a time for tradition, family, and, of course, delicious food. While pumpkin pie often takes center stage, why not shake things up this year with a stunning Caramel Apple Tart? This dessert combines the comforting flavors of fall – crisp apples, warm spices, and rich caramel – into a show-stopping treat that’s sure to impress your guests. This article will guide you through creating the perfect Caramel Apple Tart for your Thanksgiving celebration, offering tips, variations, and answers to common questions.
The Allure of Caramel Apple Tart
Why choose a Caramel Apple Tart over other Thanksgiving desserts? It’s a fantastic alternative or addition to traditional pumpkin pie. Here’s why it’s a crowd-pleaser:
- Flavor Profile: The combination of sweet, tart, and buttery flavors is irresistible. The caramelized apples offer a depth of flavor that pairs perfectly with a flaky, buttery crust and the smooth, decadent caramel.
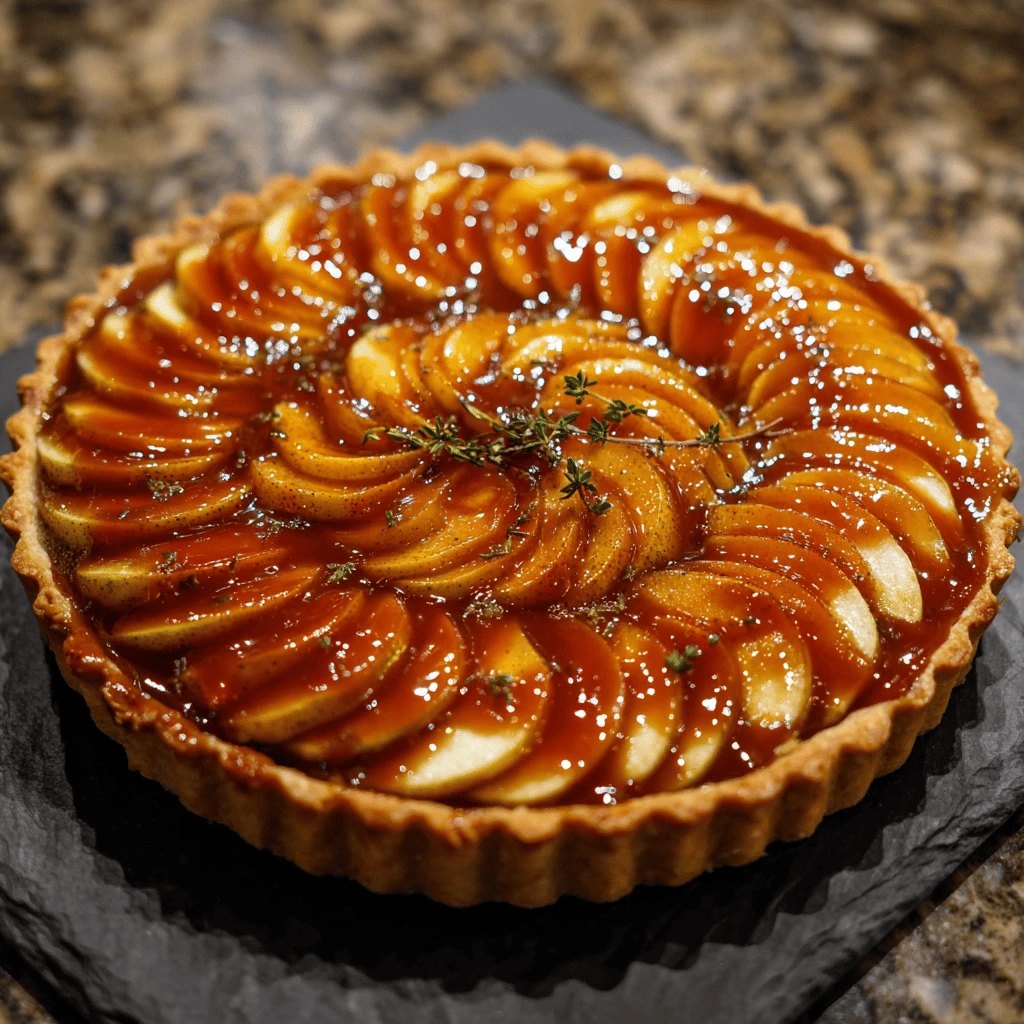
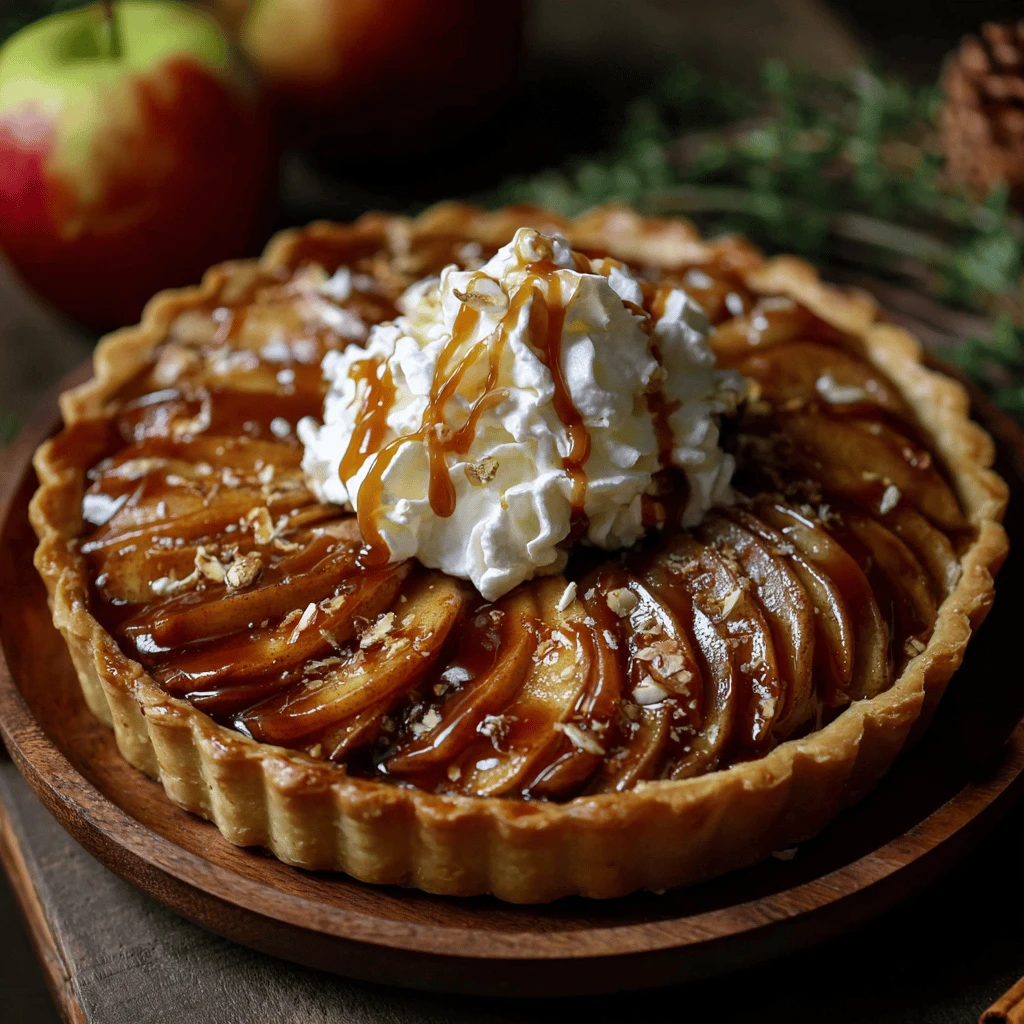
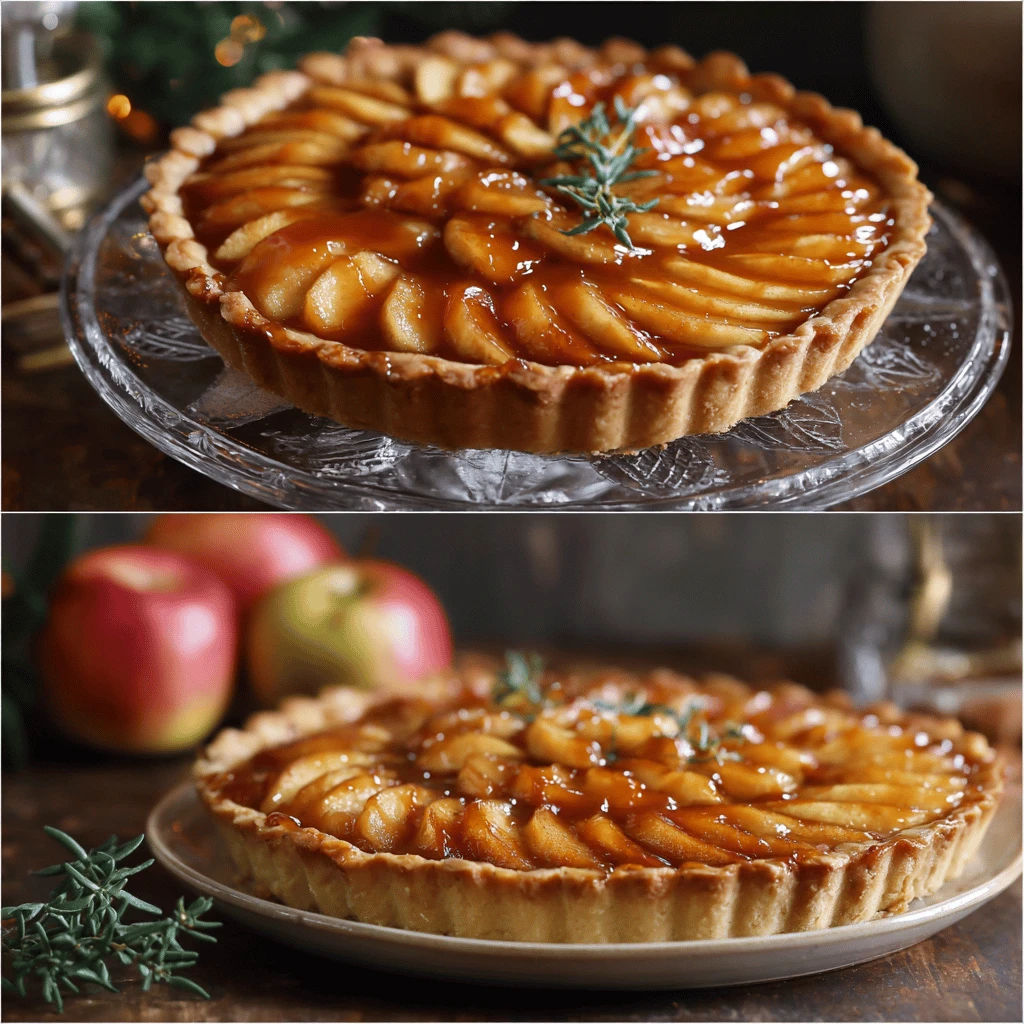
- Visual Appeal: A well-made Caramel Apple Tart is a beautiful dessert. The arrangement of the apple slices, the glistening caramel, and the golden-brown crust create an inviting visual that’s worthy of your Thanksgiving table.
- Versatility: You can customize the tart to suit your preferences. Use different apple varieties, add nuts or spices, or even incorporate a crumb topping for added texture.
- Make-Ahead Potential: Many components of the tart can be made in advance, making it a stress-free addition to your Thanksgiving menu. You can prepare the crust and caramel sauce ahead of time, and even assemble the tart the day before baking.
Crafting the Perfect Tart: A Step-by-Step Guide
Creating a Caramel Apple Tart involves several key steps, each contributing to the final result. Here’s a detailed guide to help you achieve perfection:
1. Preparing the Crust: Foundation of Flavor
The crust is the foundation of any good tart. A homemade crust offers the best flavor and texture, but a store-bought crust can be a convenient alternative.
- Homemade Crust: A classic pâte brisée (sweet shortcrust pastry) is ideal. It’s buttery, flaky, and slightly sweet. Use cold butter and ice water to prevent gluten development and ensure a tender crust.
- Store-Bought Crust: Choose a high-quality, all-butter crust for the best flavor. Pre-made crusts are available in the refrigerated or frozen section of most supermarkets.
- Blind Baking: Blind baking is essential to prevent a soggy bottom crust. Dock the crust with a fork, line it with parchment paper and pie weights (or dried beans), and bake until lightly golden. Remove the weights and parchment paper, and bake for a few more minutes to ensure the crust is fully cooked.
2. The Apple Filling: Selecting the Right Apples
The type of apples you choose significantly impacts the tart’s flavor and texture.
-
- Best Apple Varieties: Look for apples that hold their shape well during baking and offer a good balance of sweet and tartness. Some excellent choices include:
Honeycrisp: Crisp, sweet, and slightly tart.
Granny Smith: Tart and firm, adding a nice contrast to the sweetness of the caramel.
Fuji: Sweet and juicy, with a slightly firm texture.
Gala: Sweet and mild, a good all-purpose apple.
- Preparing the Apples: Peel, core, and slice the apples thinly. Toss them with lemon juice to prevent browning and add a touch of brightness. You can also add spices like cinnamon, nutmeg, and cloves to enhance the flavor.
- Layering the Apples: Arrange the apple slices in concentric circles or overlapping rows in the pre-baked crust.
3. The Caramel Sauce: A Symphony of Sweetness
The caramel sauce is the star of the show, adding richness and depth of flavor to the tart.
-
- Homemade Caramel Sauce: While store-bought caramel sauce can work in a pinch, homemade caramel sauce is far superior. It’s surprisingly easy to make and tastes incredible.
Ingredients: Sugar, butter, heavy cream, vanilla extract, and a pinch of salt.
Method: Cook the sugar until it melts and caramelizes, then add butter and heavy cream. Stir until smooth and glossy. Finish with vanilla extract and salt.
- Adding the Caramel: Pour the caramel sauce over the apple slices, making sure to coat them evenly.
4. Baking and Finishing: Achieving Golden Perfection
Baking the tart to perfection is crucial for a beautiful and delicious final product.
- Baking Temperature and Time: Bake the tart at 375°F (190°C) until the crust is golden brown and the apples are tender. The baking time will vary depending on the size of the tart and the type of apples used, but it typically takes around 45-60 minutes.
- Checking for Doneness: The apples should be tender when pierced with a fork. The caramel sauce should be bubbly and slightly thickened.
- Cooling and Serving: Allow the tart to cool completely before serving. This allows the caramel sauce to set and the flavors to meld together. You can serve the tart warm or at room temperature, with a dollop of whipped cream or a scoop of vanilla ice cream.
Variations and Enhancements: Personalizing Your Tart
The basic Caramel Apple Tart recipe is a great starting point, but there are many ways to customize it to your liking.
- Nuts: Add chopped nuts like pecans, walnuts, or almonds to the filling or sprinkle them on top of the tart before baking for added texture and flavor.
- Spices: Experiment with different spices like cardamom, ginger, or allspice to create unique flavor profiles.
- Crumb Topping: Top the tart with a crumb topping made from flour, butter, sugar, and oats for added texture and sweetness.
- Salted Caramel: Add a pinch of sea salt to the caramel sauce for a salted caramel flavor that complements the sweetness of the apples.
- Bourbon Caramel: Add a splash of bourbon to the caramel sauce for a sophisticated and boozy twist.
Tips for Success: Avoiding Common Pitfalls
Making a Caramel Apple Tart can be a rewarding experience, but it’s essential to be aware of common pitfalls and how to avoid them.
- Soggy Bottom Crust: Blind baking the crust is crucial to prevent a soggy bottom. Make sure to dock the crust with a fork and use pie weights or dried beans to prevent it from puffing up.
- Burning the Caramel: Keep a close eye on the caramel sauce while it’s cooking to prevent it from burning. Stir constantly and use a heavy-bottomed saucepan to distribute heat evenly.
- Tough Apple Filling: Choose apples that hold their shape well during baking and slice them thinly to ensure they cook evenly.
- Cracked Tart: Allow the tart to cool completely before serving to prevent the crust from cracking.
Frequently Asked Questions (FAQs)
Here are some common questions about making Caramel Apple Tart:
- Can I make the tart ahead of time? Yes, you can make the crust and caramel sauce ahead of time. Store them separately in the refrigerator until you’re ready to assemble the tart. You can also assemble the tart the day before baking.
- How do I store leftover tart? Store leftover tart in the refrigerator, covered tightly, for up to 3 days.
- Can I freeze the tart? Yes, you can freeze the tart after it has been baked and cooled. Wrap it tightly in plastic wrap and then in foil. Freeze for up to 2 months. Thaw in the refrigerator overnight before serving.
- What can I serve with Caramel Apple Tart? Caramel Apple Tart is delicious on its own, but it’s also great served with whipped cream, vanilla ice cream, or a drizzle of extra caramel sauce.
- Can I use store-bought caramel sauce? Yes, you can use store-bought caramel sauce, but homemade caramel sauce is always better.
- What other fruits can I use? While apples are classic, you can experiment with other fruits like pears or peaches.