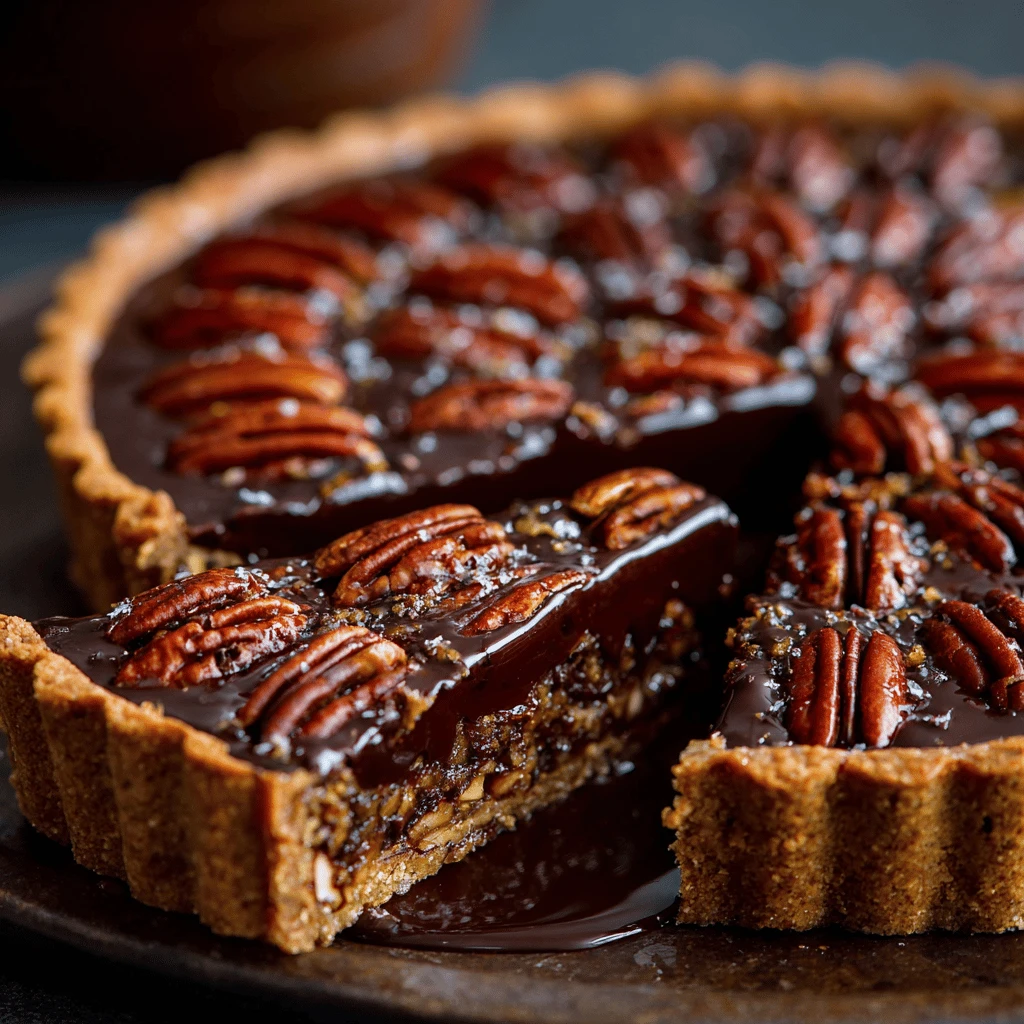
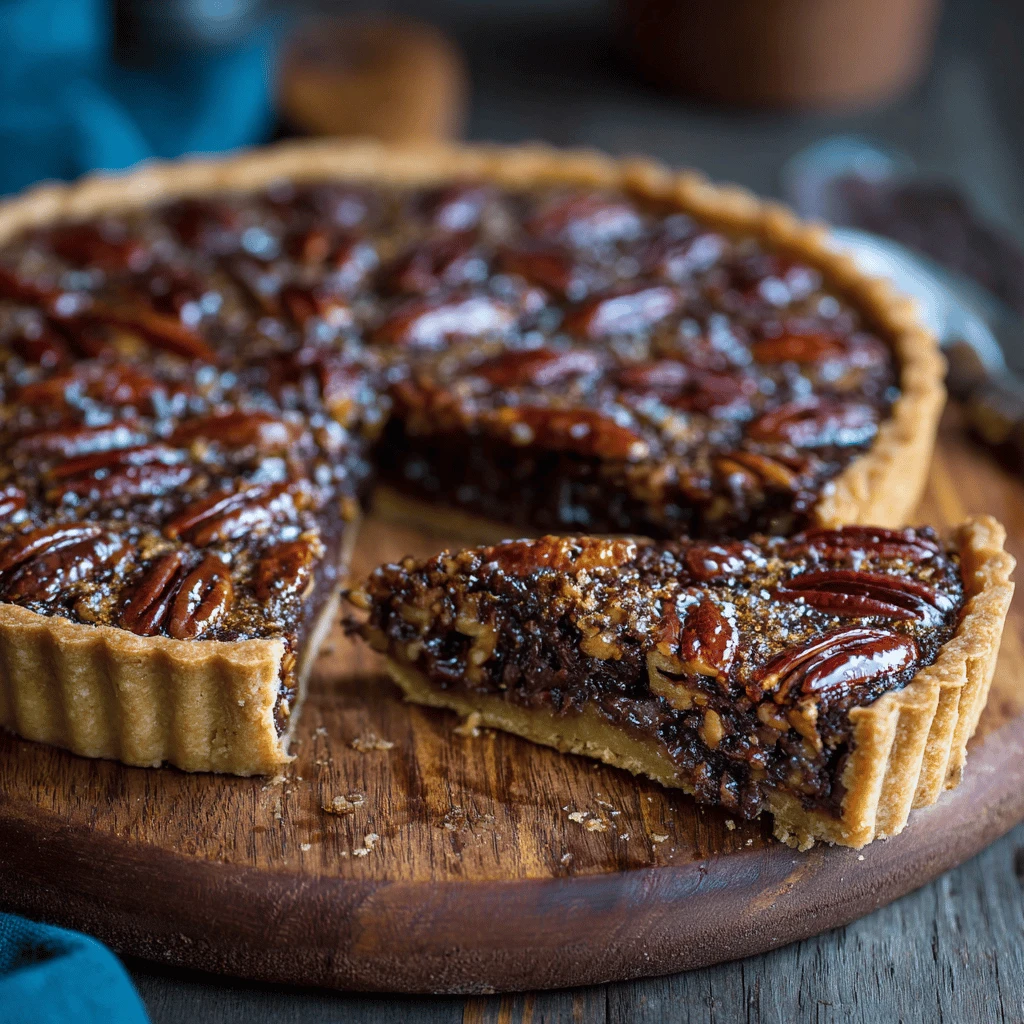
Chocolate Pecan Tart: The Ultimate Thanksgiving Dessert Thanksgiving is a time for family, gratitude, and, of course, delicious food. While pumpkin pie often takes center stage, why not shake things up this year with a decadent and unforgettable Chocolate Pecan Tart? This rich, nutty, and chocolatey treat is sure to impress your guests and become…
Chocolate Pecan Tart: The Ultimate Thanksgiving Dessert
Thanksgiving is a time for family, gratitude, and, of course, delicious food. While pumpkin pie often takes center stage, why not shake things up this year with a decadent and unforgettable Chocolate Pecan Tart? This rich, nutty, and chocolatey treat is sure to impress your guests and become a new Thanksgiving tradition.
Why Choose a Chocolate Pecan Tart for Thanksgiving?
Let’s face it, Thanksgiving dessert tables can be a bit predictable. Pumpkin pie, apple pie, maybe a pecan pie if you’re lucky. A Chocolate Pecan Tart offers a sophisticated and exciting alternative, appealing to chocolate lovers and those seeking something a little different. It brings a touch of elegance to the holiday feast while still providing the comforting flavors of pecan pie that everyone enjoys.
Furthermore, a Chocolate Pecan Tart can be prepared ahead of time, freeing up precious oven space and your time on Thanksgiving Day. This make-ahead convenience is a huge plus when you’re juggling multiple dishes and entertaining guests. Plus, the rich chocolate filling provides a beautiful contrast to the traditional Thanksgiving flavors, creating a balanced and satisfying dessert experience.
Crafting the Perfect Chocolate Pecan Tart: A Step-by-Step Guide
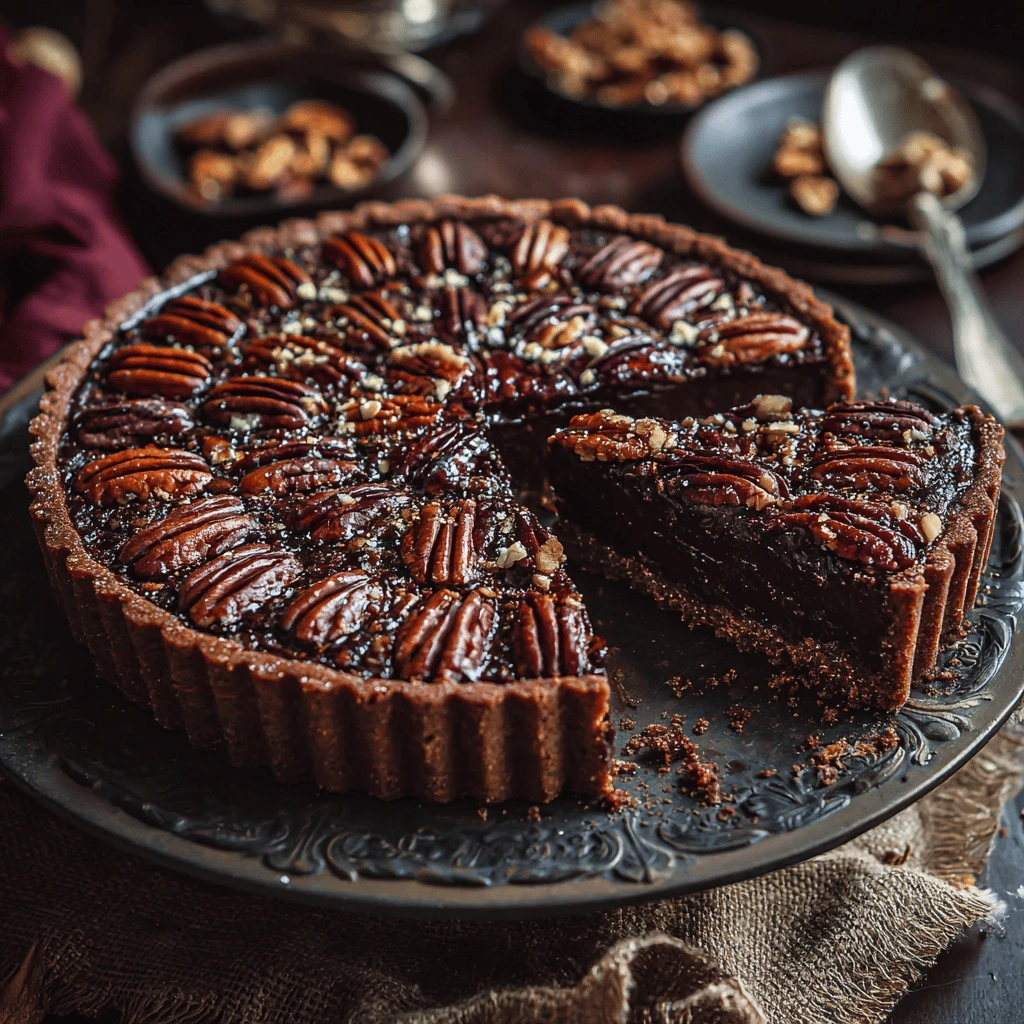
Creating a truly memorable Chocolate Pecan Tart involves a few key elements: a buttery, flaky crust, a luscious chocolate filling, and a generous topping of perfectly toasted pecans. Here’s a detailed guide to achieving tart perfection:
The Crust: Buttery and Flaky Foundation
The crust is the unsung hero of any tart. A soggy or tough crust can ruin the entire experience. To achieve a perfectly flaky crust, it’s crucial to keep the ingredients cold.
- Ingredients: Use a classic pie crust recipe, incorporating ingredients such as all-purpose flour, cold unsalted butter, ice water, sugar, and a pinch of salt. Some recipes may include shortening for added tenderness.
- Preparation: Cut the cold butter into small cubes and work it into the flour using a pastry blender or your fingertips until the mixture resembles coarse crumbs. Gradually add the ice water, mixing until the dough just comes together.
- Chilling: Wrap the dough in plastic wrap and chill for at least 30 minutes (preferably an hour or more) to allow the gluten to relax.
- Rolling and Shaping: On a lightly floured surface, roll out the dough to a 12-inch circle. Carefully transfer it to a 9-inch tart pan with a removable bottom. Gently press the dough into the pan and trim any excess. Crimp the edges for a decorative finish.
- Blind Baking: To prevent a soggy bottom, pre-bake the crust (blind bake) before adding the filling. Line the crust with parchment paper and fill it with pie weights or dried beans. Bake in a preheated oven at 375°F (190°C) for 15-20 minutes. Remove the weights and parchment paper and bake for another 5-10 minutes until the crust is lightly golden brown.
The Chocolate Filling: Rich and Decadent Delight
The chocolate filling is where the magic happens. The key is to use high-quality chocolate for a rich and intense flavor.
- Ingredients: A combination of semi-sweet or dark chocolate (or a mix of both), heavy cream, butter, eggs, sugar, and a touch of vanilla extract creates a luxurious filling. Some recipes may call for corn syrup or a liqueur for added depth of flavor.
- Preparation: Melt the chocolate and butter together in a double boiler or in the microwave in 30-second intervals, stirring until smooth. In a separate bowl, whisk together the eggs and sugar until light and fluffy. Gradually pour the melted chocolate mixture into the egg mixture, whisking constantly. Stir in the heavy cream and vanilla extract until well combined.
- Pouring: Pour the chocolate filling into the pre-baked tart crust.
The Pecan Topping: Crunchy and Nutty Perfection
The pecan topping adds a delightful crunch and nutty flavor that complements the rich chocolate filling.
- Ingredients: Pecan halves, butter, brown sugar, and a pinch of salt are the simple ingredients for a perfect pecan topping. Some recipes may include a sprinkle of cinnamon or nutmeg for added warmth.
- Preparation: Melt the butter in a saucepan over medium heat. Add the brown sugar and salt, stirring until dissolved. Add the pecan halves and toss to coat.
- Arrangement: Arrange the pecan halves artfully on top of the chocolate filling. You can create concentric circles or a more random pattern.
- Baking: Bake the tart in a preheated oven at 350°F (175°C) for 25-30 minutes, or until the filling is set but still slightly soft in the center.
Tips and Tricks for a Flawless Tart
To ensure your Chocolate Pecan Tart is a resounding success, keep these tips and tricks in mind:
- Use High-Quality Ingredients: This is especially important for the chocolate. Using premium chocolate will result in a richer, more flavorful filling.
- Don’t Overbake the Filling: The filling should be set around the edges but still slightly soft in the center. It will continue to set as it cools. Overbaking will result in a dry, cracked filling.
- Toast the Pecans: Toasting the pecans before adding them to the topping enhances their flavor and adds a pleasant crunch. Toast them in a dry skillet over medium heat for a few minutes, or in the oven at 350°F (175°C) for 5-7 minutes.
- Let it Cool Completely: Resist the temptation to cut into the tart while it’s still warm. Allowing it to cool completely (at least a few hours, or even overnight) will allow the filling to set properly and the flavors to meld together.
- Serve with a Garnish: A dollop of whipped cream, a scoop of vanilla ice cream, or a sprinkle of cocoa powder can elevate the presentation of your Chocolate Pecan Tart.
Variations and Adaptations
The Chocolate Pecan Tart is a versatile dessert that can be easily adapted to suit your preferences and dietary needs.
- Gluten-Free: Use a gluten-free pie crust recipe or purchase a pre-made gluten-free crust.
- Vegan: Substitute the butter with vegan butter and the eggs with a flax egg or aquafaba. Use a vegan chocolate.
- Different Nuts: Experiment with other nuts, such as walnuts, hazelnuts, or almonds, in place of pecans.
- Liqueur Infusion: Add a splash of bourbon, rum, or coffee liqueur to the chocolate filling for an extra layer of flavor.
- Salted Caramel: Drizzle a salted caramel sauce over the tart before serving for a sweet and salty twist.
- Mini Tarts: Make individual mini tarts for a charming and elegant presentation. Simply divide the dough and filling into smaller tart pans and adjust the baking time accordingly.
Frequently Asked Questions (FAQ)
Q: Can I make the Chocolate Pecan Tart ahead of time?
A: Absolutely! In fact, it’s recommended. The tart can be made 1-2 days in advance and stored in the refrigerator. This allows the flavors to meld together and the filling to set properly.
Q: How do I prevent the crust from shrinking during baking?
A: Blind baking the crust with pie weights is essential to prevent shrinking. Also, make sure the dough is well-chilled before rolling it out.
Q: Can I freeze the Chocolate Pecan Tart?
A: Yes, you can freeze the tart. Wrap it tightly in plastic wrap and then in aluminum foil. It can be frozen for up to 2 months. Thaw in the refrigerator overnight before serving.
Q: What kind of chocolate should I use?
A: Semi-sweet or dark chocolate is recommended for the filling. Use high-quality chocolate for the best flavor.
Q: How do I store leftover Chocolate Pecan Tart?
A: Store leftover tart in the refrigerator, covered, for up to 3-4 days.
Q: What if the pecan topping starts to brown too quickly?
A: If the pecan topping is browning too quickly, tent the tart with aluminum foil during the last 10-15 minutes of baking.
Q: Can I use a store-bought crust?
A: Yes, a store-bought crust can be used for convenience. Just make sure it’s a good quality crust that will hold its shape during baking.