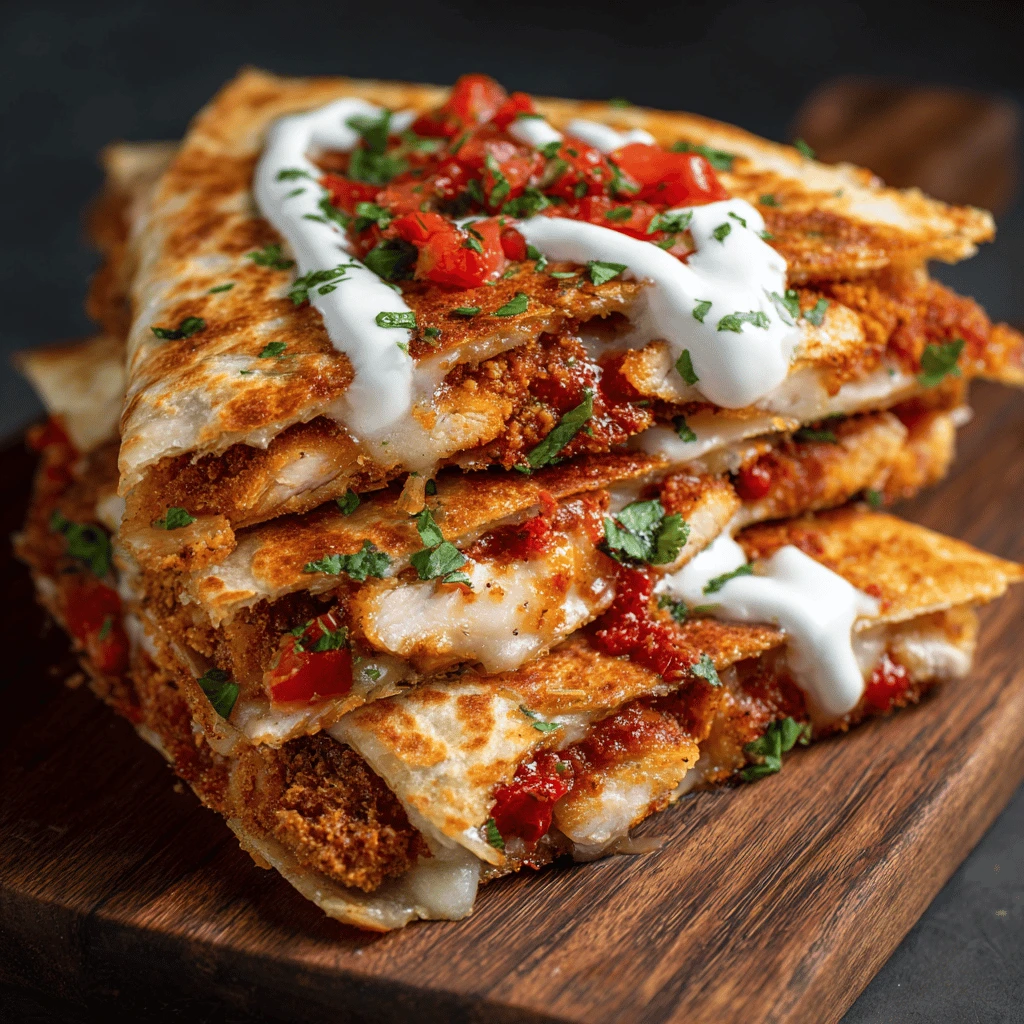
Best Ever Crispy Chicken Fried Chicken (Meal Prep Comfort Recipe) Ah, chicken fried chicken. Just the name conjures images of cozy kitchens, steaming plates, and pure, unadulterated comfort. I can still vividly recall those chilly, grey Saturday afternoons back home. The air would fill with the comforting aroma of frying, and I knew exactly what…
Best Ever Crispy Chicken Fried Chicken (Meal Prep Comfort Recipe)
Ah, chicken fried chicken. Just the name conjures images of cozy kitchens, steaming plates, and pure, unadulterated comfort. I can still vividly recall those chilly, grey Saturday afternoons back home. The air would fill with the comforting aroma of frying, and I knew exactly what was coming: my grandma’s legendary chicken fried chicken. She’d always say, “A good meal starts with love, honey, and a little bit of butter!” Those were the days when simple ingredients transformed into something magical, a dish that hugged you from the inside out.
That cherished memory is exactly what inspired me to perfect this Chicken Fried Chicken (Meal Prep Comfort Recipe). It’s not just a dinner; it’s a warm embrace on a plate, a taste of home that’s surprisingly easy to whip up. Forget the fuss; this tested and true recipe brings all that classic, crispy, juicy goodness right to your modern kitchen, designed even for your busiest weeknights.
This isn’t just about a delicious meal; it’s about reclaiming those moments of culinary joy, proving that ultimate comfort food can absolutely be a part of your healthy, organized meal prep routine. Get ready for an easy dinner that feels like a special occasion, every single time.
Why You’ll Love This Recipe
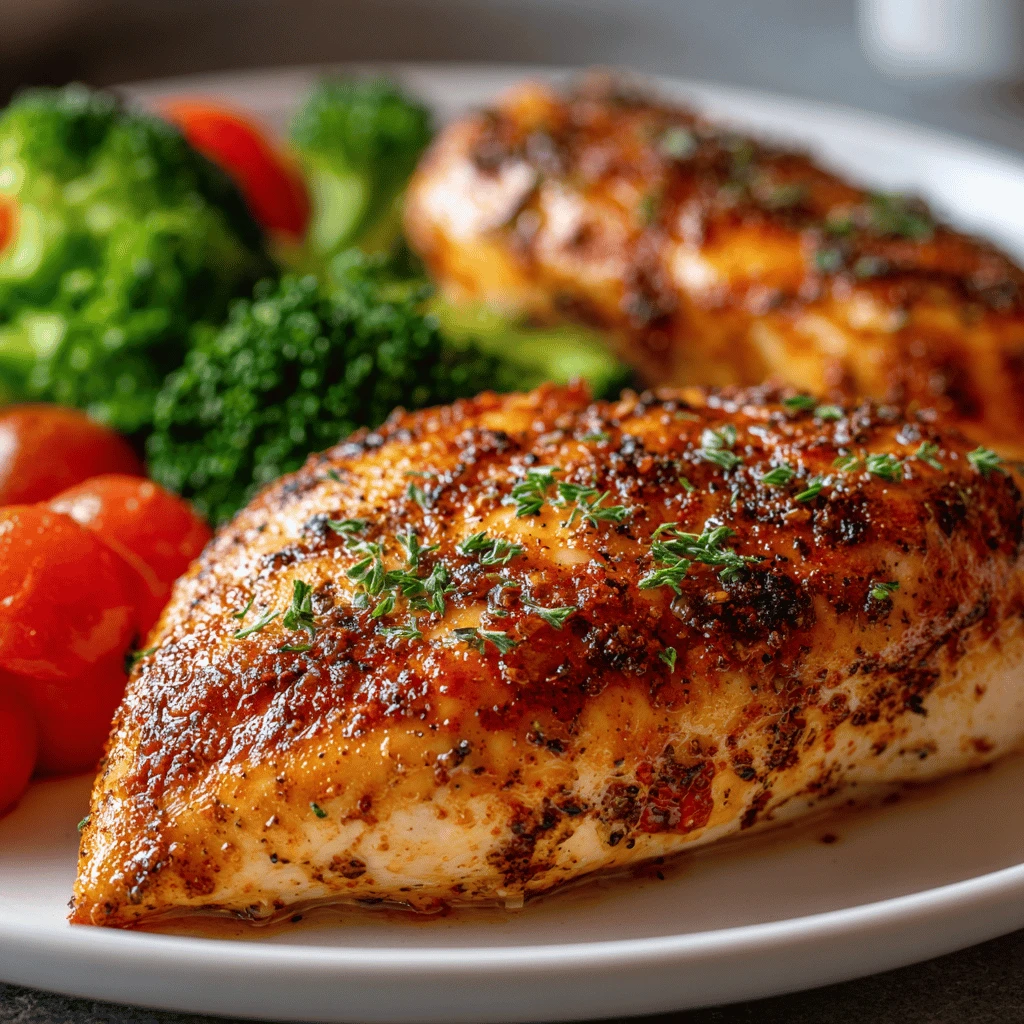
- Unbelievably Crispy & Flavorful: We’re talking about a golden-brown crust that shatters with every bite, revealing tender, juicy chicken underneath. The secret lies in our double-dredging technique and perfectly seasoned flour, ensuring maximum crunch and a depth of flavor that’s truly irresistible. Every piece is a testament to perfect texture and savory delight.
- Meal Prep Perfection: Yes, you read that right! This recipe is specifically designed to be freezer-friendly and reheats beautifully, making your future self incredibly happy. Imagine having a wholesome, homemade comfort meal ready to go on a busy Tuesday. It’s a game-changer for staying on track with your healthy eating goals without sacrificing taste or satisfaction.
- Juicy, Tender Chicken Every Time: Say goodbye to dry, bland chicken! Our method, including a crucial buttermilk soak, ensures the chicken pieces remain incredibly moist and tender, absorbing all those delicious flavors. Each bite is a testament to perfectly cooked protein, dissolving in your mouth with a burst of savory goodness.
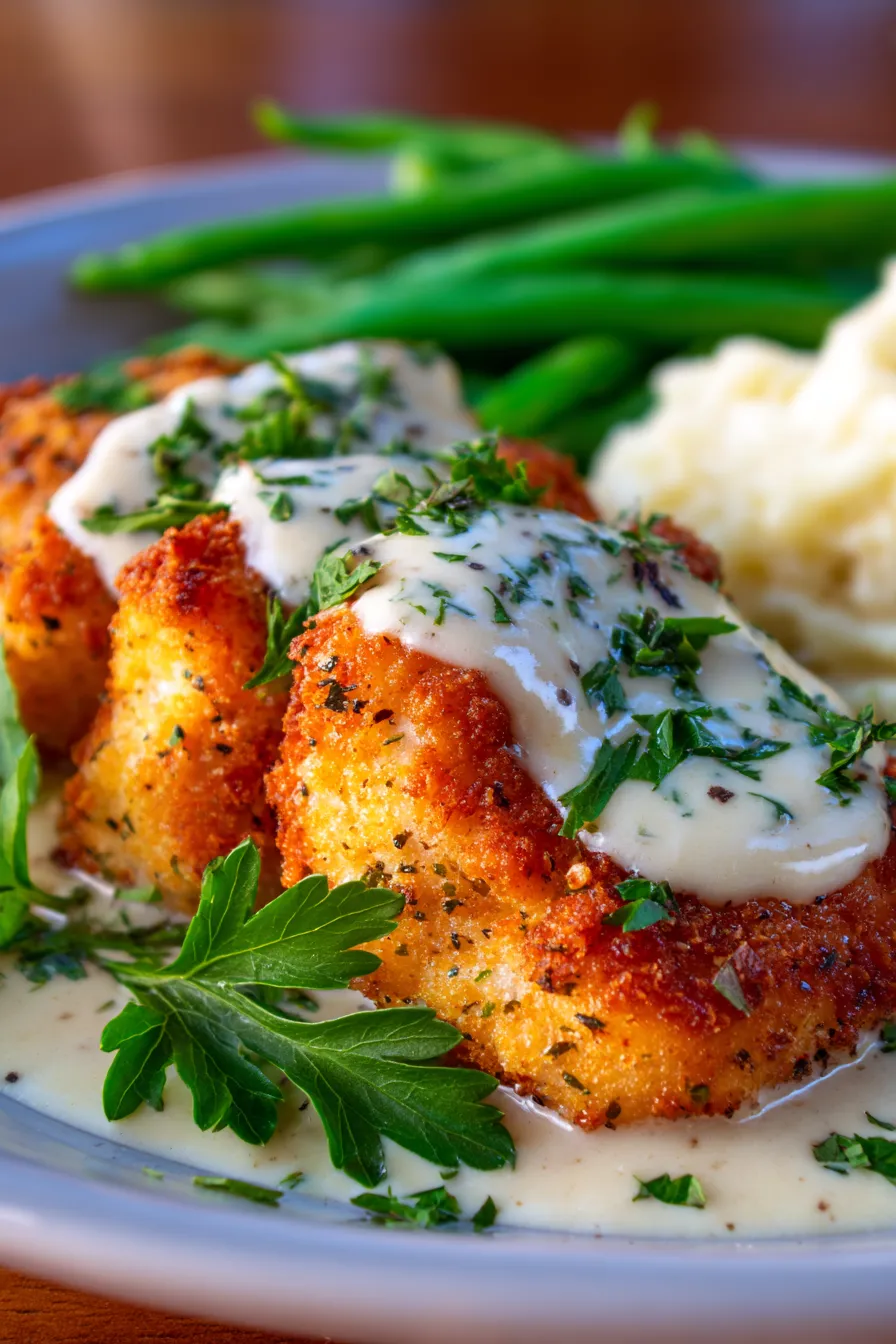
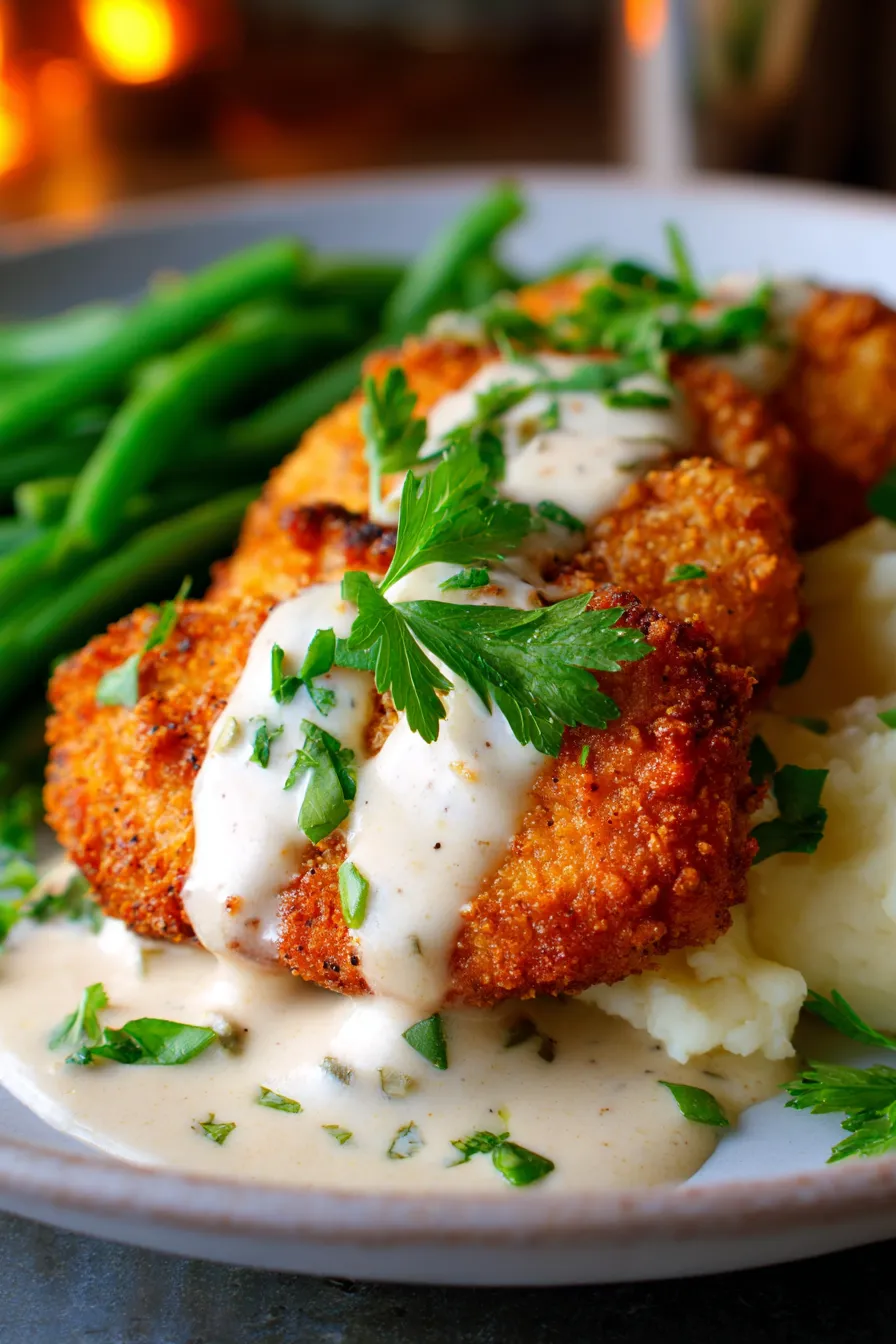
- Classic Comfort, Elevated: This isn’t just a basic fried chicken; it’s a nostalgic journey with a modern twist. The creamy, peppery gravy takes it to another level, transforming simple ingredients into a gourmet experience. It’s the kind of meal that brings everyone to the table, eager for seconds, and leaves them feeling truly nourished and content.
- Simple Ingredients, Big Impact: You won’t need any fancy, hard-to-find items for this recipe. We use everyday pantry staples that, when combined with our expert techniques, create a dish that tastes like it came straight from a five-star restaurant. It’s proof that extraordinary flavor can be achieved with accessibility and ease.
- Versatile & Customizable: This recipe is a fantastic base for all sorts of culinary adventures. Feel free to adjust the seasoning to your liking, experiment with different spices, or serve it alongside a variety of side dishes. It’s your canvas to create a meal that perfectly suits your family’s preferences and dietary needs, always delivering on its promise of deliciousness.
What You Need
You only need a few simple pantry staples for this recipe! We’re talking about basic flour, eggs, milk (or buttermilk for that extra tender touch), and a selection of common seasonings that you likely already have on hand. The beauty of this dish is how such humble ingredients can combine to create something so incredibly rich and satisfying. Check the full printable recipe card below for detailed measurements and a complete list of what you’ll need to create this masterpiece.
Expert Tips
- The Buttermilk Soak is Non-Negotiable: Don’t skip this step! Soaking your chicken cutlets in buttermilk not only tenderizes the meat but also helps the breading adhere perfectly, resulting in an incredibly juicy and flavorful fillet. Aim for at least 30 minutes, but an overnight soak in the fridge yields even better results, infusing the chicken with a subtle tang and ensuring maximum tenderness.
- Master the Breading Technique: For that signature crispy, craggy coating, a proper dredging technique is key. Ensure your chicken is well-coated in the seasoned flour mixture, pressing firmly to create those delicious nooks and crannies. A double dredge – first in flour, then egg wash, then back into flour – provides an extra thick, extra crispy crust that will hold up beautifully.
- Perfect Oil Temperature is Crucial: Use a thermometer! Maintaining an oil temperature of 325-350°F (160-175°C) is vital. If the oil is too cold, your chicken will be greasy and soggy; too hot, and the outside will burn before the inside cooks through. Consistent temperature ensures a beautifully golden, evenly cooked, and supremely crispy result every time.
- Don’t Crowd the Pan: Frying in batches is essential for maintaining consistent oil temperature and achieving that perfect crispiness. Overcrowding cools the oil down quickly, leading to soggy chicken. Give each piece enough space to sizzle and brown properly, allowing air to circulate around them for optimal crisping.
- Rest Your Fried Chicken: After frying, transfer your chicken to a wire rack set over a baking sheet, rather than directly onto paper towels. This allows excess oil to drip away and prevents the bottom from becoming soggy, keeping your crust crisp all around. A brief rest also allows the juices to redistribute, ensuring every bite is tender and moist.
- Season Generously: Don’t be shy with your seasonings in both the flour mixture and the buttermilk. A well-seasoned breading is the foundation of flavor. Taste your flour mixture if safe, or simply trust the recipe’s balance of salt, pepper, garlic powder, onion powder, and a touch of paprika for that warm, inviting flavor profile.
- Make the Gravy from Pan Drippings: The flavorful bits left in the pan after frying (the “fond”) are liquid gold for your gravy. Whisking flour into these drippings creates a rich roux, which forms the base of an incredibly savory, creamy gravy that perfectly complements the chicken. Don’t waste those precious flavors!
- Meal Prep Smart: If prepping ahead, let the fried chicken cool completely before storing in an airtight container in the fridge or freezer. For best reheating results, a few minutes in a hot oven or air fryer will bring back much of that glorious crispiness. Avoid the microwave for reheating if you want to preserve the crust!
Variations & Substitutions
Want to mix things up? This recipe is incredibly adaptable!
- Gluten-Free: Swap out the all-purpose flour for a 1:1 gluten-free baking flour blend. Ensure your seasonings are also gluten-free.
- Dairy-Free: Use a dairy-free milk alternative (like almond or oat milk) mixed with a tablespoon of apple cider vinegar or lemon juice to create a “buttermilk” substitute.
- Spicy Kick: Add a pinch of cayenne pepper or a dash of your favorite hot sauce to the buttermilk soak or the flour mixture for an extra fiery flavor.
- Herb Infusion: Incorporate finely chopped fresh herbs like thyme or sage into the flour coating for an aromatic twist.
- Oven-Baked “Fried” Chicken: For a lighter option, after breading, bake the chicken at 400°F (200°C) for 25-30 minutes, flipping halfway, until golden and cooked through. It won’t be quite as crispy, but still delicious!
- Different Cuts: While chicken cutlets are ideal, you can use boneless, skinless chicken thighs for an even richer, more succulent result. Adjust cooking time accordingly.
Storage & Freezing
This Chicken Fried Chicken is fantastic for meal prep!
- Refrigeration: Store leftover chicken in an airtight container in the refrigerator for up to 3-4 days. The crispiness will soften slightly, but the flavor remains superb.
- Reheating: For best results, reheat in an oven or air fryer at 375°F (190°C) for 10-15 minutes, or until heated through and re-crisped. Avoid the microwave if you want to maintain any semblance of crispness.
- Freezing: Allow the cooked chicken to cool completely. Wrap individual pieces tightly in plastic wrap, then place them in a freezer-safe bag or container for up to 2-3 months.
- To Reheat from Frozen: Thaw overnight in the fridge, then reheat as described above. For quicker reheating, you can bake from frozen at a slightly lower temperature (around 350°F/175°C) for a longer period (20-30 minutes), ensuring it’s fully heated through.
FAQ
Q: What exactly is Chicken Fried Chicken?
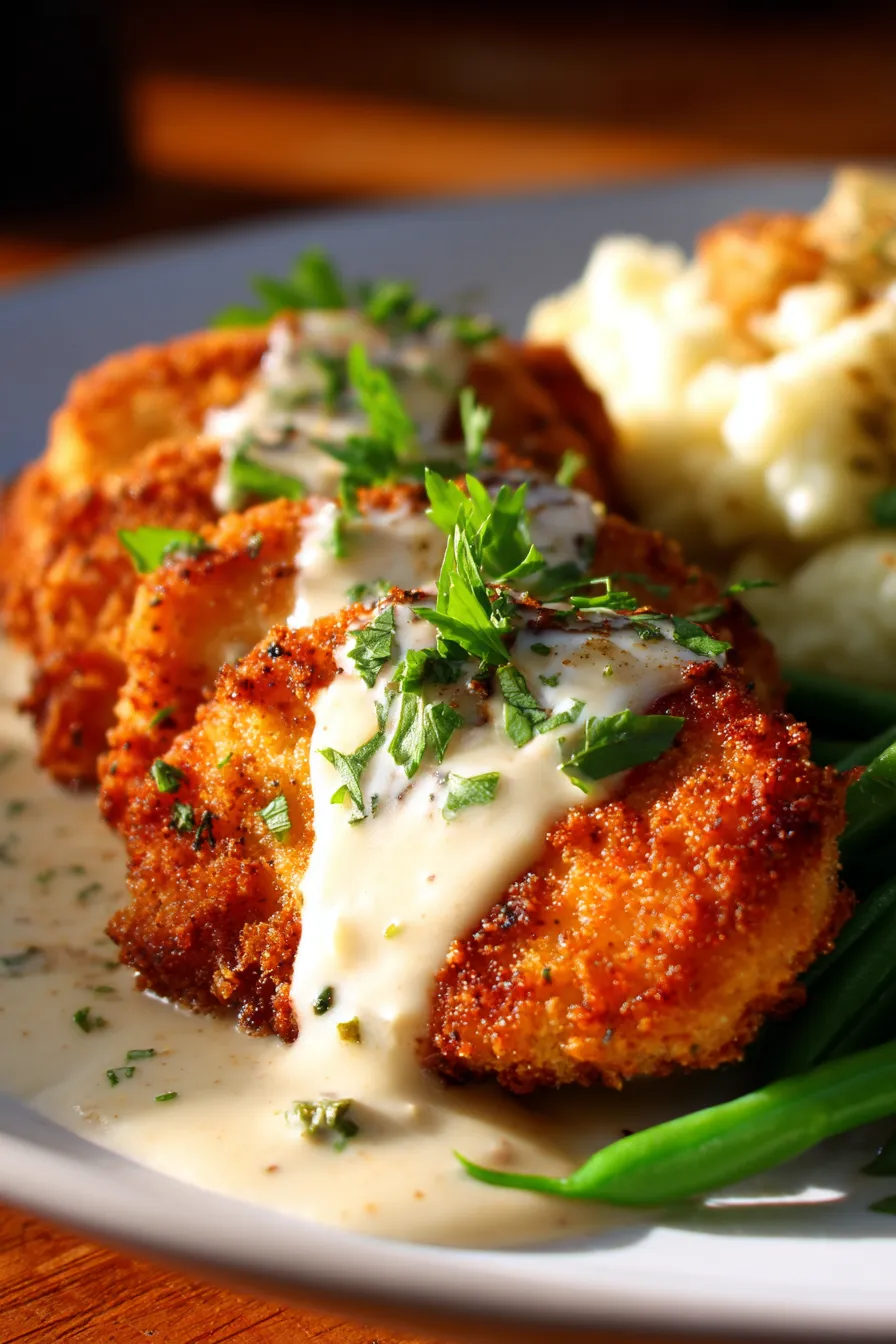
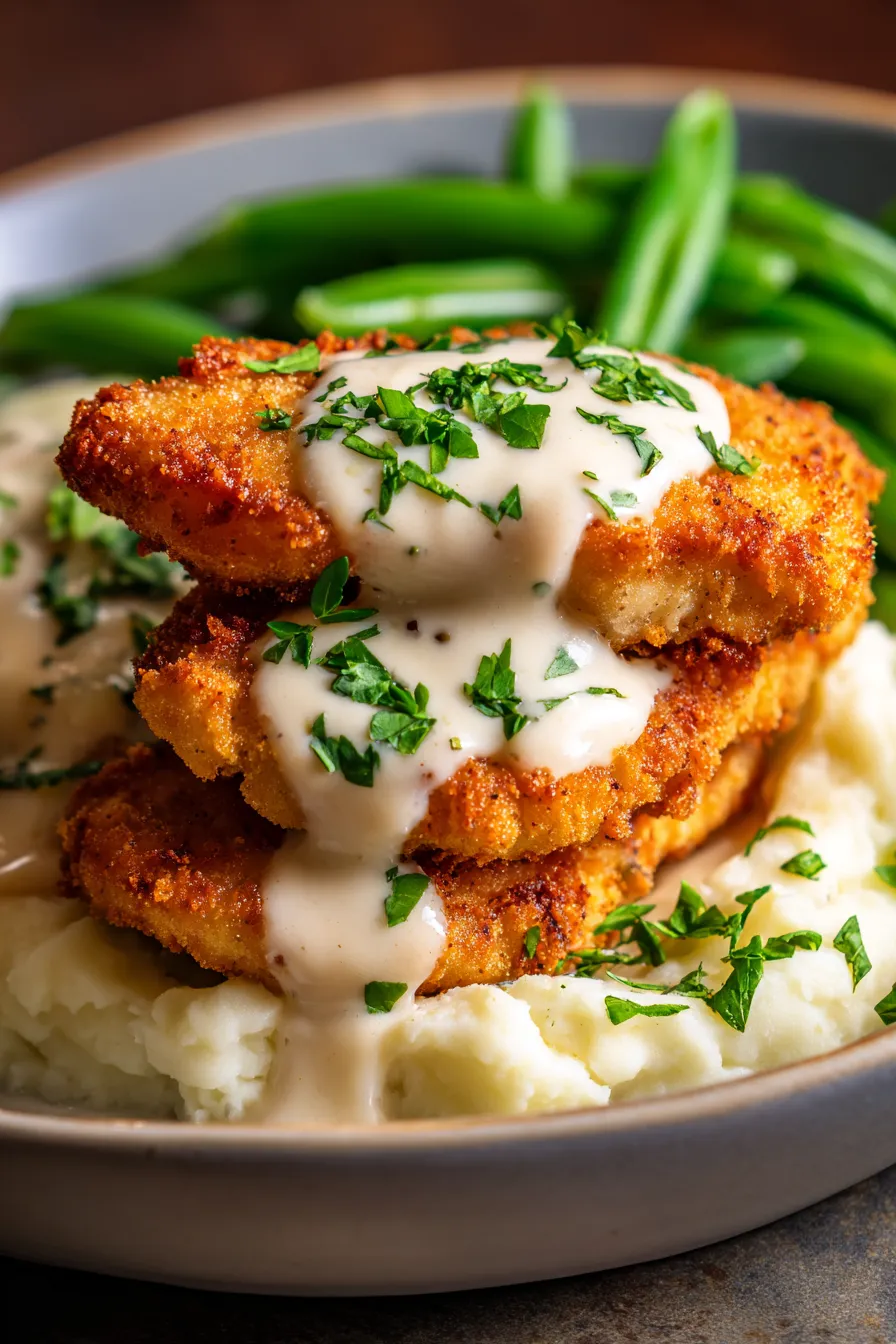
A: Chicken Fried Chicken is a beloved Southern dish where boneless chicken pieces (usually cutlets) are pounded thin, breaded like traditional fried chicken (often with a buttermilk soak), and then pan-fried until golden and crispy. It’s typically served with a creamy white gravy made from the pan drippings, offering all the comfort and flavor of chicken fried steak, but with chicken!
Q: Can I make this recipe gluten-free?
A: Absolutely! Simply substitute the all-purpose flour with a 1:1 gluten-free all-purpose baking flour blend. Make sure your chosen blend contains xanthan gum for the best texture. The result will be just as delicious and satisfying, with a wonderfully crispy coating.
Q: How do I prevent my Chicken Fried Chicken from becoming soggy?
A: There are a few key tricks! First, ensure your oil is at the correct temperature (325-350°F / 160-175°C) and don’t overcrowd the pan. After frying, immediately transfer the cooked chicken to a wire rack set over a baking sheet. This allows air to circulate around the pieces and prevents steam from building up, which is the main culprit for sogginess.
Q: What are the best side dishes to serve with Chicken Fried Chicken?
A: Classic pairings include creamy mashed potatoes (perfect for soaking up that delicious gravy!), green beans, corn on the cob, collard greens, or a simple side salad for a fresh contrast. Don’t forget some warm biscuits for an ultimate Southern-inspired meal!
Q: Can I use boneless, skinless chicken thighs instead of cutlets?
A: Yes, absolutely! Boneless, skinless chicken thighs are a fantastic choice as they tend to stay even juicier due to their higher fat content. Just be sure to pound them to an even thickness for consistent cooking and adjust your frying time slightly if they are thicker than chicken cutlets.
Conclusion
There you have it – the ultimate Chicken Fried Chicken (Meal Prep Comfort Recipe)! This dish is more than just a meal; it’s a culinary hug, a taste of nostalgia, and a testament to how simple ingredients can create extraordinary comfort. I truly hope this recipe brings as much warmth and joy to your table as it does to mine. Don’t forget to pin this recipe for later, and if you make it, come back and tell me how much you loved it in the comments below! Happy cooking, friends!

Crispy Chicken Fried Chicken (Meal Prep Comfort Recipe)
Ingredients
- 4 boneless, skinless chicken cutlets (about 1.5 lbs), pounded to 1/2-inch thick
- 1 cup buttermilk
- 1 large egg
- 1/4 cup milk
- 2 cups all-purpose flour
- 2 tsp salt, divided
- 1 tsp black pepper, divided
- 1 tsp garlic powder
- 1/2 tsp onion powder
- 1/2 tsp paprika
- 2 cups vegetable oil (for frying)
- 3 tbsp unsalted butter
- 3 tbsp all-purpose flour (for gravy)
- 2 cups whole milk (for gravy)
- 1/2 tsp salt (for gravy)
- 1/4 tsp black pepper (for gravy)
Instructions
- Step 1 Place chicken cutlets in a shallow dish and pour buttermilk over them. Cover and refrigerate for at least 30 minutes, or up to 4 hours.
- Step 2 In a large shallow bowl, whisk together 2 cups flour, 1.5 tsp salt, 0.5 tsp pepper, garlic powder, onion powder, and paprika.
- Step 3 In another shallow bowl, whisk egg and 1/4 cup milk until well combined.
- Step 4 Remove chicken from buttermilk, allowing excess to drip off. Dredge each cutlet thoroughly in the seasoned flour, pressing to coat. Dip into the egg mixture, then dredge again in the flour, ensuring a thick, even coating. Place breaded chicken on a wire rack.
- Step 5 Heat vegetable oil in a large, heavy-bottomed skillet over medium-high heat until it reaches 325-350°F (160-175°C).
- Step 6 Carefully add 2-3 chicken cutlets to the hot oil, ensuring not to overcrowd the pan. Fry for 4-6 minutes per side, or until golden brown and cooked through (internal temperature of 165°F / 74°C).
- Step 7 Transfer cooked chicken to a clean wire rack set over a baking sheet to drain. Keep warm in a low oven while frying remaining chicken.
- Step 8 To make the gravy: Carefully drain all but 3 tablespoons of the oil from the skillet, leaving any browned bits. Reduce heat to medium.
- Step 9 Add 3 tbsp butter to the skillet and melt. Whisk in 3 tbsp flour and cook for 1-2 minutes, stirring constantly, to create a roux.
- Step 10 Gradually whisk in 2 cups milk until smooth. Bring to a simmer, stirring, until gravy thickens. Season with 0.5 tsp salt and 0.25 tsp pepper. Taste and adjust seasonings.
- Step 11 Serve the crispy chicken fried chicken immediately with warm gravy and your favorite side dishes.