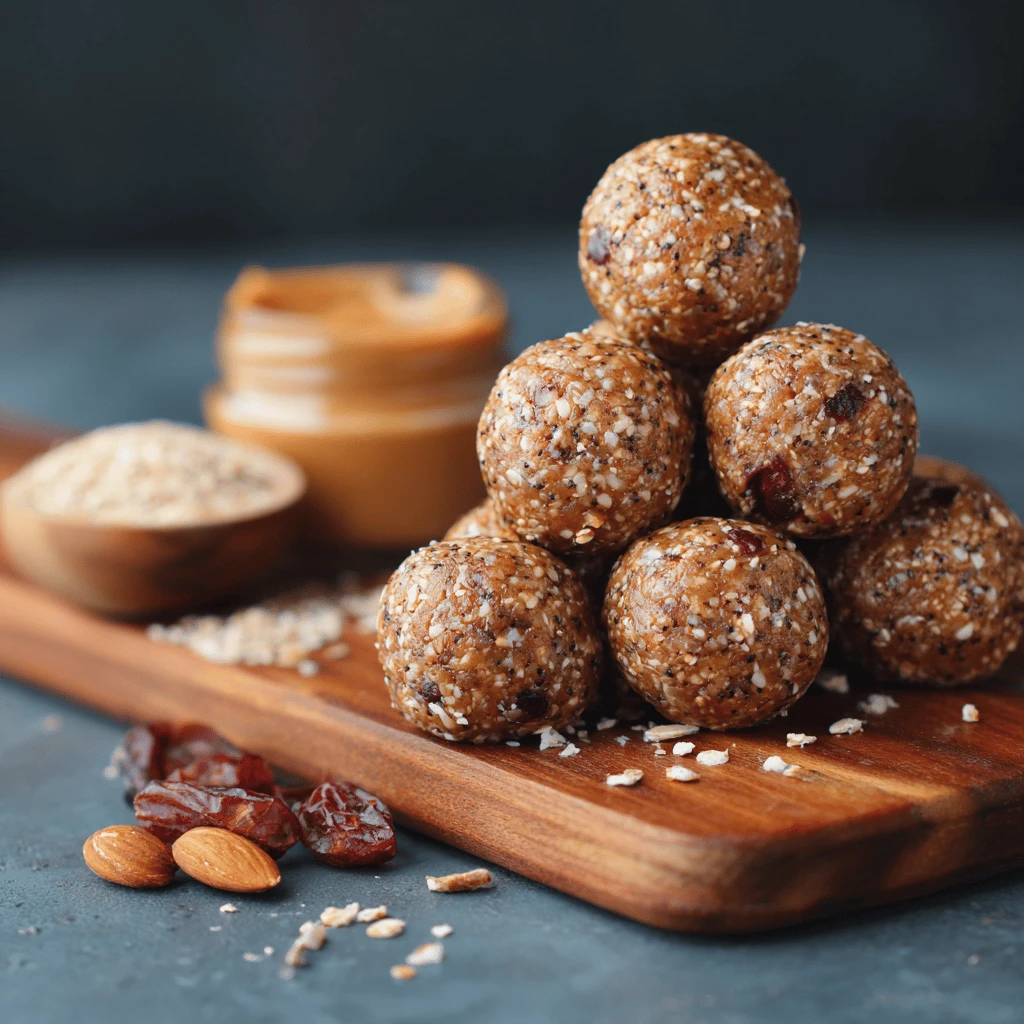
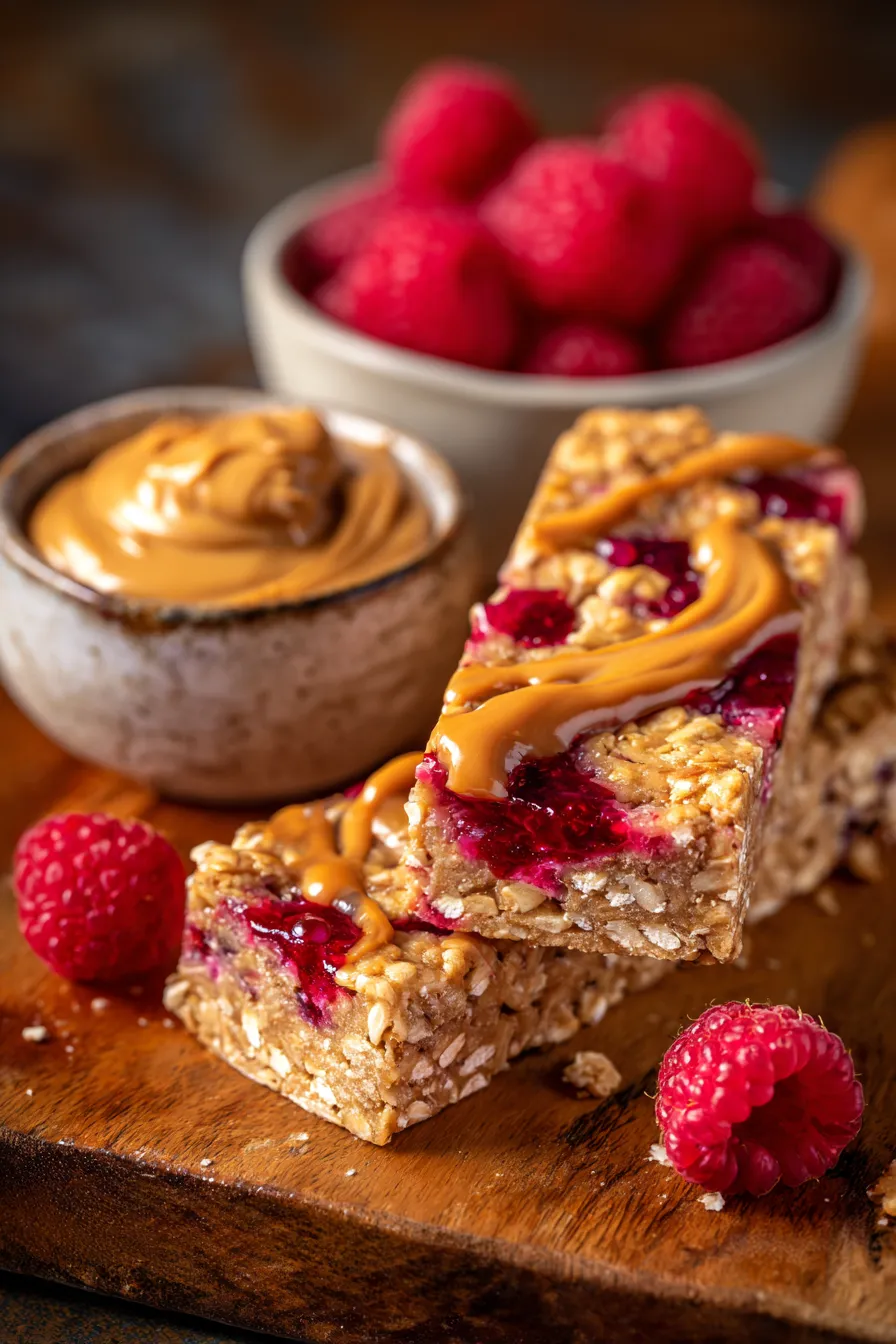
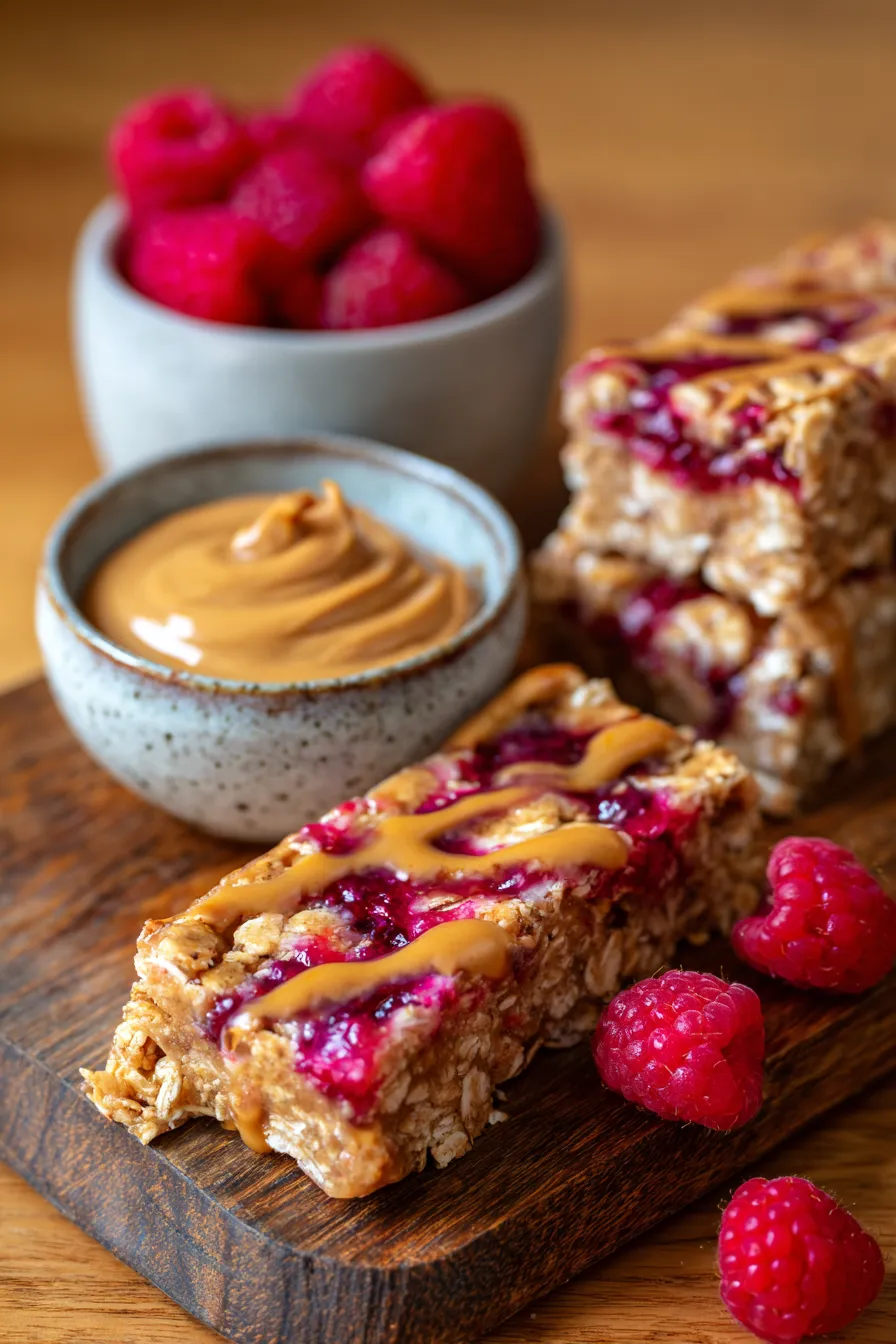
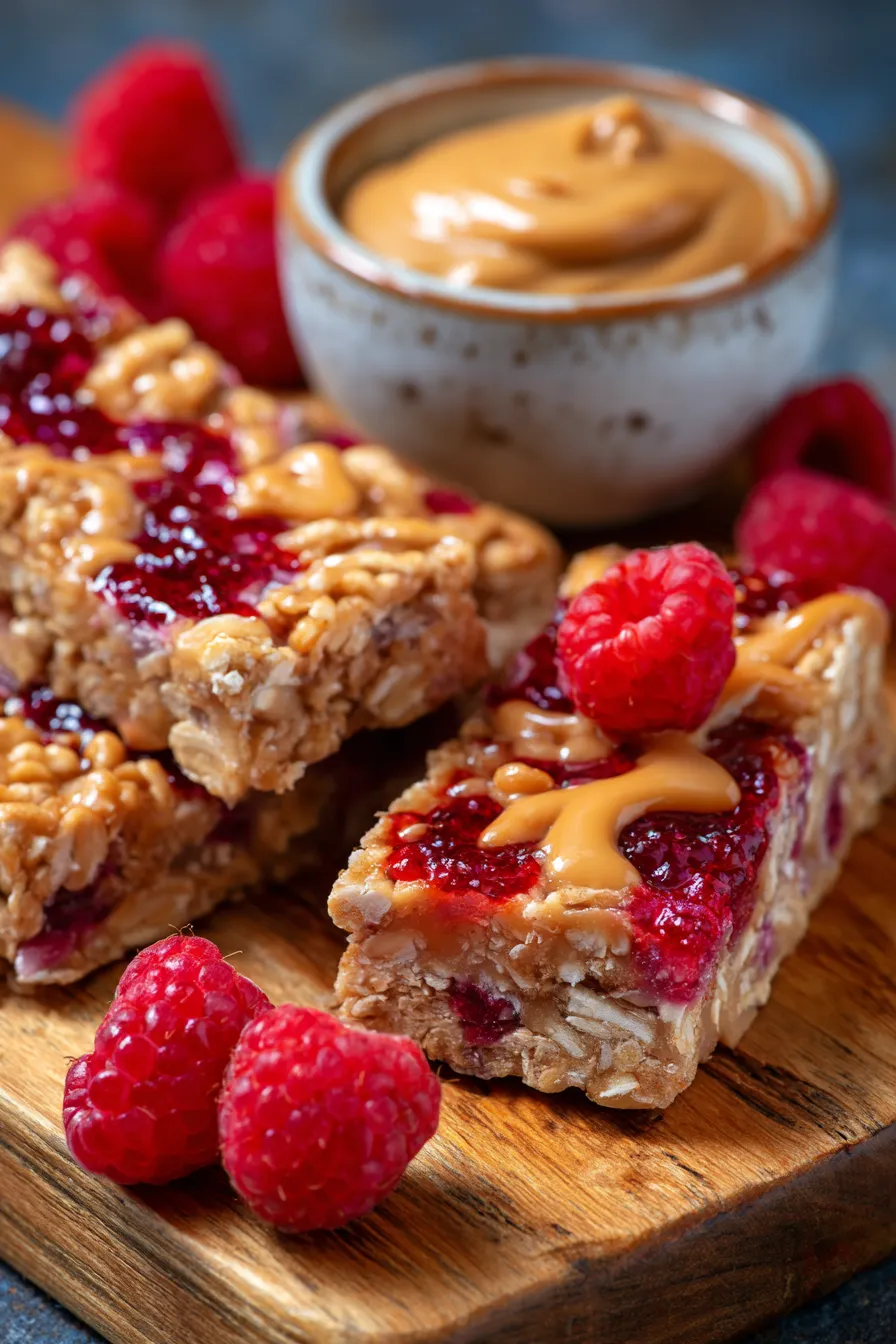
Irresistible Homemade Peanut Butter & Jelly Granola Bars I still remember those crisp autumn mornings, the scent of fallen leaves filling the air, and the mad dash to get out the door for school. My mom, a true superhero in her own right, always had a little something ready for us, but sometimes, even she…
Irresistible Homemade Peanut Butter & Jelly Granola Bars
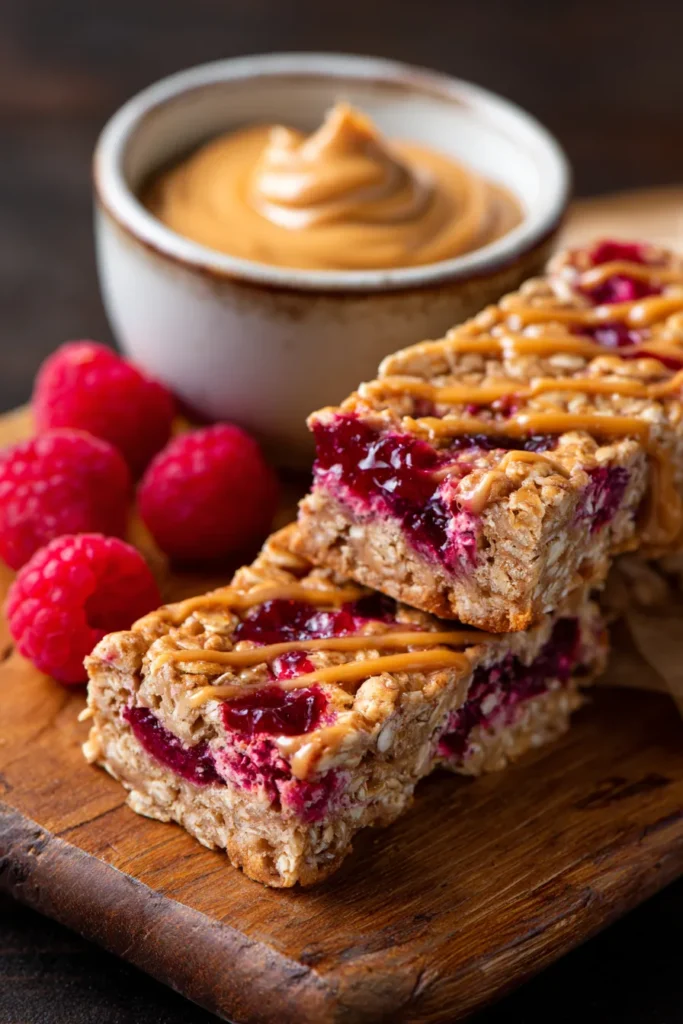
I still remember those crisp autumn mornings, the scent of fallen leaves filling the air, and the mad dash to get out the door for school. My mom, a true superhero in her own right, always had a little something ready for us, but sometimes, even she ran out of ideas. That’s where the magic of “grab-and-go” snacks came in, and none were more beloved than a good old peanut butter and jelly sandwich. Over the years, I’ve reimagined that classic comfort into something even better: these absolutely delicious Peanut Butter & Jelly Granola Bars. They’re not just a snack; they’re a hug in bar form!
This recipe for Peanut Butter & Jelly Granola Bars has become an absolute family favorite, a staple in our household for easy breakfasts, quick after-school bites, and even a satisfying pick-me-up during those notorious 3 PM slumps. I’ve tested and re-tested this simple recipe countless times, perfecting the balance of chewy oats, creamy peanut butter, and sweet fruit jelly to ensure every bite is pure bliss. Get ready to transform your snacking game with this wonderfully easy and unbelievably tasty treat. It’s truly the perfect solution for busy families and anyone looking for a wholesome, comforting snack.
Why You’ll Love These Irresistible Granola Bars
- Pure Nostalgia in Every Bite: These bars bring back all the comforting flavors of your favorite childhood peanut butter and jelly sandwich. It’s that classic sweet and savory combination in a convenient, portable form. Prepare for a delicious trip down memory lane.
- Effortlessly Easy to Make: Forget complicated steps! This recipe is incredibly straightforward, perfect for beginners and quick kitchen projects. You’ll be amazed at how quickly you can whip up a batch.
- No-Bake Wonder: No oven required, making them ideal for hot summer days or anytime you want a delicious treat without heating up your kitchen. Just mix, press, chill, and enjoy!
- Customizable to Your Heart’s Content: While the classic PB&J flavor is a winner, these bars are a fantastic canvas for your creativity. Experiment with different nut butters, jams, or add-ins like chocolate chips or seeds.
- Perfect for Meal Prep & On-the-Go Snacking: Make a big batch at the beginning of the week for wholesome snacks ready for lunchboxes, quick breakfasts, or post-workout fuel. Convenience meets deliciousness for your busy schedule.
- Wholesome & Energizing Ingredients: Packed with hearty rolled oats and protein-rich peanut butter, these bars offer a balanced energy boost. They’re a much better option than many store-bought alternatives, letting you control the ingredients and sweetness.
- Kid-Friendly & Approved by All Ages: There’s something universally appealing about peanut butter and jelly. Kids adore these bars, making them a fantastic alternative to sugary store-bought options, and adults love them too!
What You Need
You only need a few simple pantry staples for this recipe to create these incredibly satisfying Peanut Butter & Jelly Granola Bars! Gather your rolled oats, a good quality peanut butter, your favorite fruit jelly or jam, and a few other simple binders. Check the full printable recipe card below for detailed measurements and a complete list of ingredients. You’ll be surprised how quickly these come together!
Expert Tips for Granola Bar Perfection
- Choose the Right Peanut Butter: Use a creamy, natural peanut butter that’s well-stirred and somewhat drippy for the best binding. Avoid overly thick or crunchy varieties unless you prefer a different texture.
- Don’t Skimp on the Binder: Honey, maple syrup, or agave are crucial. Warm them slightly with the peanut butter to create a pliable, adhesive mixture that ensures your bars hold their shape.
- Press FIRMLY: This is the most important step for no-bake bars! Use a flat spatula or even a second piece of parchment paper to press the mixture down as firmly and evenly as possible. The harder you press, the less likely your bars are to crumble.
- Chill Time is Non-Negotiable: Allow at least 2-3 hours for the bars to chill in the refrigerator, or even better, overnight. This gives the ingredients ample time to set and firm up, making them easy to cut.
- Lining Your Pan: Always line your pan with parchment paper, leaving an overhang. This creates “handles” for easy removal of the entire slab, simplifying the cutting process.
- Swirl the Jelly Strategically: Drizzle or dollop the jelly over the base layer, then use a knife or skewer to gently swirl it into the peanut butter mixture. This distributes the fruit flavor evenly and creates beautiful marbling.
- Optional Add-ins for Texture: Consider adding mini chocolate chips, chopped nuts, or extra seeds (like chia or flax) to the oat mixture for added texture and nutrition. Stir them in with the dry ingredients.
- Sweetness Adjustment: Taste your peanut butter and jelly mixture before pressing. Adjust the honey or maple syrup if your peanut butter is unsweetened or your jelly is very tart.
- Clean Cuts: For the neatest bars, use a sharp knife run under hot water and wiped dry. Reheat and wipe the knife periodically to prevent sticking and ensure smooth edges.
- Room Temperature Ingredients: Ensure your peanut butter and honey are at room temperature or slightly warmed for easier mixing with the oats.
Variations & Substitutions for Every Craving
These Peanut Butter & Jelly Granola Bars are wonderfully versatile! Here are some ideas to customize them:
- Nut-Free Option: Swap peanut butter for sunflower seed butter (SunButter) or tahini. It’s a great choice for allergen concerns.
- Gluten-Free: Use certified gluten-free rolled oats. All other main ingredients are typically GF.
- Vegan Delight: Substitute honey with maple syrup or agave nectar. Ensure your jelly and any chocolate chips are vegan-friendly.
- Different Nut Butters: Experiment with almond butter, cashew butter, or mixed nut butters for distinct flavor profiles.
- Jam & Jelly Exploration: Explore beyond grape or strawberry! Raspberry, apricot, or blueberry preserves offer delightful twists.
- Boost the Nutrition: Stir in chia seeds, flax seeds, or hemp hearts with the dry oats for extra omega-3s and fiber.
- Chocolate Lovers: Fold in mini chocolate chips or drizzle melted chocolate over the set bars for added indulgence.
- Spiced Up: A pinch of cinnamon or nutmeg in the dry ingredients can add a warm, comforting note.
- Protein Punch: Incorporate a scoop of unflavored or vanilla protein powder with the dry ingredients, adjusting liquid if needed.
Storage & Freezing for Maximum Freshness
Keeping your homemade granola bars fresh and delicious is key!
- Countertop Storage (Short Term): Store the bars in an airtight container at room temperature for up to 3-4 days. While they’ll be fine, they tend to soften slightly.
- Refrigerator Storage (Recommended): For best results and to maintain their firm, chewy texture, store the bars in an airtight container in the refrigerator for up to 1-2 weeks. Separate layers with parchment paper to prevent sticking.
- Freezing for Longer: These bars freeze beautifully! Once cut, wrap individual bars tightly in plastic wrap, then place them in a freezer-safe bag or container. They can be frozen for up to 2-3 months. Thaw individual bars at room temperature for about 30 minutes, or enjoy them slightly chilled for a firmer bite. Freezing is perfect for having a quick snack on hand whenever a craving strikes!
Frequently Asked Questions
Q: Can I use quick oats instead of rolled oats?
A: Rolled oats provide the best chewy texture and hold their shape well for these no-bake bars. While quick oats can be used in a pinch, they will result in a softer texture and potentially more crumbly bars. If using quick oats, ensure you press the mixture very, very firmly.
Q: My bars are falling apart! What went wrong?
A: The most common culprits are not pressing the mixture firmly enough into the pan or insufficient chilling time. Make sure to really pack the mixture down with significant pressure. Also, allow at least 2-3 hours in the fridge, or preferably overnight, for them to fully set before cutting.
Q: Can I reduce the amount of sweetener (honey/maple syrup)?
A: You can try reducing it slightly, but be aware that the sweetener acts as a crucial binder. Too much reduction might make the bars less cohesive and more prone to crumbling. Ensure your chosen jelly is sweet enough to compensate for less added sweetener.
Q: What kind of jelly or jam works best for swirling?
A: Smooth, seedless jams or jellies work best for easy swirling and an even texture. Classic grape or strawberry are fantastic choices, but feel free to use your favorite fruit flavor. Avoid very chunky preserves as they can be difficult to spread and swirl effectively.
Conclusion
And there you have it – a truly delightful, incredibly easy, and wonderfully nostalgic snack that’s perfect for any time of day! These homemade Peanut Butter & Jelly Granola Bars are proof that sometimes, the simplest flavors are the most satisfying. Whether you’re making them for lunchboxes, a quick breakfast, or just a comforting treat, I promise they’ll become a beloved staple in your home. Don’t forget to Pin this recipe for later and share your creations with me! Happy snacking!
Easy Peanut Butter & Jelly Granola Bars (No-Bake Recipe!)
Ingredients
- 2 cups rolled oats (gluten-free if needed)
- 1 cup creamy peanut butter (natural, well-stirred)
- 1/2 cup honey or maple syrup
- 1 tsp vanilla extract
- 1/4 tsp salt
- 1/2 cup fruit jelly or jam (strawberry or grape recommended)
Instructions
- Step 1 Line an 8x8 inch baking pan with parchment paper, leaving an overhang on all sides for easy lifting.
- Step 2 In a large microwave-safe bowl, combine peanut butter and honey (or maple syrup). Microwave for 30-60 seconds, or until warmed and easily stirrable.
- Step 3 Stir in vanilla extract and salt until well combined.
- Step 4 Add the rolled oats to the peanut butter mixture and stir thoroughly until all oats are evenly coated.
- Step 5 Transfer about two-thirds of the oat mixture to the prepared baking pan. Press it down very firmly and evenly into the bottom of the pan using the back of a spoon or a flat spatula.
- Step 6 Evenly spread the fruit jelly over the pressed oat layer. Use the back of a spoon to ensure full coverage.
- Step 7 Crumble the remaining one-third of the oat mixture evenly over the jelly layer. Gently press it down lightly, just enough to adhere, without pressing too hard to prevent the jelly from squeezing out.
- Step 8 Chill the bars in the refrigerator for at least 2-3 hours, or preferably overnight, until completely firm. This is crucial for them to set properly.
- Step 9 Once thoroughly chilled, use the parchment paper overhang to lift the entire slab out of the pan. Place on a cutting board and cut into 12 equally sized bars using a sharp knife that has been run under hot water and wiped dry.
- Step 10 Store the homemade Peanut Butter & Jelly Granola Bars in an airtight container in the refrigerator for optimal freshness and texture.